If you follow my partners YouTube channel, Drop Table Adventures, you’ll be well aware that they have been entering the “Around the Bay” cycling event for several years now. Specifically “The Classic” route. This is a 220km circuit….. around the (Melbourne) bay.
This year on a bit of a whim, and within 5 days until the event I decided to buy a ticket for the 100km route. Then I checked the weather. I should have checked the weather first.
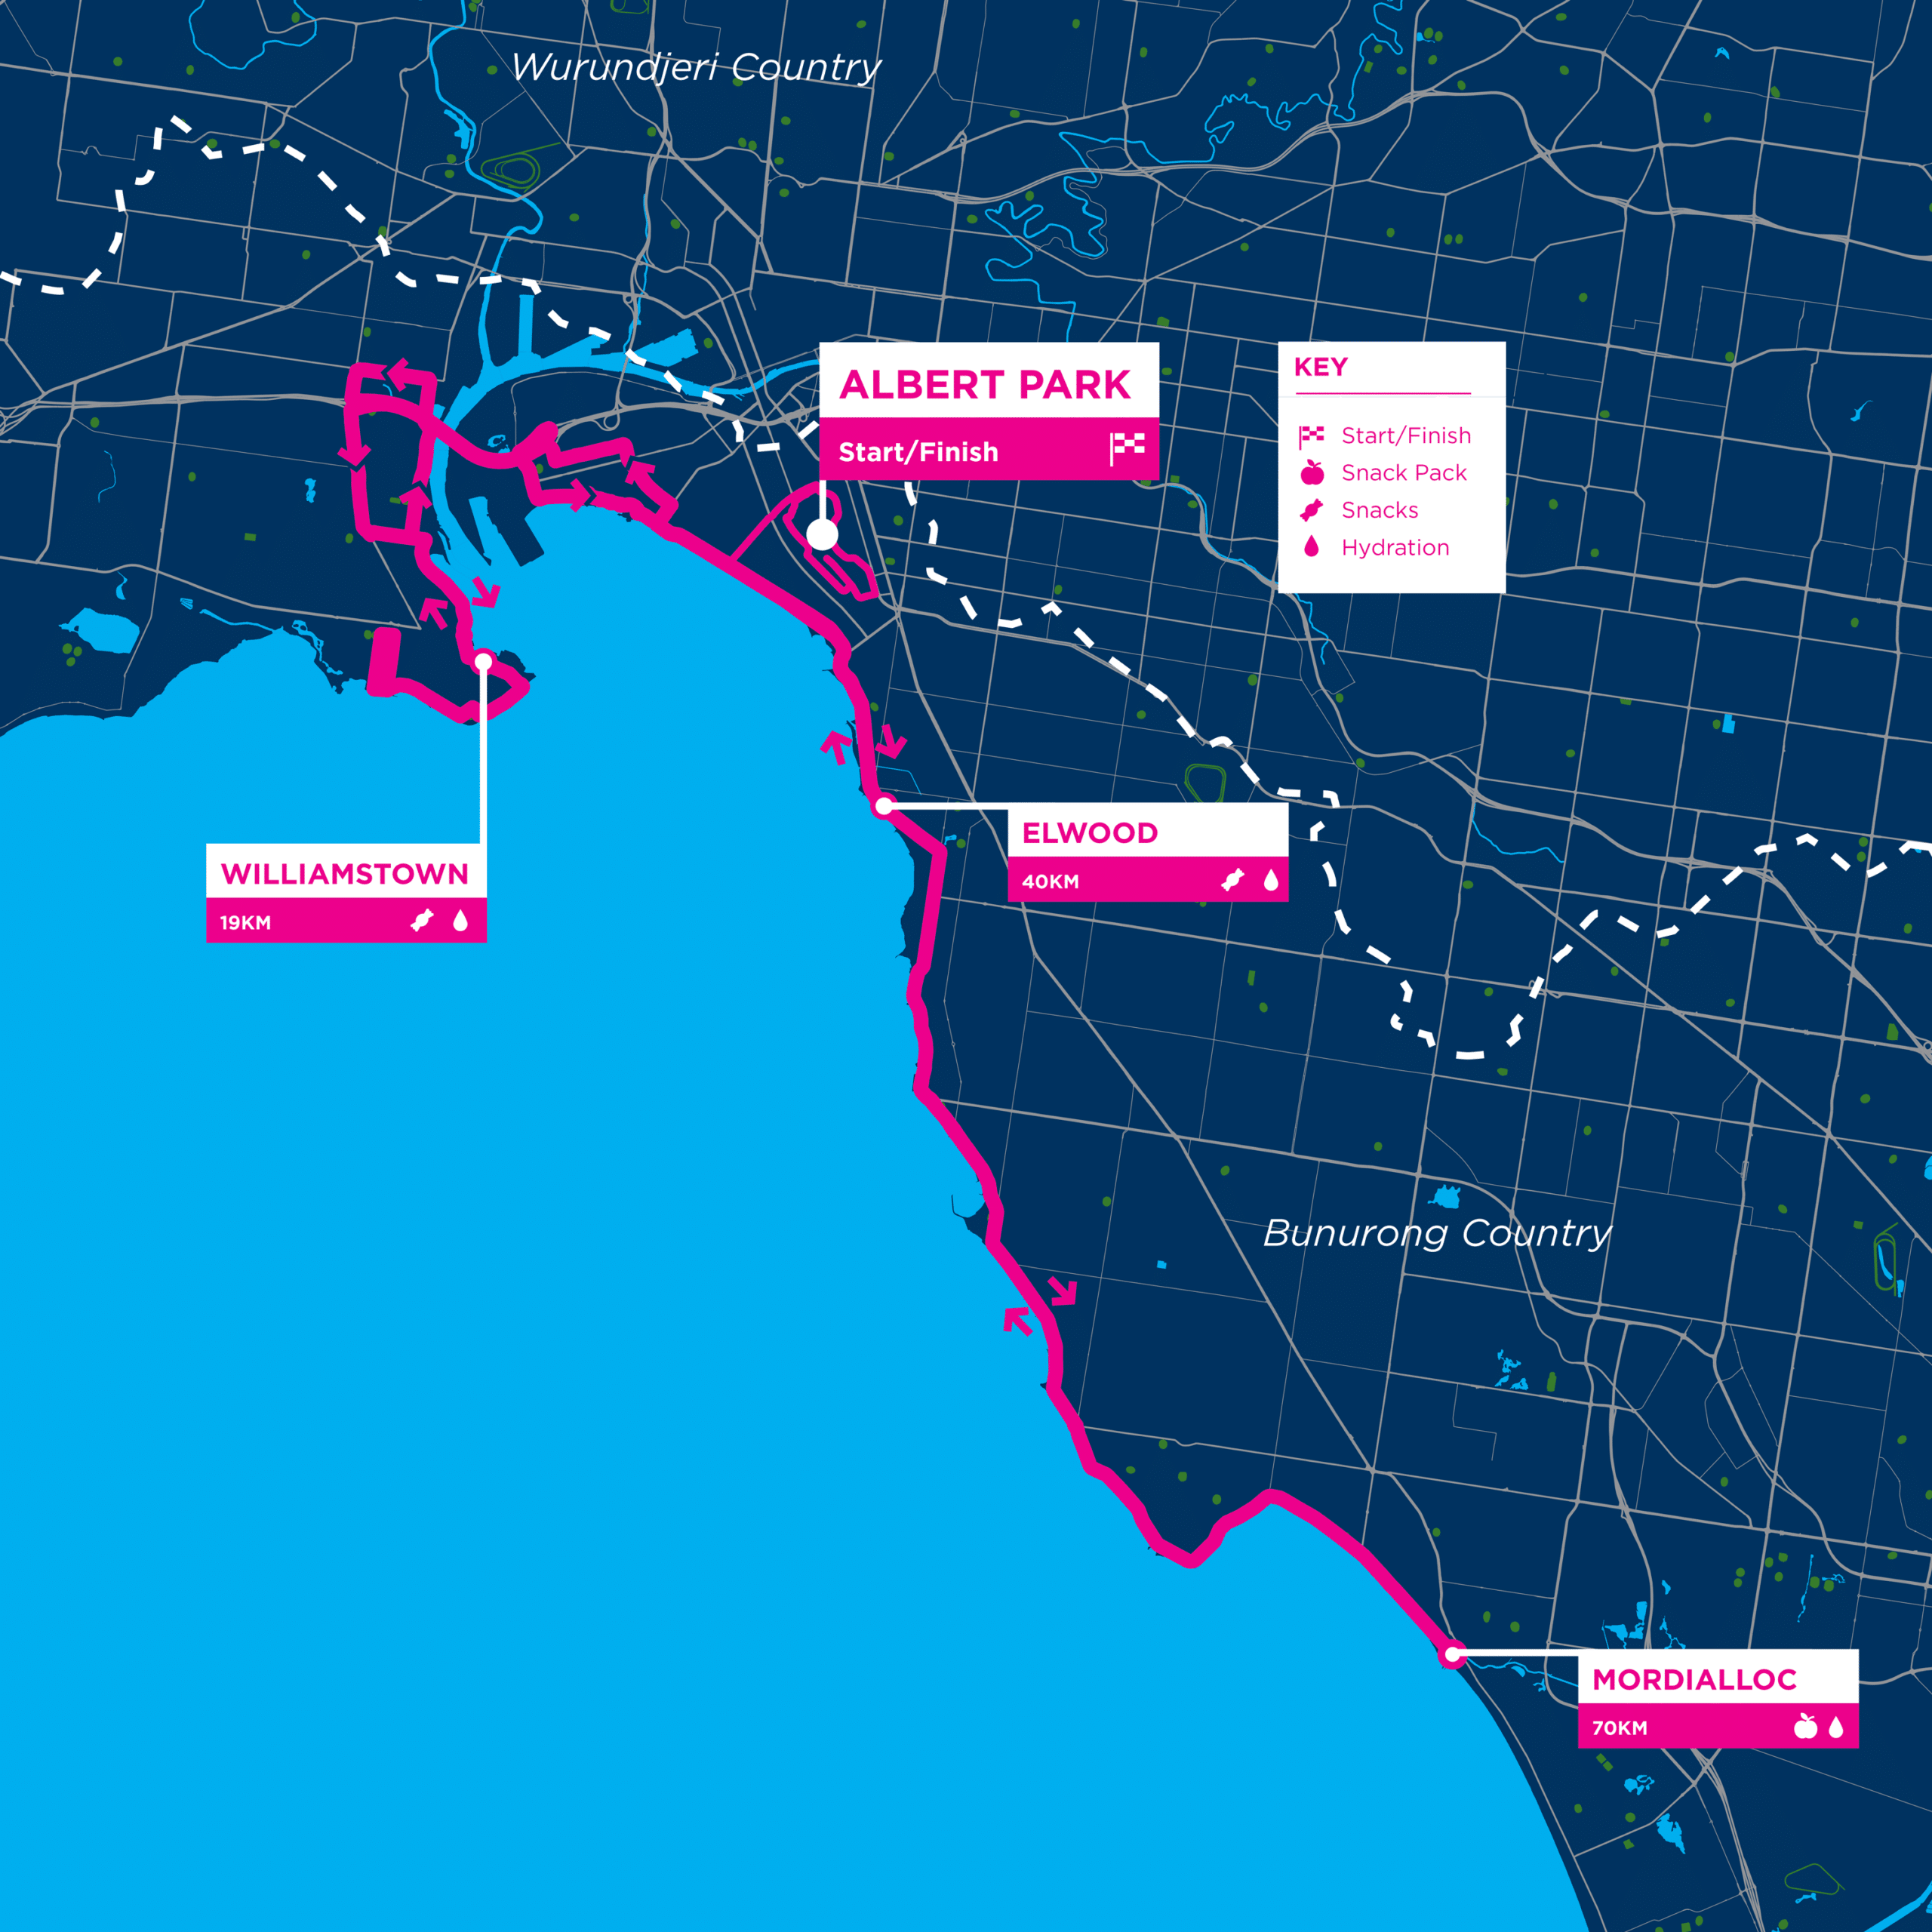
The 100km route leaves Albert Park, over the West Gate bridge to Williamstown, back across West Gate, follows the bay towards Mordialloc before returning to Albert Park.
A 100km ride is big for me. The last time I rode 100km was in high school. Made even more challenging in that I hadn’t trained for this. But I felt strong when I purchased the ticket.
Challenges:
Scoliosis - riding long distances has historically been extremely hard on my back
No training - I did a 40km social and slow ride about a month prior, and a 20km about 2 weeks prior
Still somewhat recovering from my last bike crash
I don’t really have much experience in group riding
3 days prior I managed to give myself food poisoning (stomach related fun seems to be a reoccurring problem when I enter events it seems)
The 100km route requires crossing the West Gate twice - so a bit of elevation change compared to just riding the bay trail
On my side:
Have been keeping fairly fit, swimming, short runs
Competing in the commuter cup 2-3 days a week
Prep
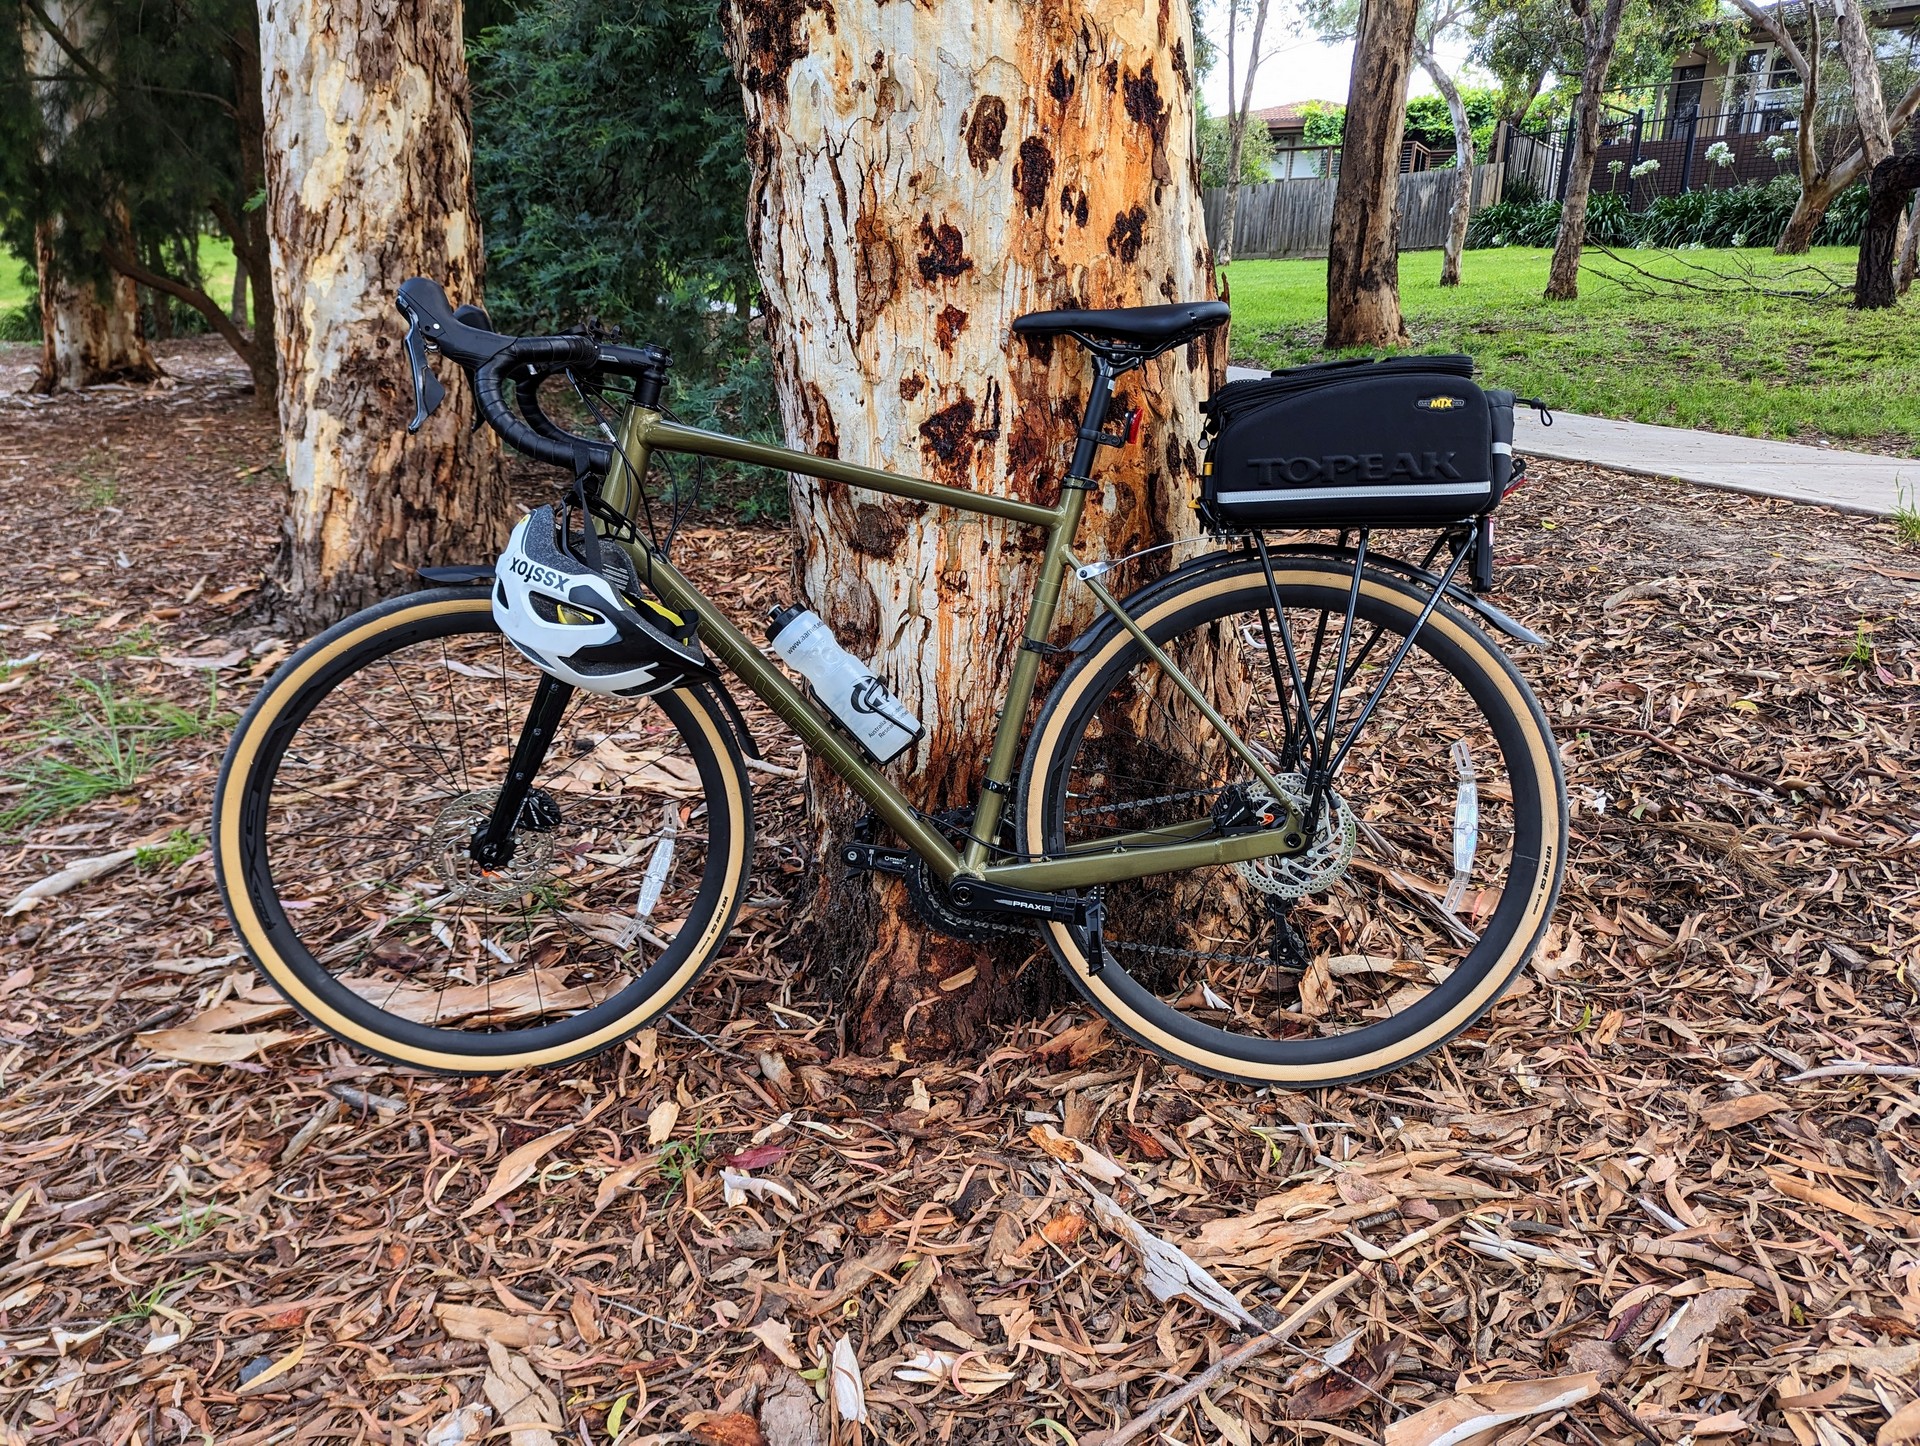
To give myself the best shot of making the distance I stripped my bike of the lock, front and rear racks. Given the weather I left the mud guards on (more of a courtesy to other riders but seems I was alone here). With no racks, I had a small saddle bag which carried a toolkit, bacon strips, tyre levers, a tube, my phone and a pump.
For hydration and fuel I carried… an AARNet water bottle. I decided to rely on the rest stops for fuelling needs. In hindsight I probably should have packed at least a single gel.
Go
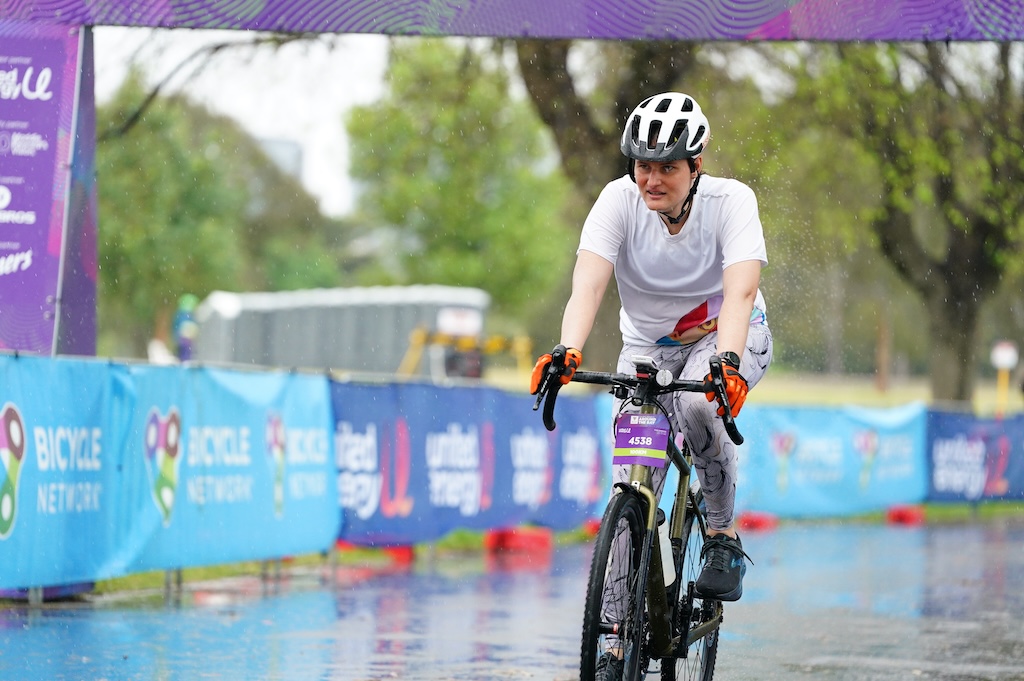
Since I had traveled with Droppy and Alex to the event, I was very early for the 100km start. This meant I found myself at the start of the pack. It’s not a race so it doesn’t matter so much, but it certainly grouped me with some riders that were probably a little bit fitter than me.
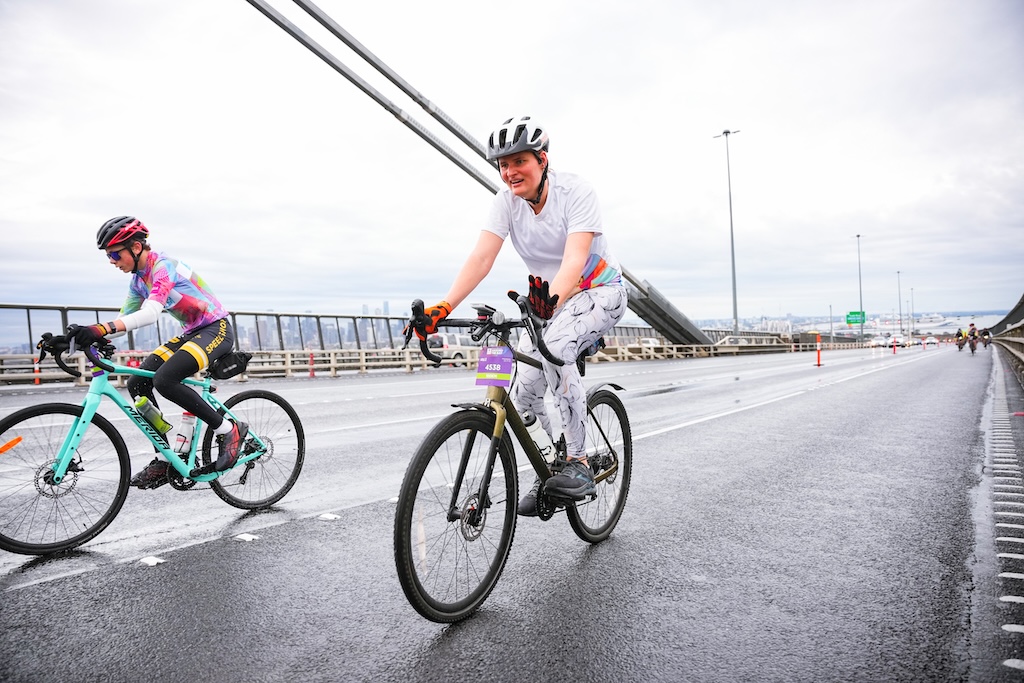
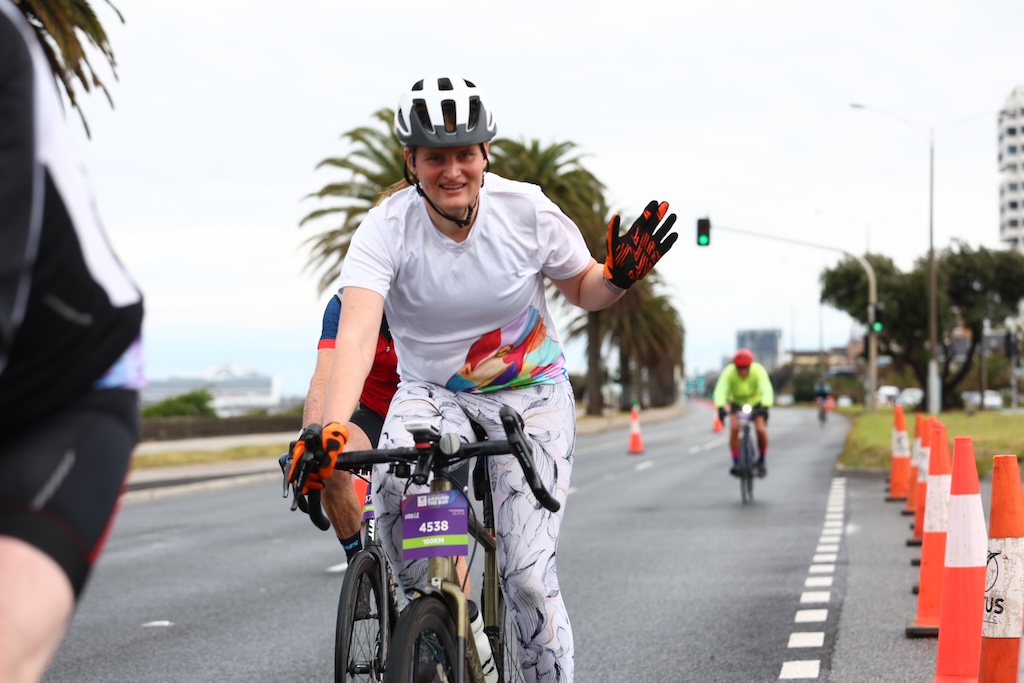
Leaving the start line I was filled with “oh god what have I gotten myself into” as I kept up with some very expensive bicycles being ridden by people that at the very least looked the part. I on the other hand was wearing a loose fitting running top and running tights with my budget gravel bike. There was some slight drizzle but it was otherwise not bad conditions to ride in. Moving speed was around 30km/hr.
Hitting the west gate though and that speed dropped right back to 16-20km/hr, but I was still keeping up with the main pack. The pack was cruising at closer to 28km/hr after the bridge which was a bit closer to what I could handle.
At 18km we hit the first rest stop - I decided to keep riding through. The pack thinned at this point but I clearly wasn’t the only one continuing through. Back over the bridge and on the other side I felt that my legs were a bit more like Jell-O™ now (40km in). Unfortunately the pack split up a bit due to traffic lights and eventually I was practically alone. At this point I was considering skipping the next stop and continue straight onto Mordialloc (70km in).
However at 45km logic prevailed and I realised I needed fuel and a top up of my water. So when the 50km Elwood rest stop came up I entered. At this point I found myself in an interesting situation - I was too fast to be in the casual riding groups and too slow to keep up with the serious groups. At Elwood rest stop I entered while they were practically still setting up. I think I saw two other cyclists. I was still able to grab a banana and some water. Was hoping that there would be some hydralite. Onwards!
This next section between Elwood and Mordialloc was horrible, the worst even. I’m not sure if it was just because I was low on energy or the way the elevation changes occur, but speed dropped significantly on the slight uphills. The downhills didn’t feel like they lasted for long. A couple of packs over took me here, I tried to keep up for a bit but just couldn’t. Regardless still averaging around ~25km/hr. I was riding alone for pretty much all of this section.
Arriving at Mordialloc (70km) I was sore. I knew I had to spend some time at this stop. I grabbed some crisps, trail mix, and a gel. While eating I spent some time sitting and standing to give the muscles that keep my back in check a break. Legs were feeling ok, but not strong. During this time I overheard that rain would be coming at 11am. At this point I decided that maybe, just maybe I could make it back dry.
While the Elwood/Mordialloc stretch was the hardest, the Mordialloc to finish stretch was the sorest. At 80km my back just said no. I considered stopping for a break. I felt I was close enough that I could just suffer a bit more.
I noticed on my bike computer that my average speed was around 25.3km/hr. This shocked me a little as I went into this thinking that my speed would be closer to 20km/hr. My immediate thought was “maybe I can get 100km in under 4 hrs”. Could I keep up my pace?
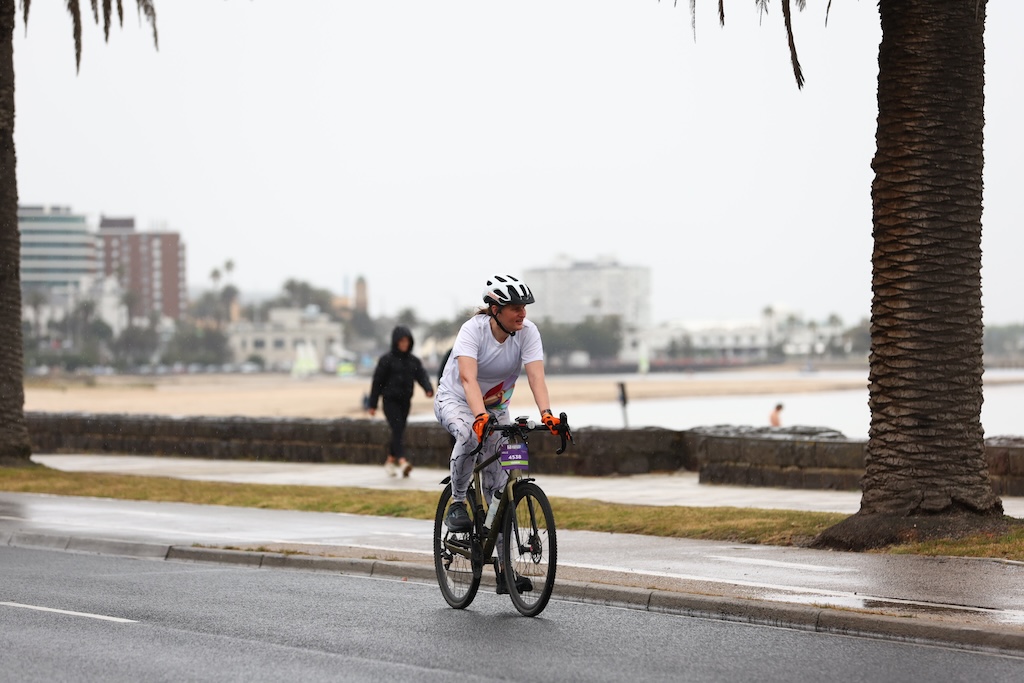
No. By 90km it had lowered to 25.0km/hr. All was not lost though, the elevation flattens out and I was able to keep my speed up. Just one tiny problem. The much more casual 50km riders were now mixed in, combined with more traffic lights. The average speed kept slipping lower and lower, the rain started, and my focus became just making it back. I’m glad I made this decision - the traffic was just too busy and the interruptions too great to make it.
Coming in to Albert Park for the finishing lap, it was wet. I was cold from waiting for traffic lights. My Garmin read 99.3km. This was going to be unsatisfying. So instead of ending the ride, I quickly funneled through the finish then rode to our car. Making up the missing 700m + giving me shelter from the rain.
The pain
Surprisingly my back recovered fairly quickly. Just being off the bike was enough. My right leg however was not. Any slight twist on it when load bearing was extremely painful. I was extremely concerned that I had undone a bunch of recovery.
The next day was a relief. While there was some amount “somethings not right here” feelings, the issue had mostly gone away. Hopefully this trend continues. I generally feel like my body should feel a lot worse than it is today.
The bike
So how did the bike hold up? It was a dream with one tiny hiccup. Shifting became unreliable about 50km in. I think this is just a cable tension issue and is easily fixed, but I didn’t want to risk making it worse during the day. I figured I could just double shift then back one when it didn’t change. Could be as simple as the wheel sitting slightly differently after being reassembled post transported.
Again?
I won’t say no, but it’s unlikely. This really pushed the limits of my back, just a bit more than I feel comfortable with.
The event was extremely enjoyable. Maybe I’ll sign up for the 50km instead.
The stats
100km Time
4:07:13
Average speed
24.2 km/hr
Ascent
538 m
Passing Vehicles
204
Pedal strokes
17,992
One more thing
Remember that desire to get under 4 hours? Well, since I get to set the rules… if you look at Garmin’s recorded moving time (aka, removing all the traffic light stops) we get:
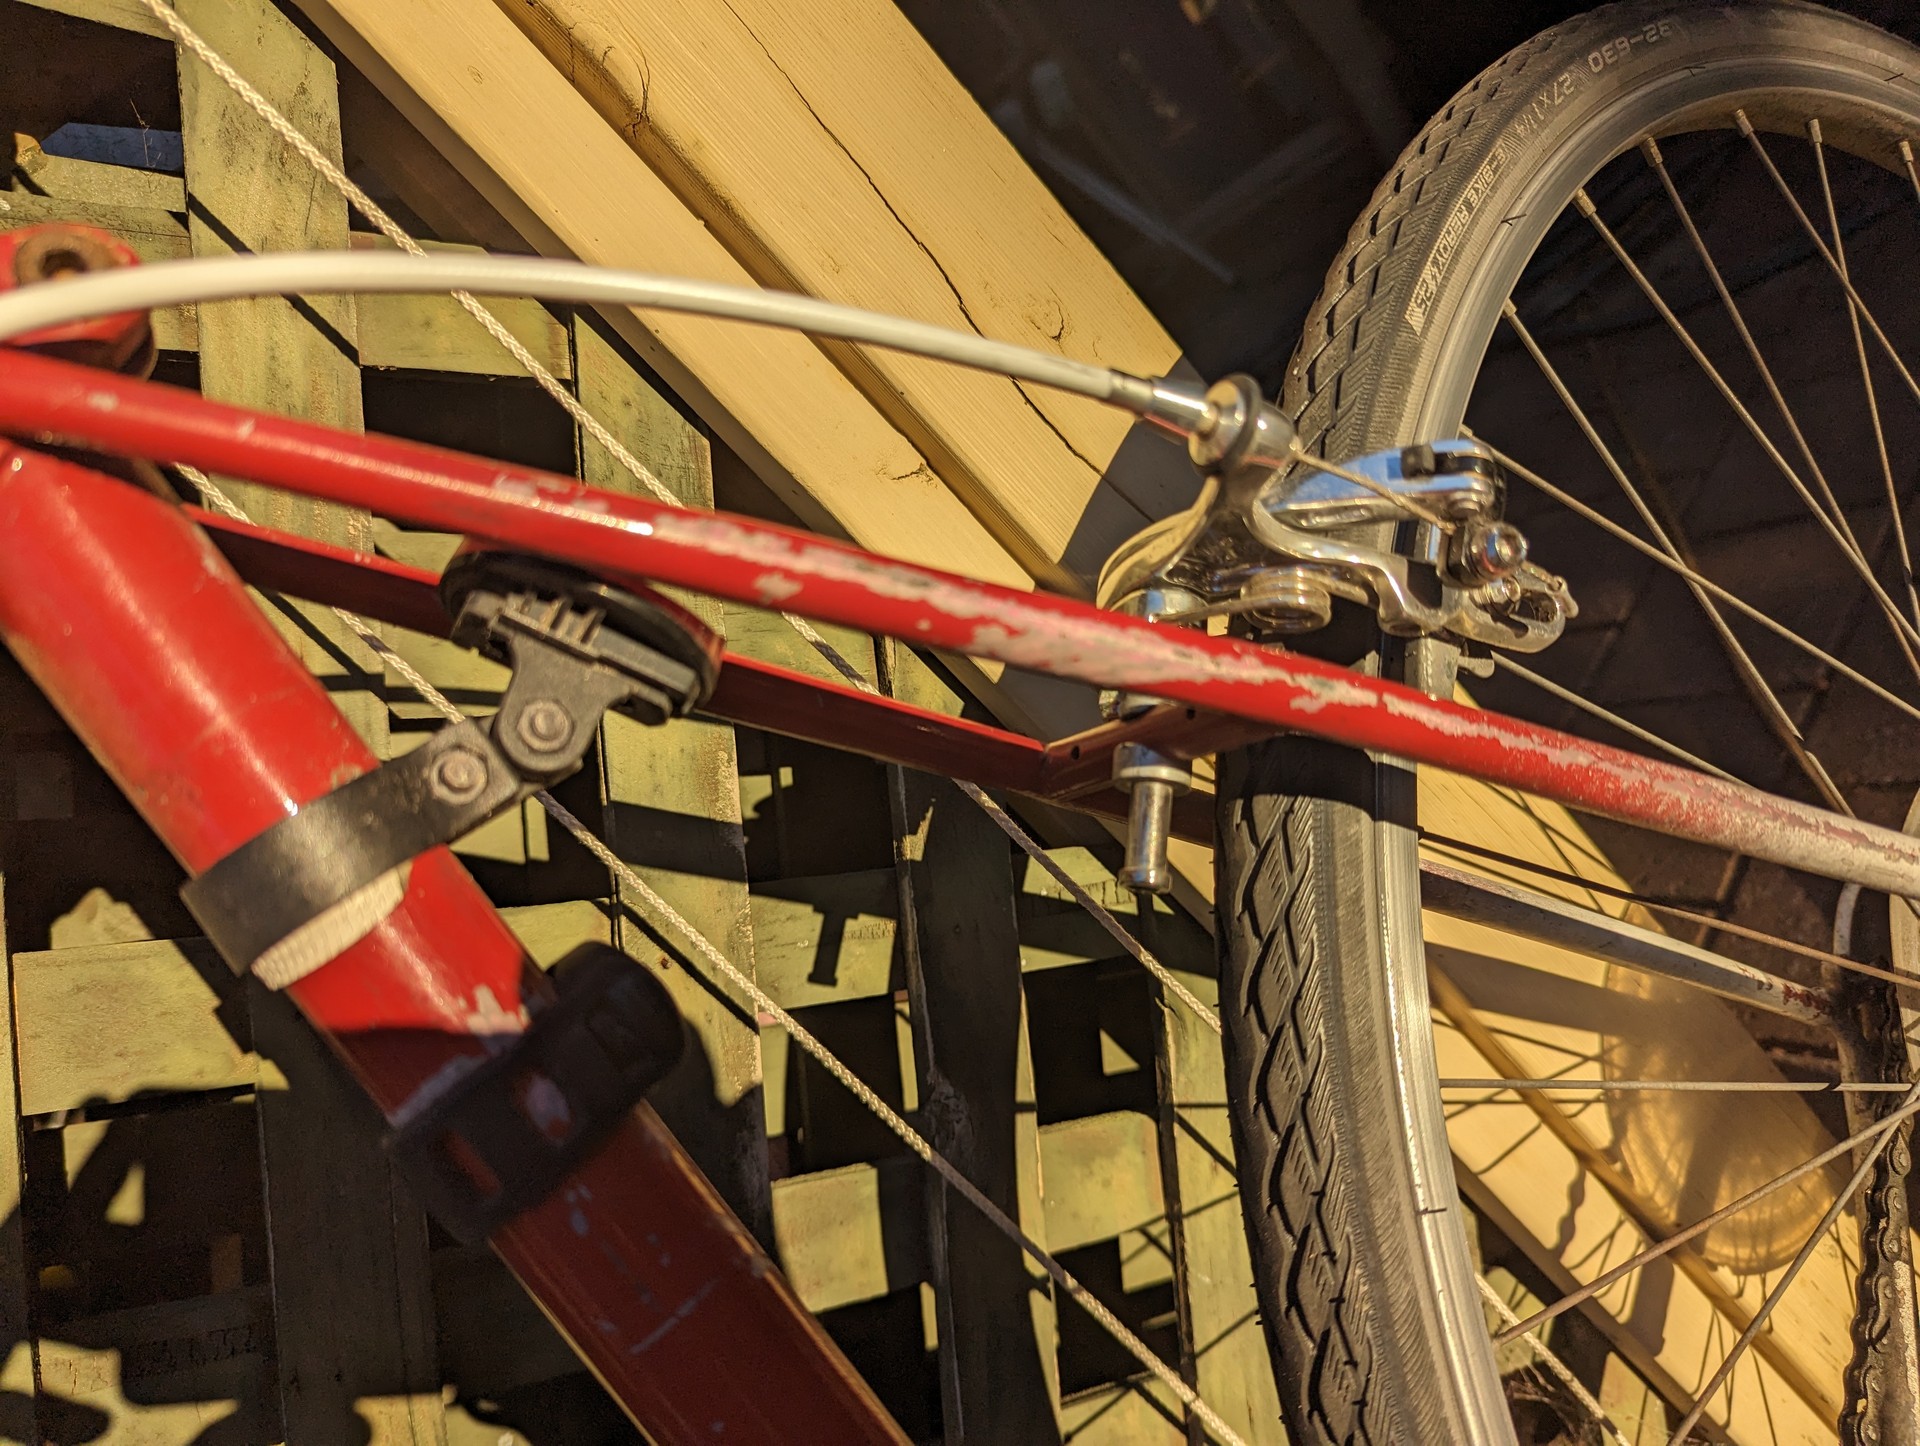
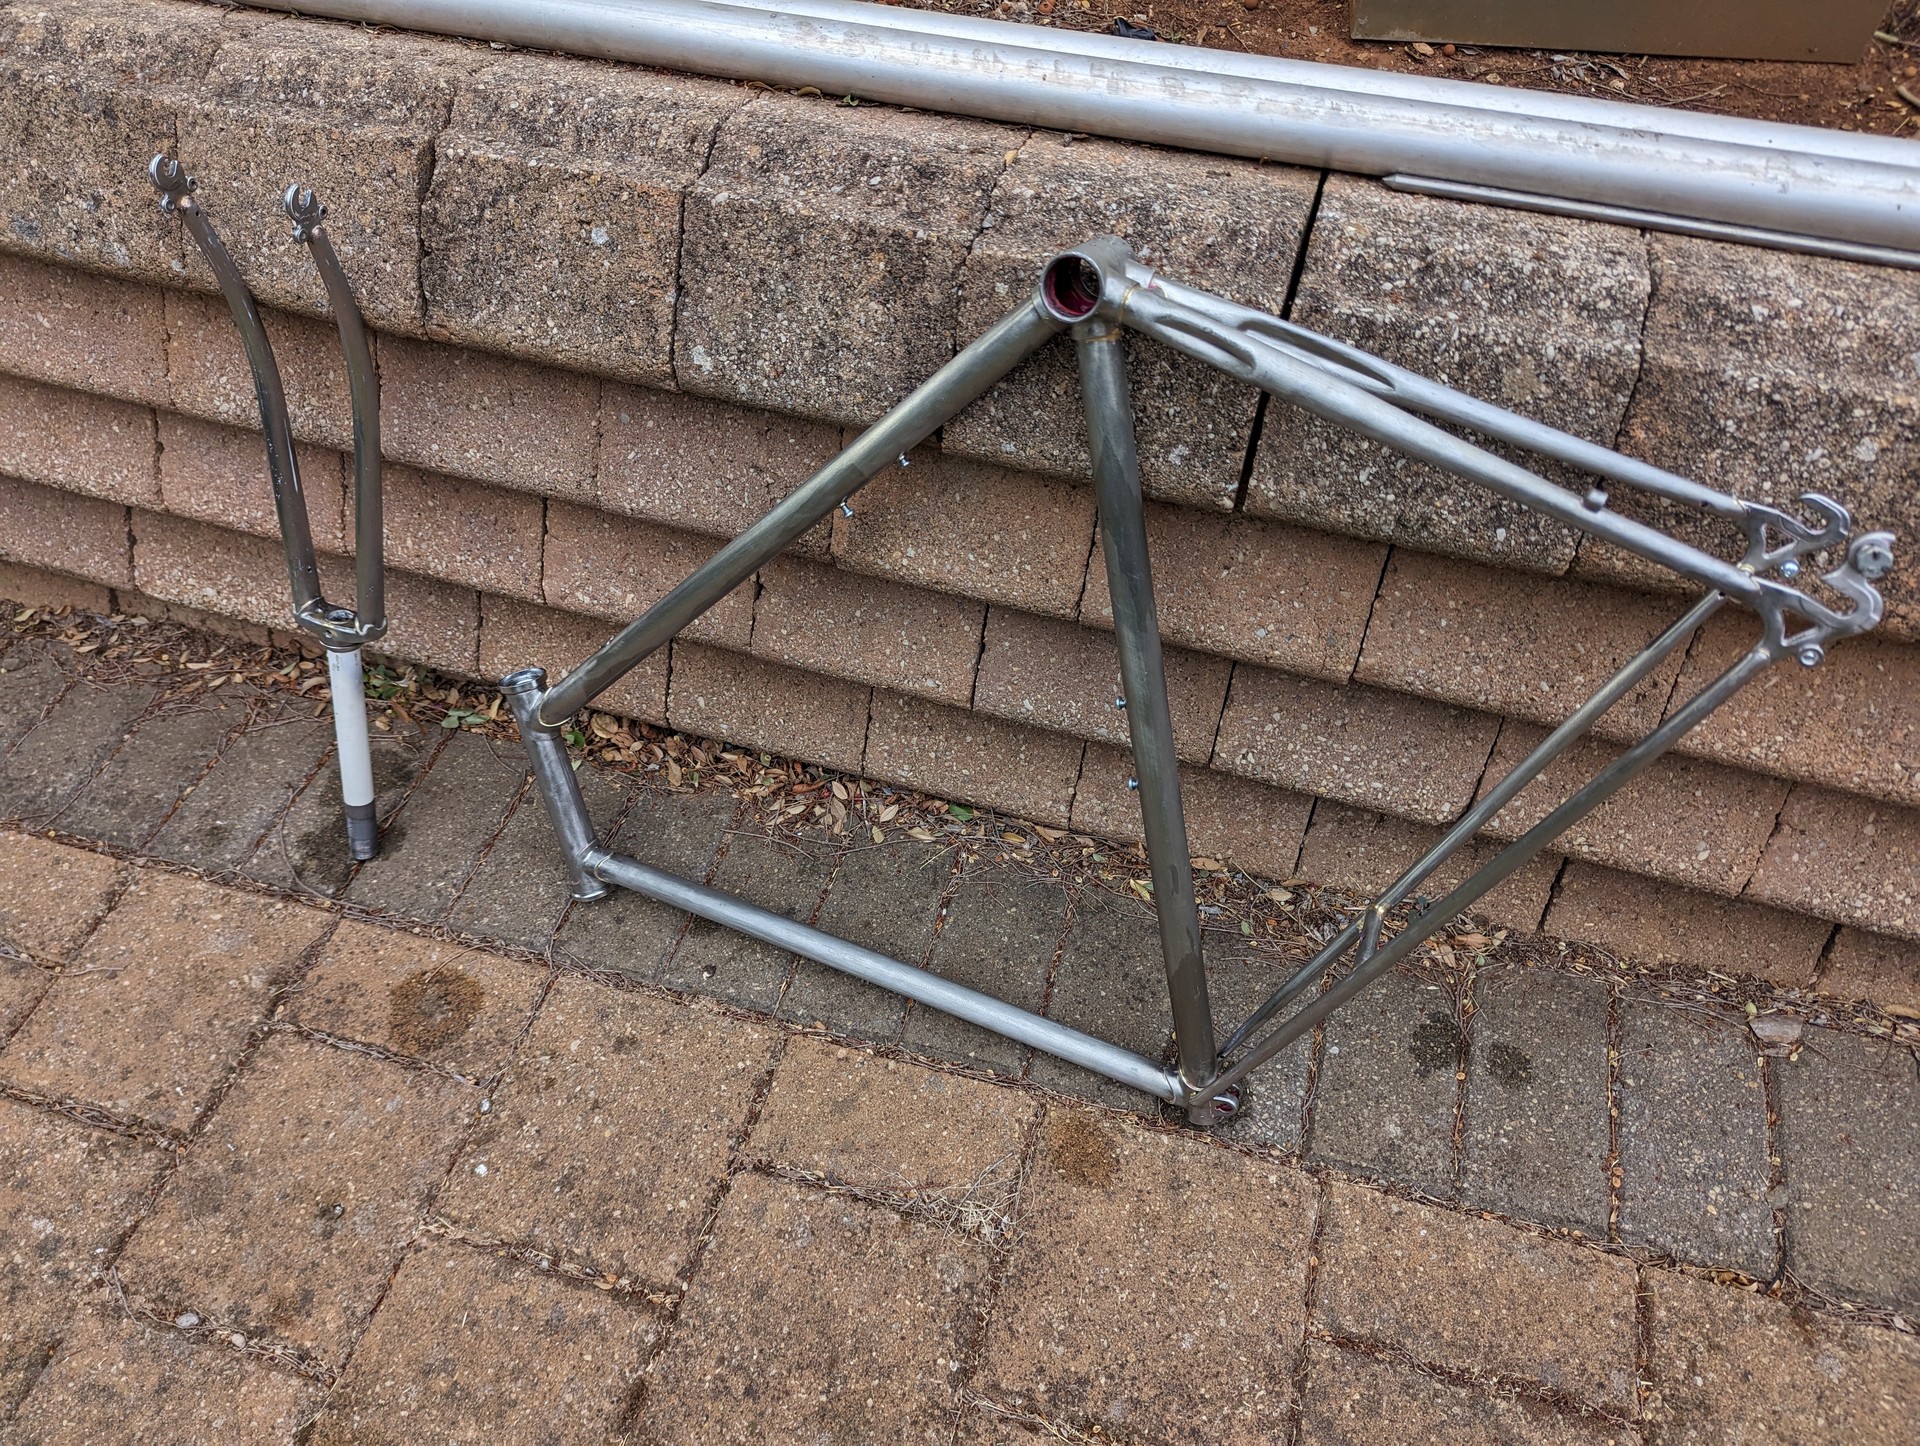
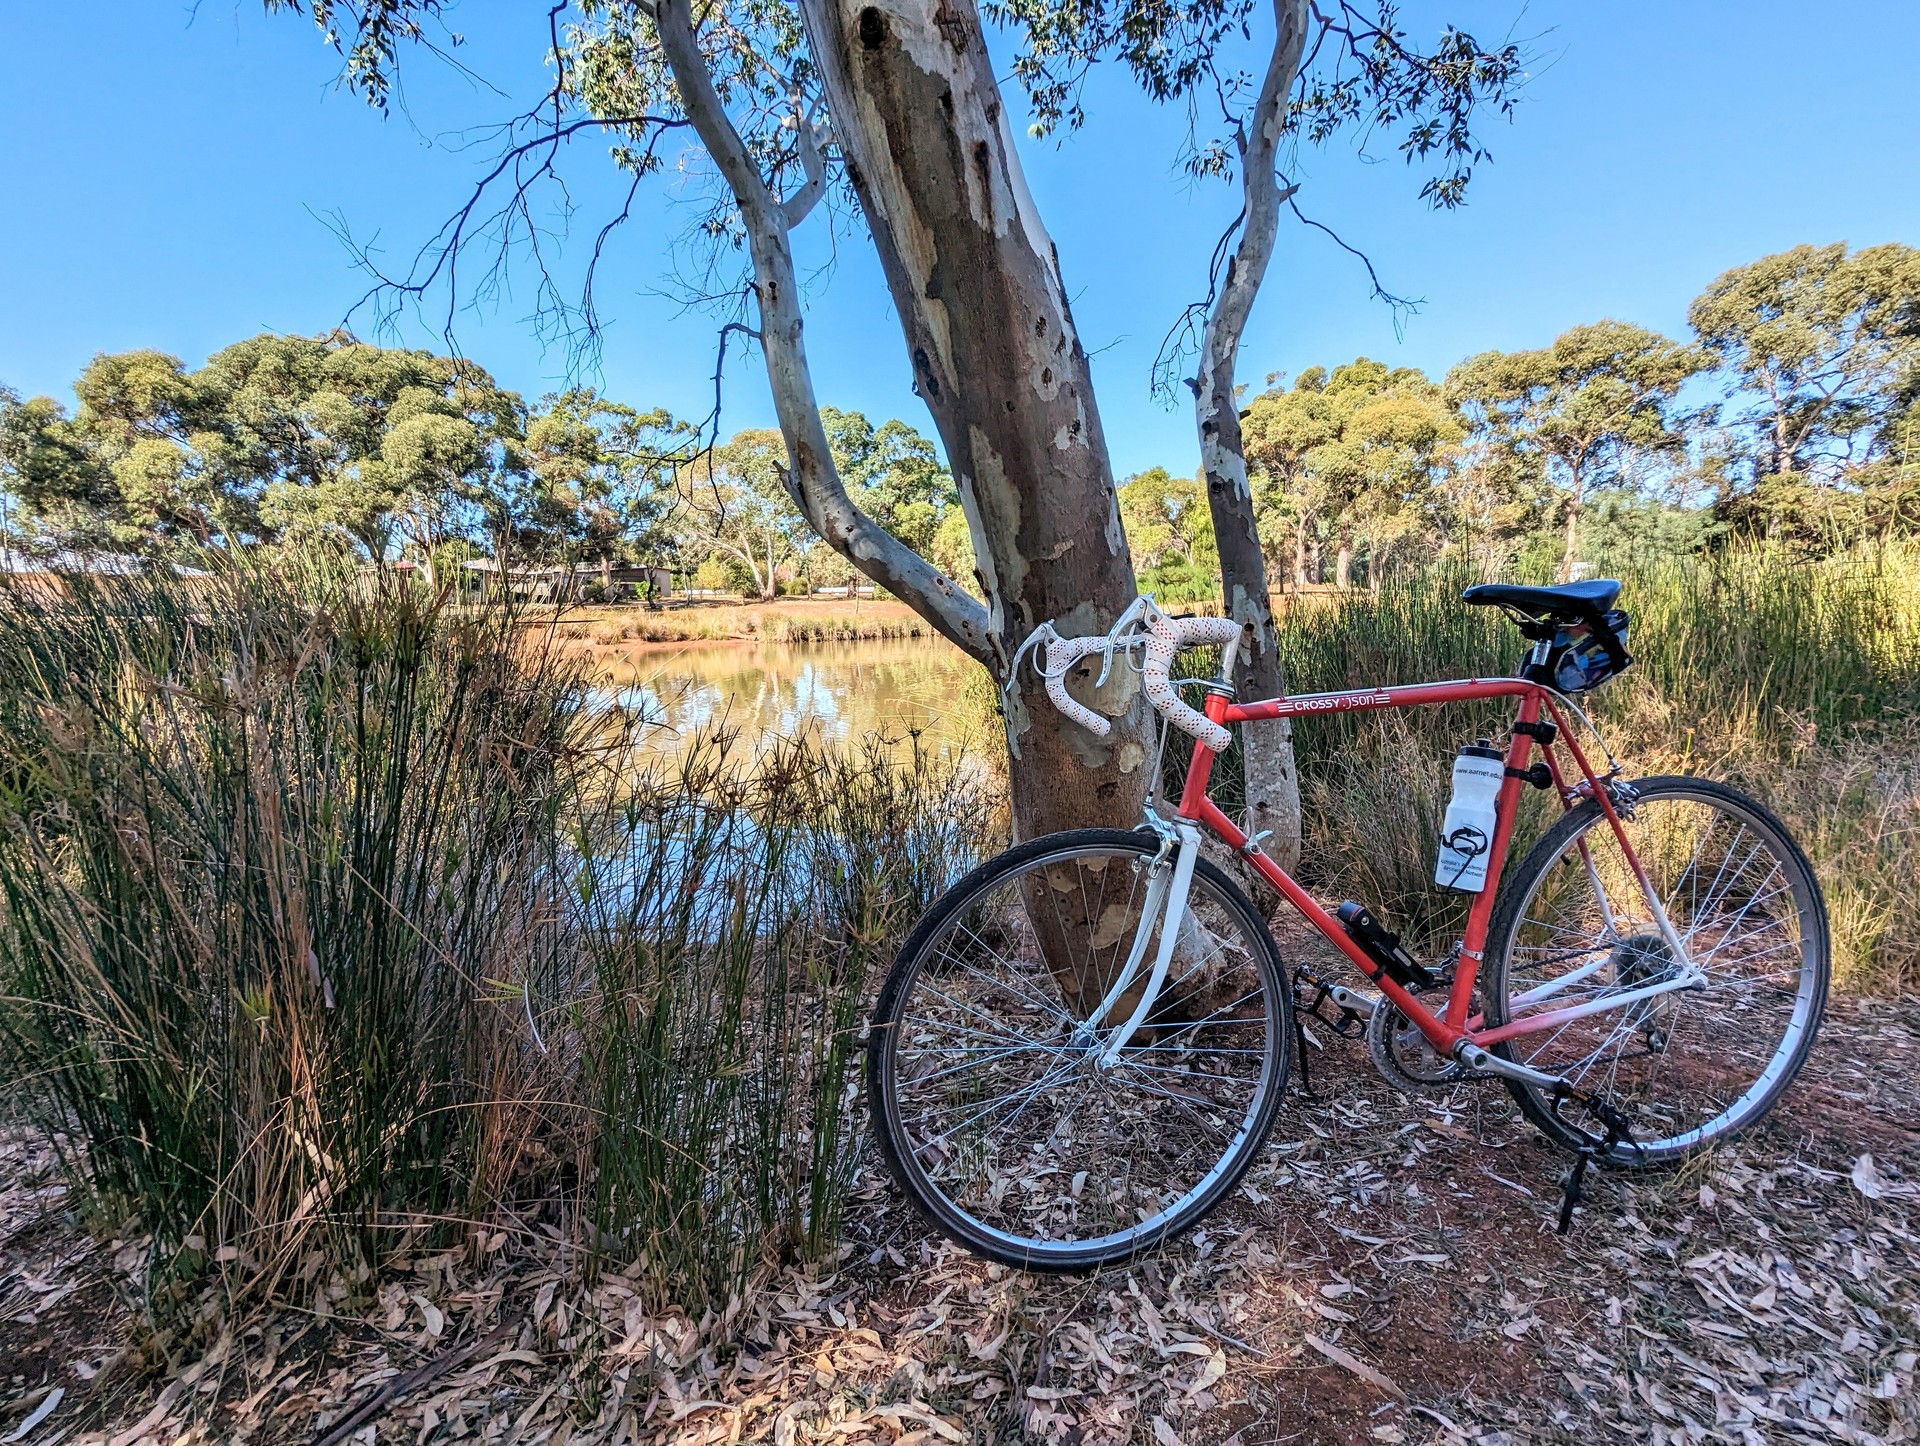
JSON’s had a tough life. Before I was all that attached with the bike I didn’t exactly treat it with same the respect I do today. It was just a cheap bike to get me from point A to point B. The more I rode it the more I fell in love with it. Combined with damage from the previous owner and other general wear and tear the frame was starting to show some signs of rusting.
The plan was to strip the bike of paint, then respray it. This wasn’t going to happen in our apartment, however an excuse to visit Mark in Adelaide presented itself. I took the bike across the border and over the period of several weeks redid the paint work.
Prep
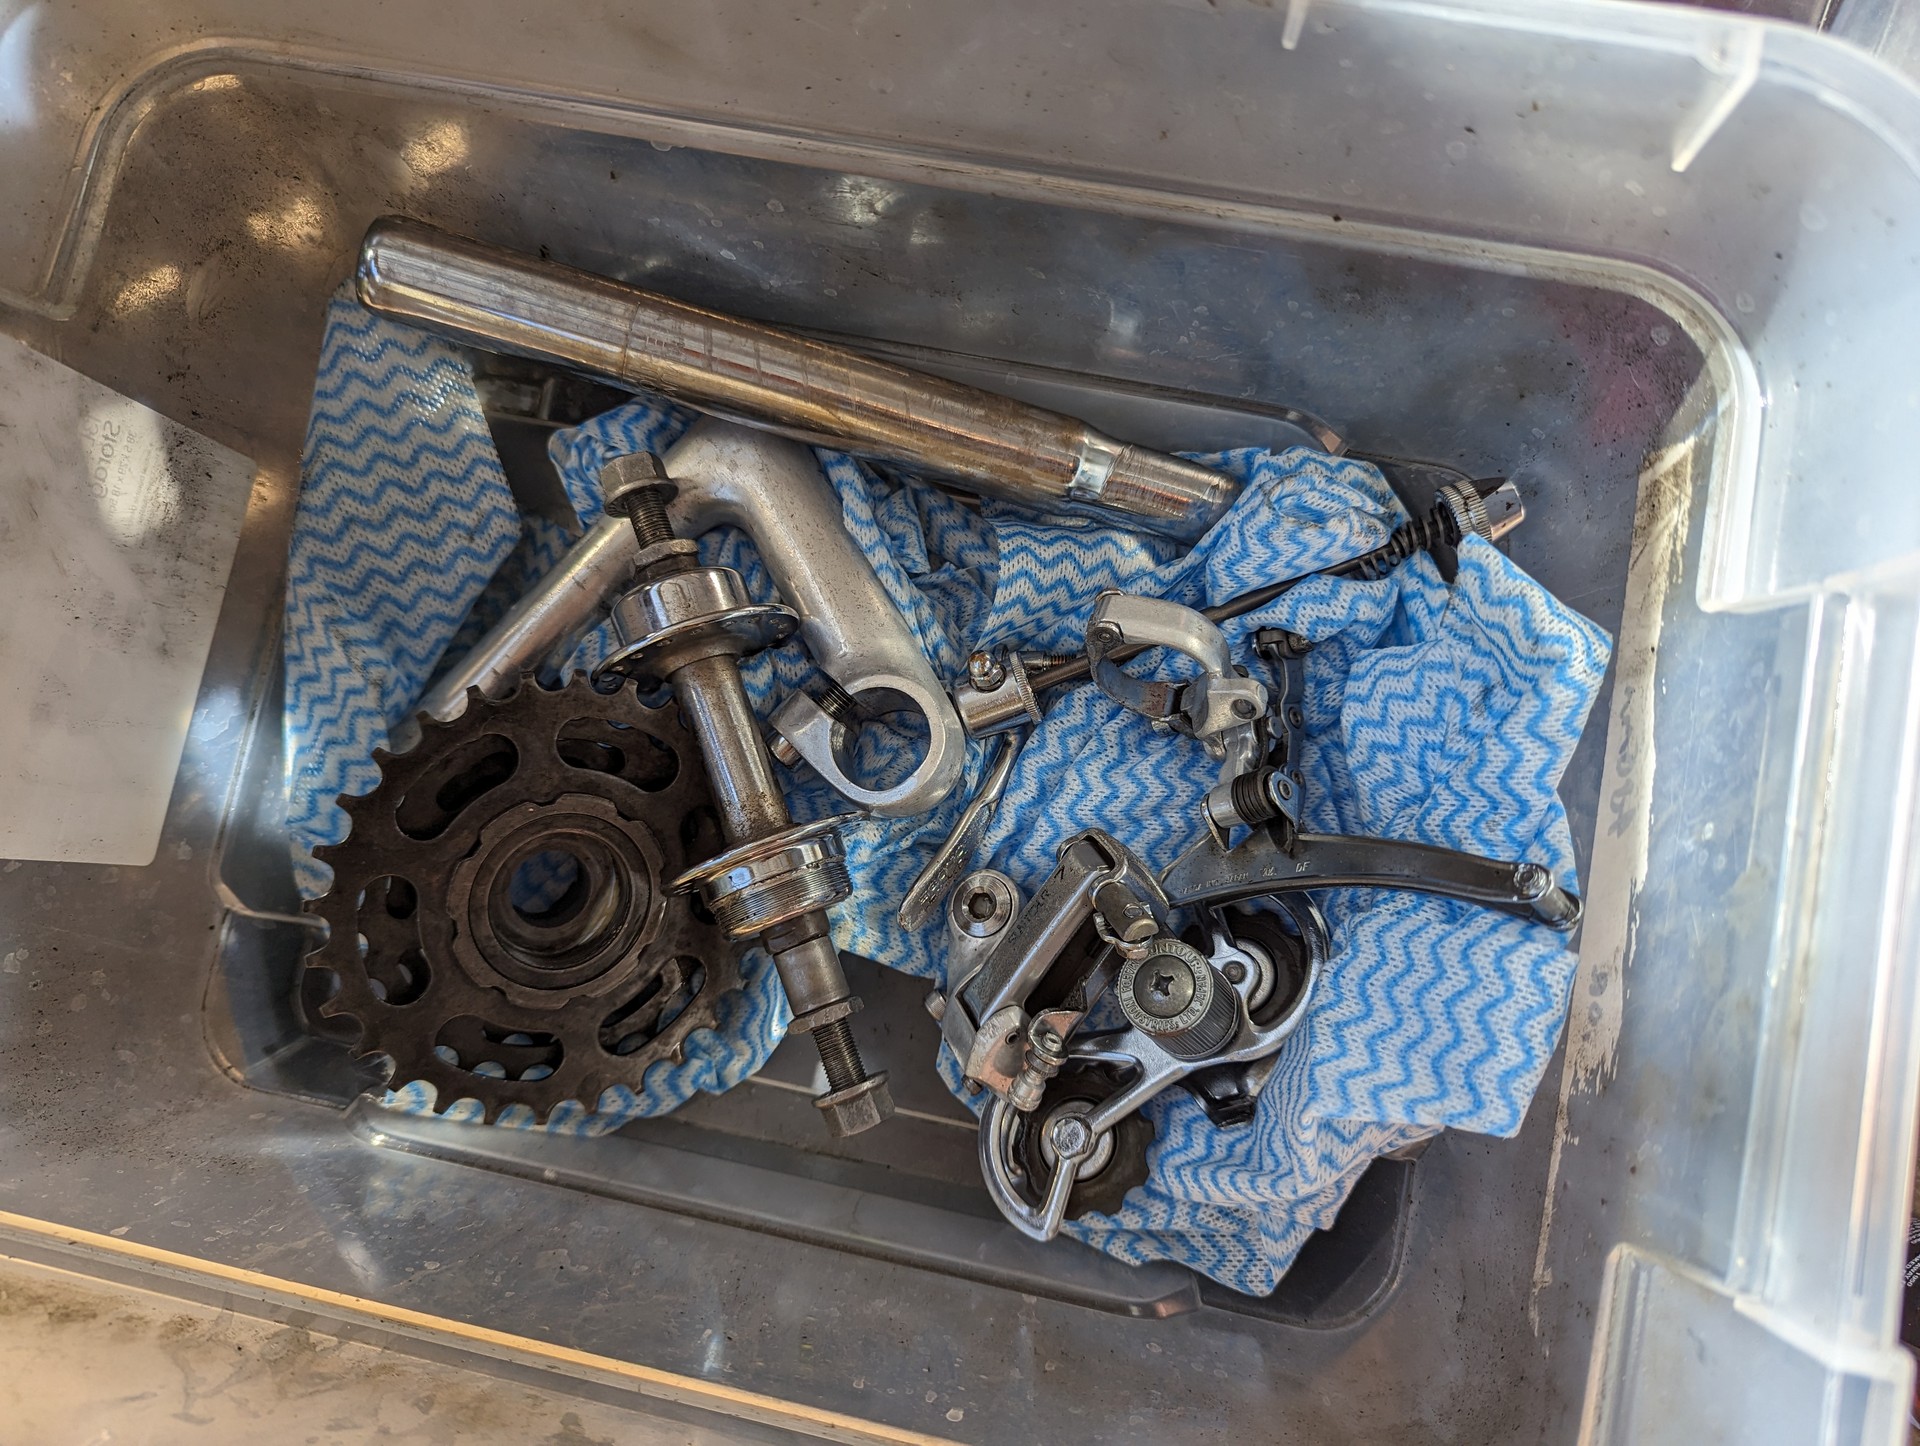
At this point I’d become pretty familiar with the process of removing every type of bike part on my bike. Within a few hours I had removed everything which left only the frame. If you are planning on embarking on this adventure and you are unfamiliar with removal of all your parts, get some help or do some research. Some parts can be fragile, some have reverse threads and some can be damaged if force is applied in the wrong spots. There’s also a bunch of tricks to learn for when things don’t go to plan.
An example is the quill stem - often on these bikes they become stuck. If you try to strike the stem directly you’ll likely either damage it or get it more stuck. While it doesn’t always work a good starting place is to leave the stem bolt in, but proud, then strike the bolt with a hammer - this will dislodge the wedge and hopefully allow removal of the stem.
After removing all the parts from the bike frame I decided to strip most of the paint off the bike. Now stripping the paint entirely off isn’t necessary. You only need to strip the paint back far enough for the new paint to stick, along with getting the surface finish to the quality you want it. I went for stripping it back entirely (there were a few bits I couldn’t easily get to so I just roughed these up as best I could). The reasoning for stripping back entirely was to ensure there was no hidden rust - along with removing a nasty paint run was present on the bike already.
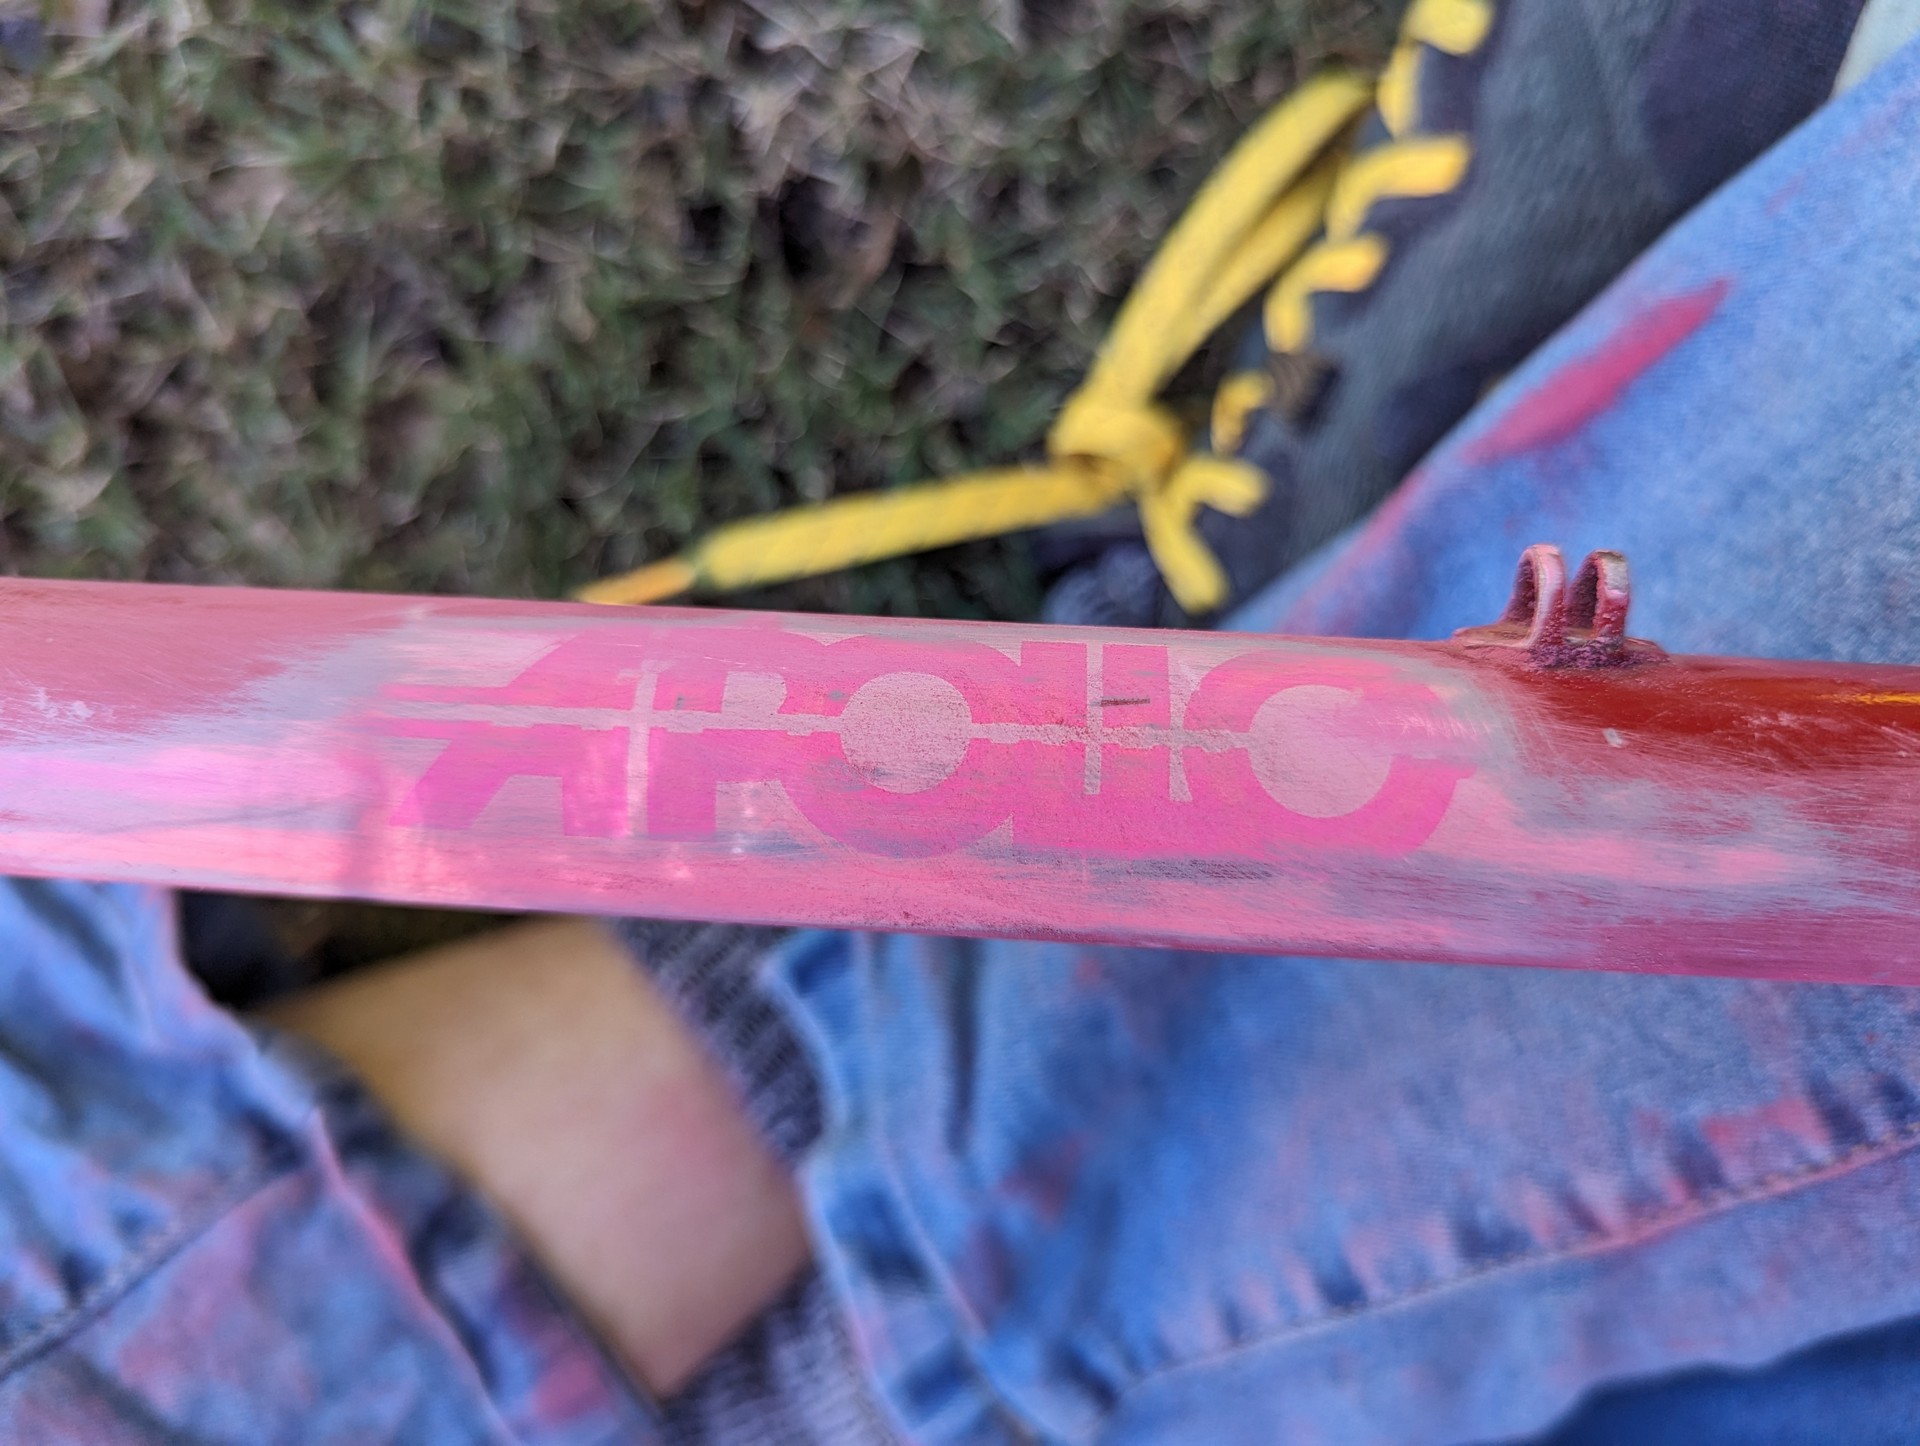
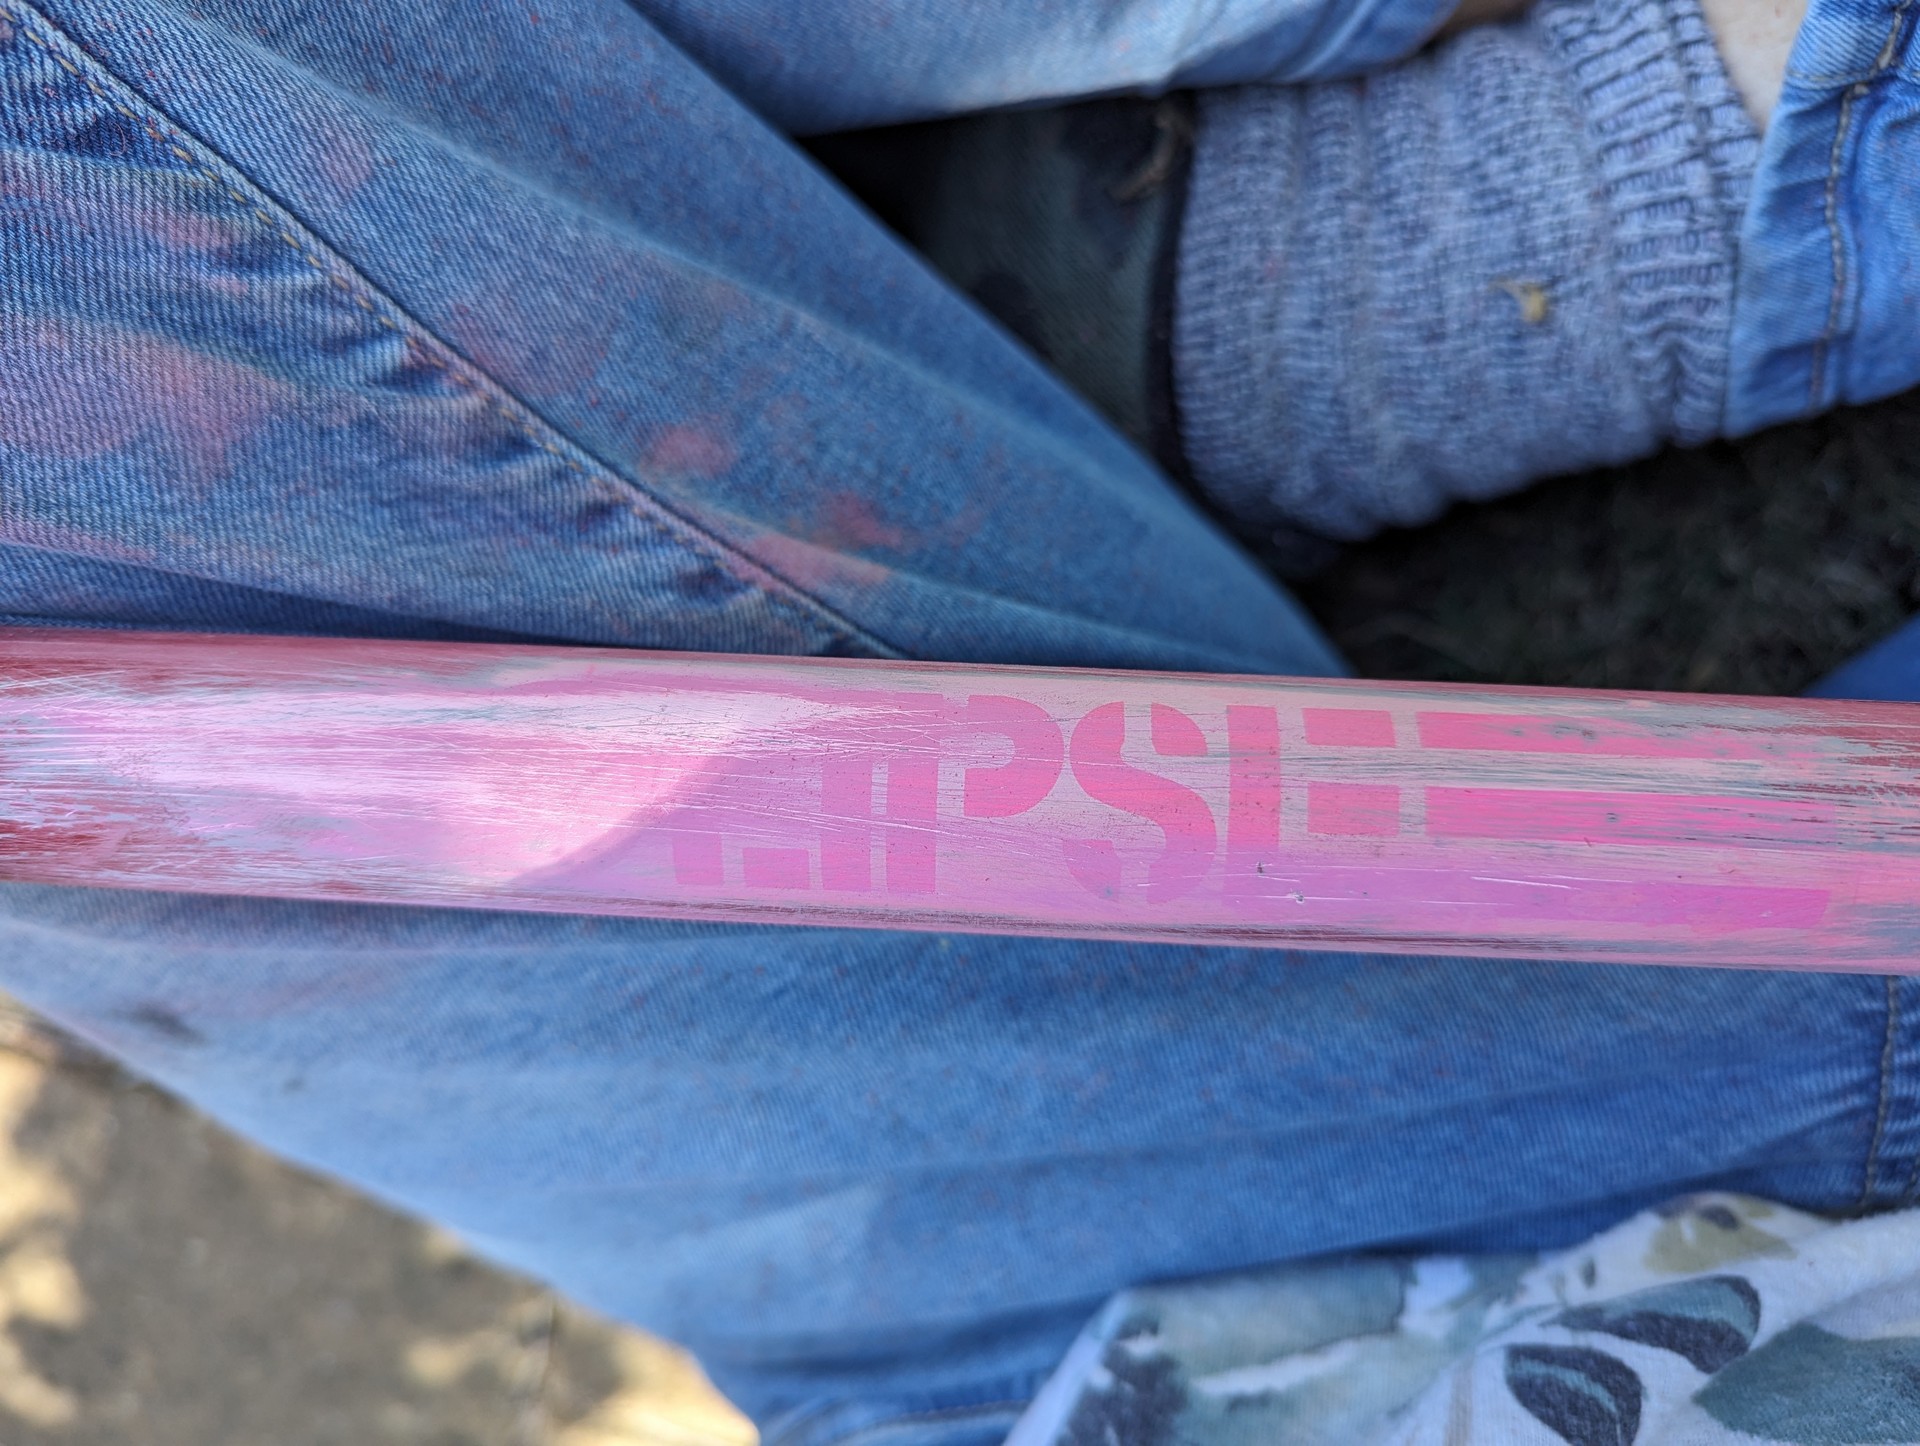
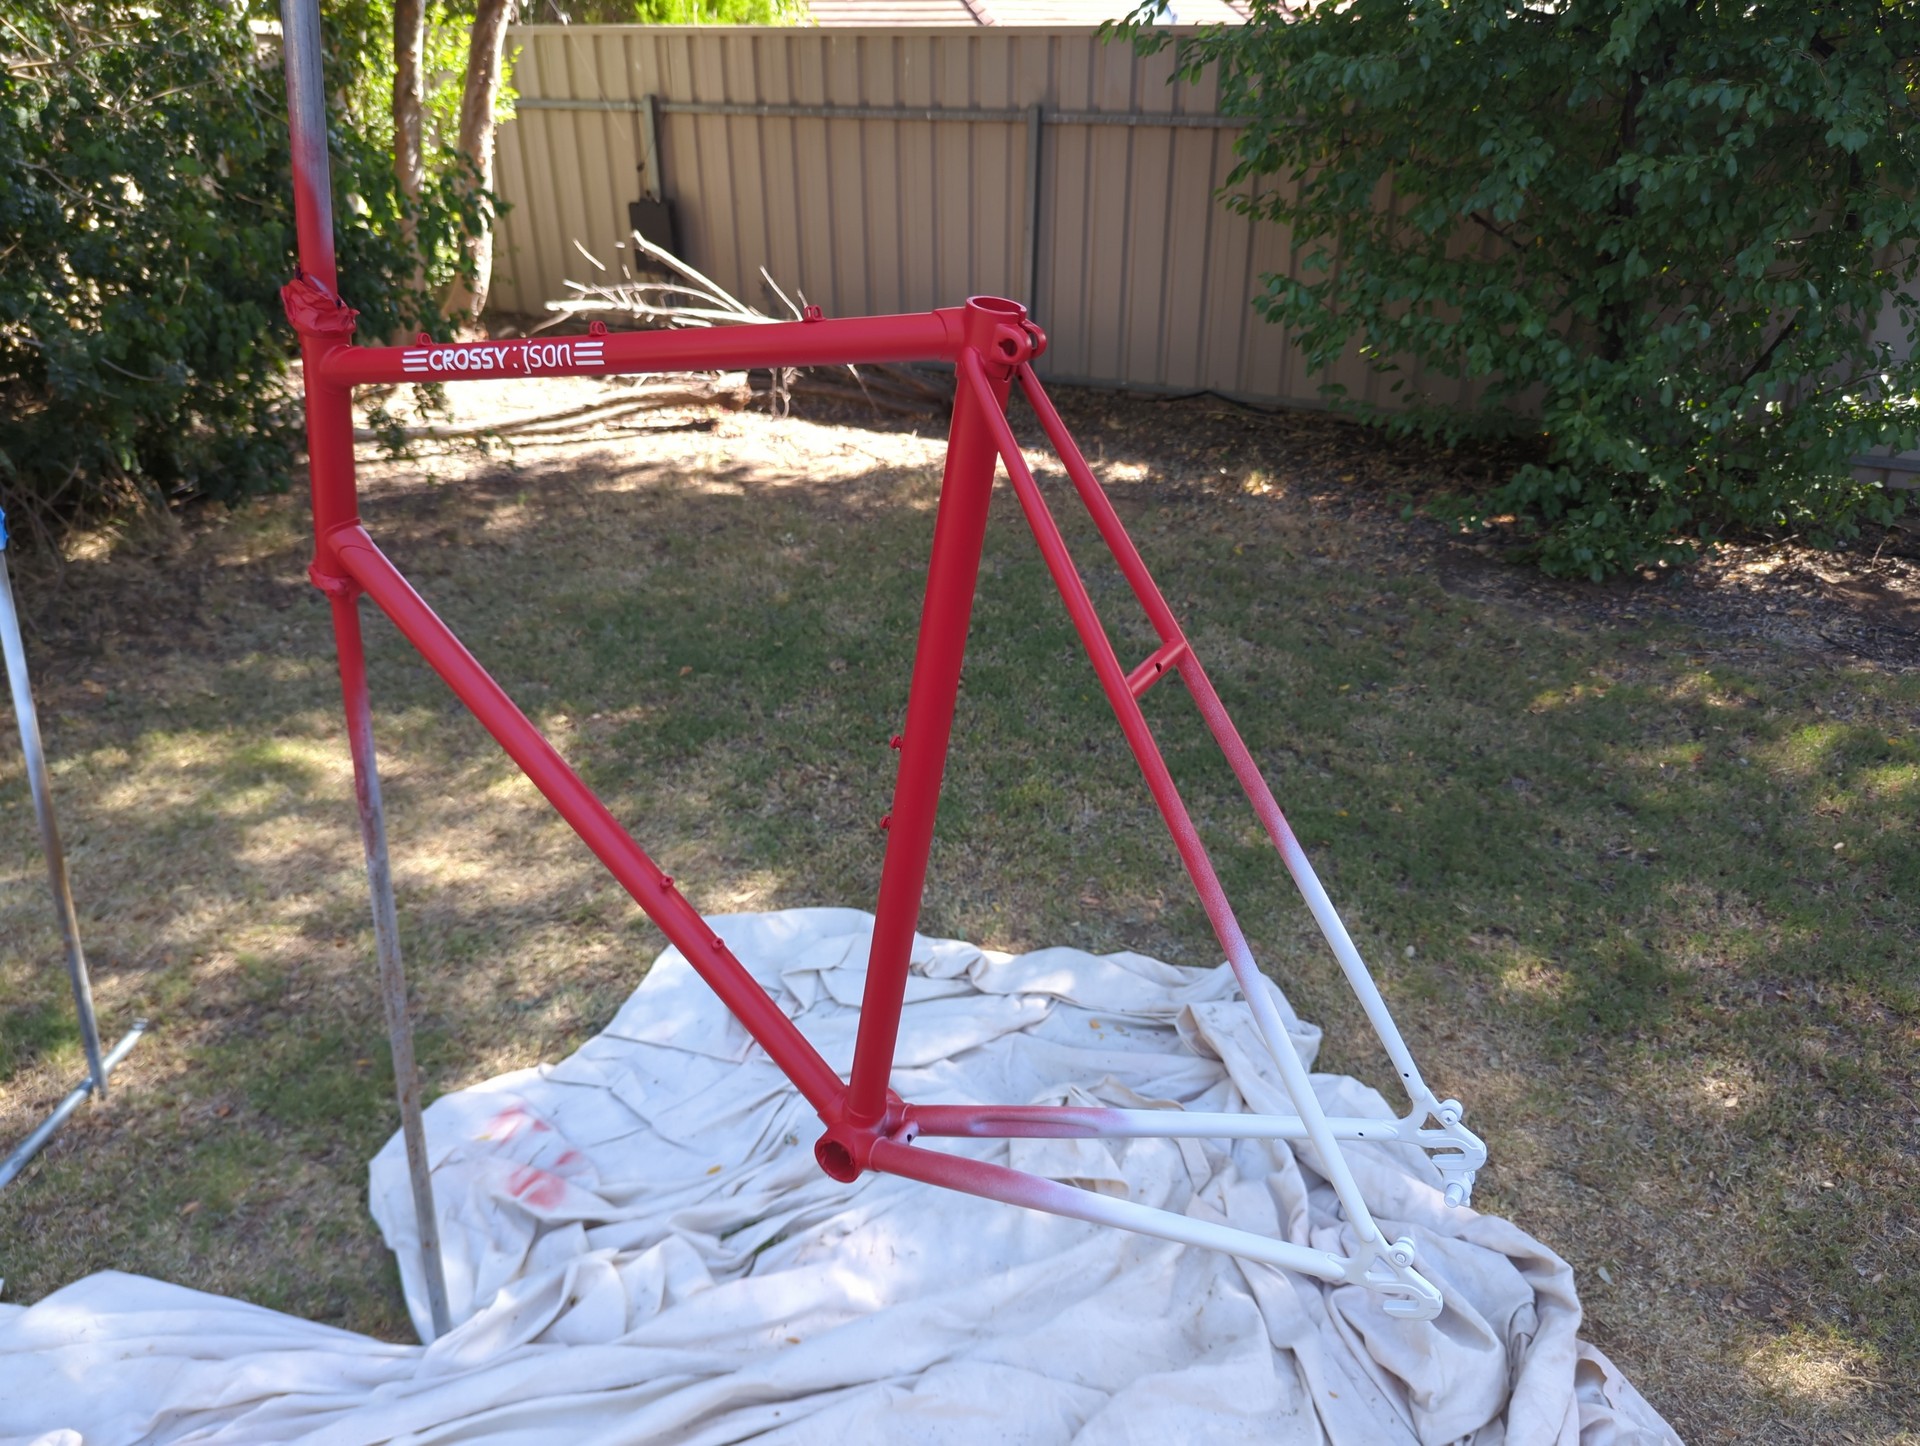
I’m really glad I did strip it all the way back during sanding I noticed some weird pattens forming, slowed down an used a higher grit sand paper. To my surprise the red and white paint scheme wasn’t original. I had suspected this given the paint run, however I could never confirm this. I never knew the make or model of the bike and by carefully sanding back the top layer it revealed a uv damaged outline of the original branding. An Apollo Eclipse. This would have been the pink and white model. For me the bike has always been red and white, that’s now part of its history. So while I could return it to original colours, they wouldn’t be original to me.
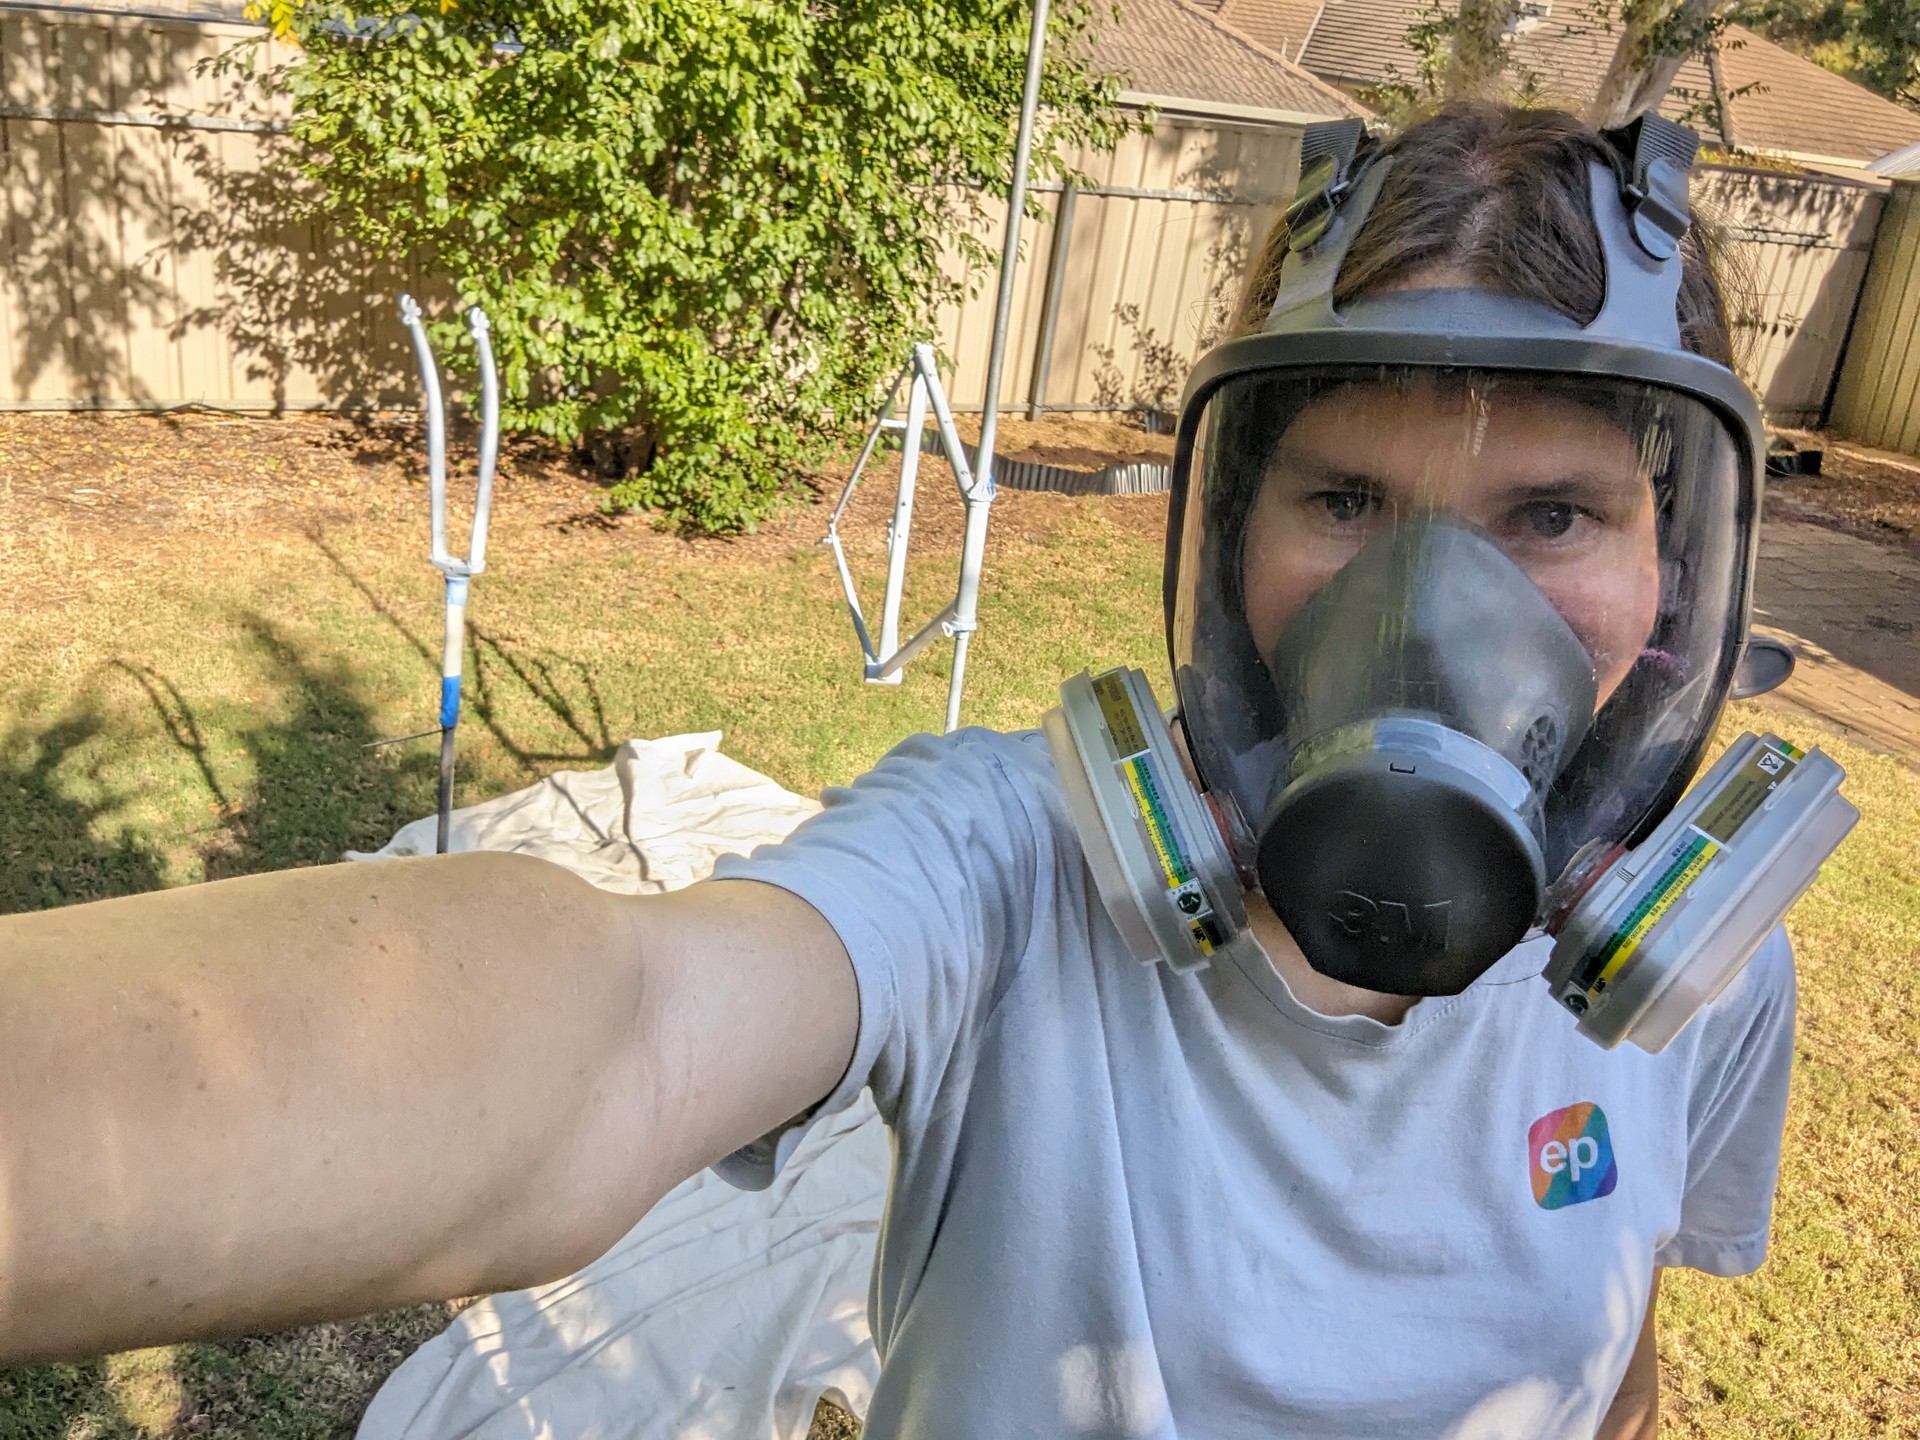
For the majority of stripping I used low grit sand paper however for the fiddly bits I restorted to wire wheel brushes on a cordless drill. Removing the paint is probably the hardest part, once its removed moving up in grit to make a smooth finish happens fairly easily. I went with the sanding approach because sand blasting seemed too expensive for this project and sanding didn’t seem like too much effort (it was a lot of work, don’t get me wrong, but it didn’t really take that long). I looked into chemical processes however youtube tutorials and reviews gave me the impression that it seemed more annoying than just sanding. Everyone has different advice on the process however I settled for about about 400 grit for the final sand working off the theory that while spray paint is thin, it still needs some roughness to the surface to stick well. I used higher grit sandpaper to touch up some parts during painting. If you want to take away anything from this blog post though, think PPE. Not just when spraying paint but when sanding. I generated so much dust when sanding back the frame.
Painting Rust
The next day with all the rust and paint sanded back I went to paint. I thought I’d be able to get away with a day of stripped bike frame in less than 20% humidity but flash rust struck. It wasn’t a big deal however, I was able to sand back the frame with high grit sandpaper again just prior to painting. I gave the frame a wipe down with some acetone to remove debris and now we were ready to paint.
Painting
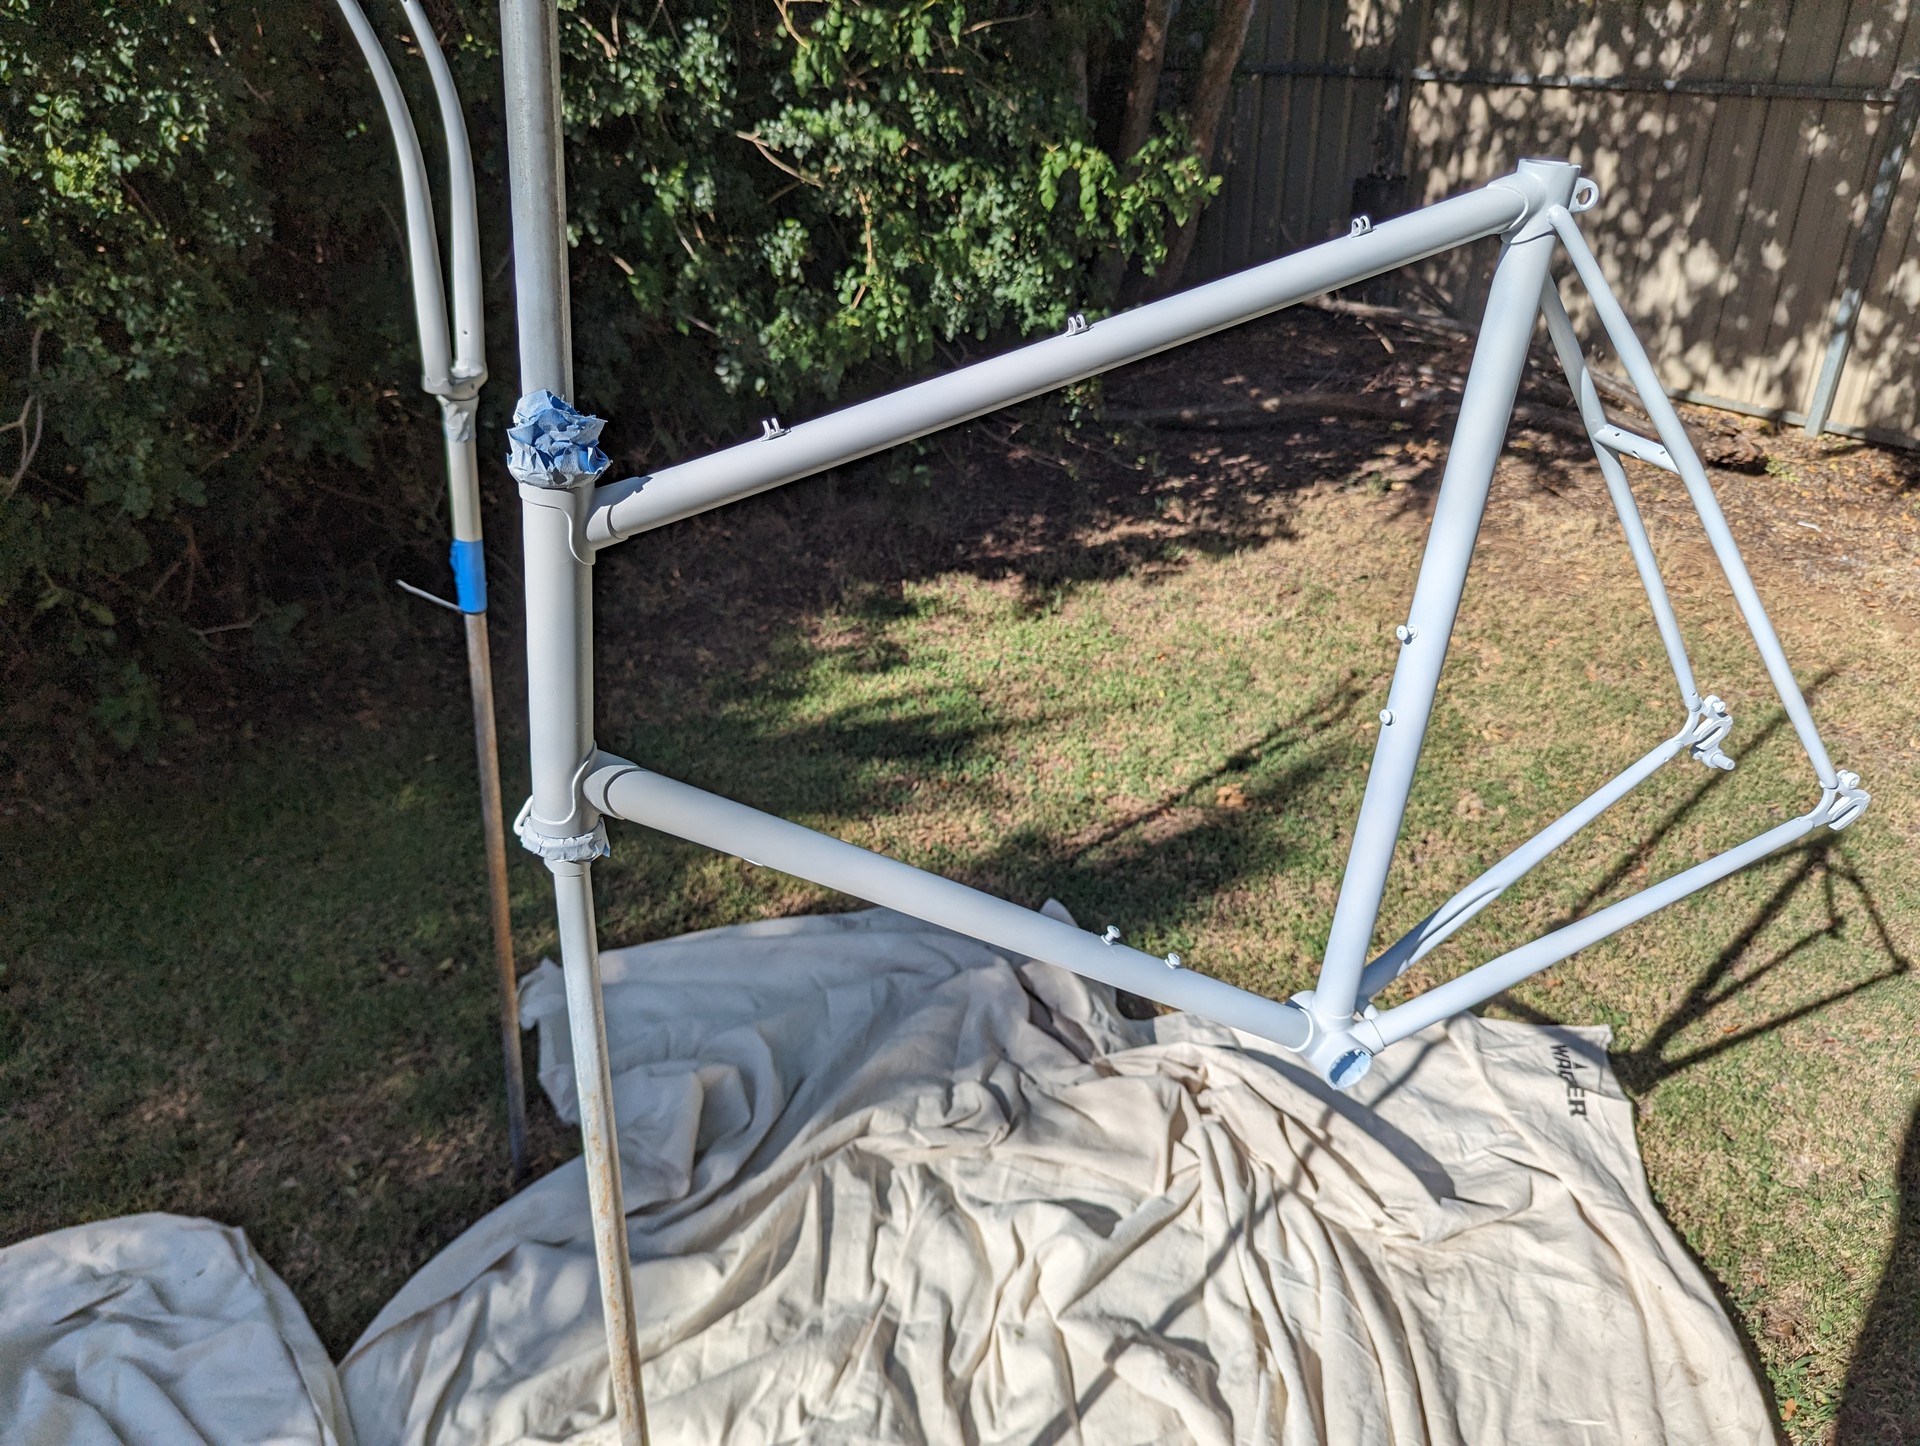
I went with Rust-oleum 2X Primer and Custom Spray 5-in-1 for the paint. This was mostly because I’m familiar with how they spray and work. They probably aren’t the best choice for bike paint, however rattle cans in general aren’t good - this is because the layer of paint is so thin compared to other methods. Regardless it’s something that fit the budget, and that I could easily do.
I actually reached out to Rust-oleum to confirm my planned process prior to painting and they were able to provide a bunch of nice details and provide confidence. First up was priming. The Rust-oleum paints allow re-coat anytime within 1 hour and they recommend coats 15 minutes apart. I setup the forks and main frame near each other so I could do them at the same time. This allowed me to switch between each while waiting. I was able to get 4 coats onto each within the window. The usual rattle can advice applies - thin coats. Sicne the frame is so large I applied thin coats and moved around the frame, usually doing 3 coverages every time I did a coat. Priming was probably the hardest part not to get runs on I got a slight run during this and sanded it back prior to the top coats.
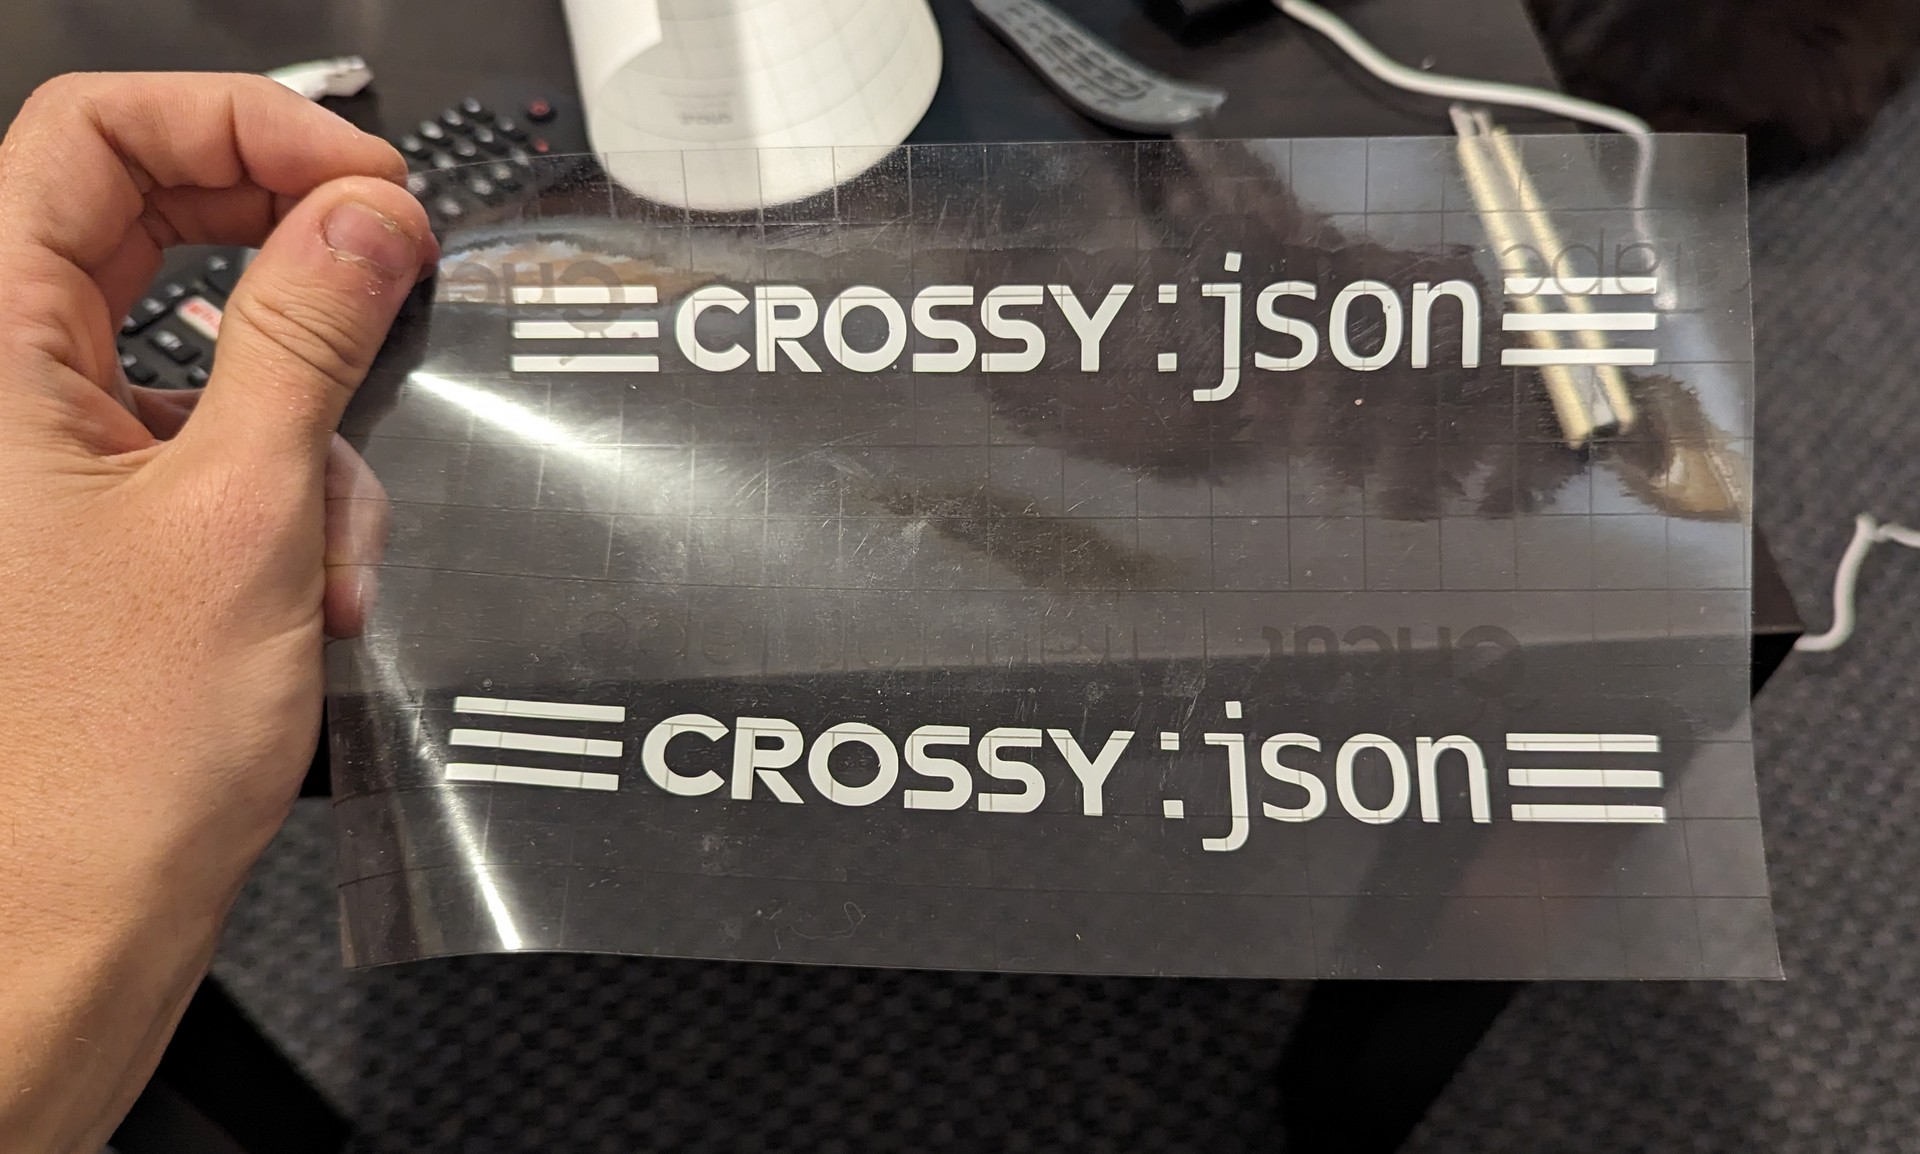
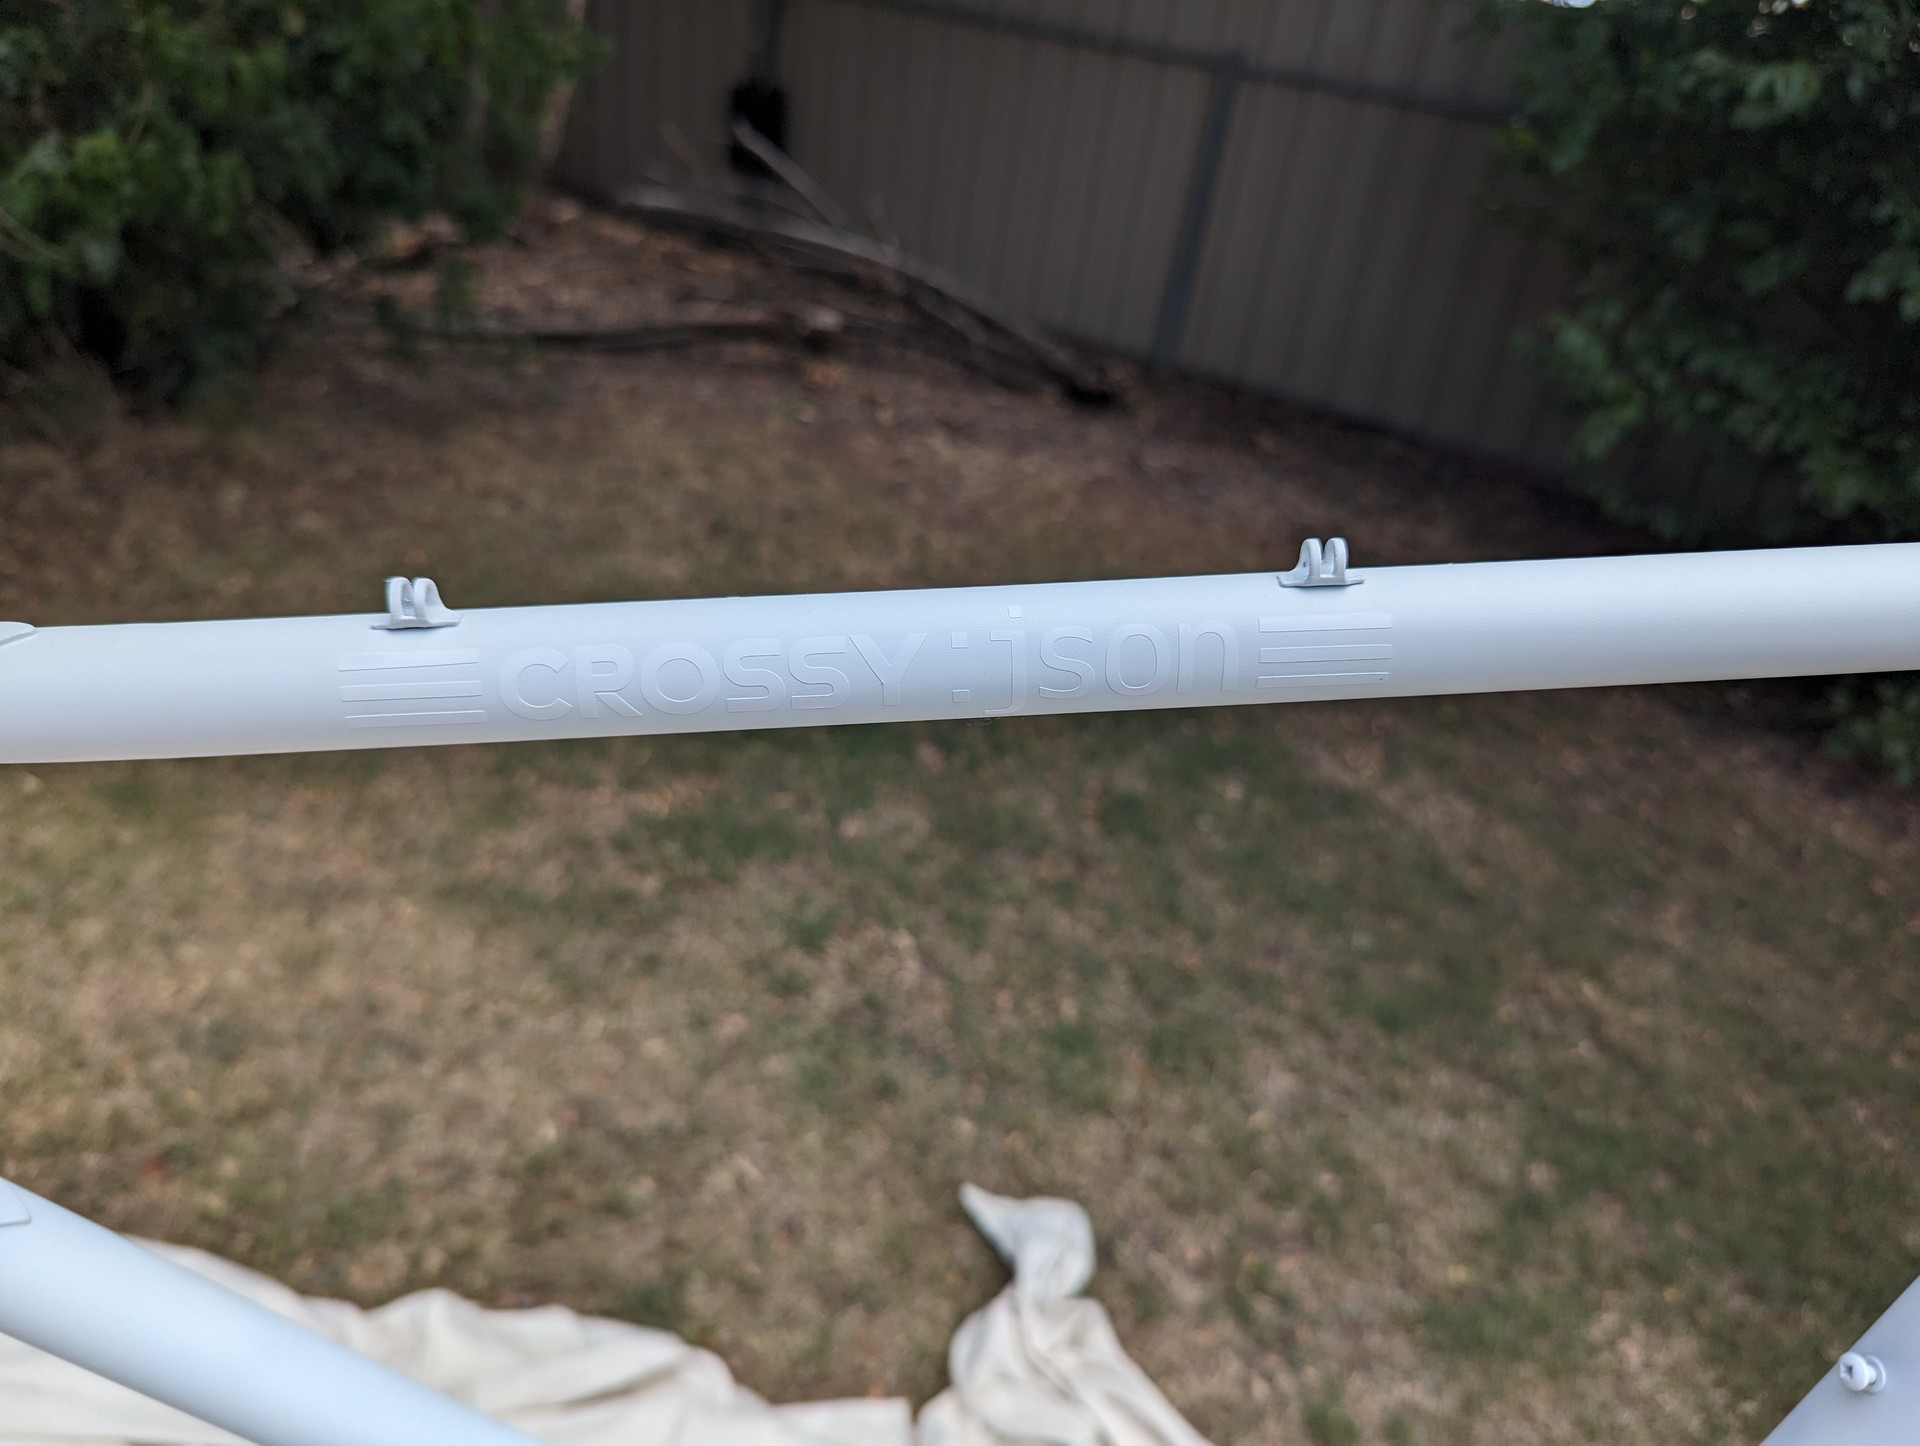
Since the bike was lacking any sort of branding, I wanted to give it some. I had a original plan for that - Crossy JSON - however since I now knew the make, model and what the original decals looked like I incorporated some of the design into my plans. There was the option of simply making some decals and slapping it onto the bike afterwards, but I really wanted to try using the decals as mask. I cut out some new decals for a mask and applied them careful. This meant that prior to the decals being applied I had to do some extra top coats in the masked off colour.
Some red coats went on. The Custom 5-in-1 cans low output mode really helped prevent any runs. I got a slight run where the rear brake sits but it was easily fixed up. The tricky part however was replicating the “original” white gradient on the dropouts. I did a few practice sprays for this to get an idea of what I was doing along with masking off everything that wouldn’t be part of the gradient and in the end it turned out great - I feel like its better than the previous gradient.
The masked off sections were removed prior to the clear coat. This is where I learnt that my masking approach was probably wrong. A negative mask would have been easier to remove (I created a bunch of damage to the paint getting each piece off) and would have made the painting process easier. Regardless I’m happy with the results given it was my first time doing this sort of thing.
I was originally concerned about runs on the clear coat - because that could have caused disaster, however even on high output mode I couldn’t have made a run if I wanted to. I’m sure the temperature helped but I feel like the chemical composition just makes it really hard to run with that paint. One approach for painting bikes it to actually not worry about clear coats, just make the top coat as thick as possible. I however wanted the finish that the clear coat provided.
Post
Prior to reassembling the bike I decided to give its internals a blast of cavity wax. This is intended to prevent rust from the inside. An idea I picked up from Croker vs ROVER. Most of the internals have drainage holes that the applicator can be fed through.
Pre-sequel
During painting I throughly washed all the parts, rebuilt bearings and placed everything in Evaporust. The Evaporust worked a treat, however flash rust struck again leaving me to have to repeat the process for many parts. The problem is that with the rust removed, washing with water just creates the perfect surface for more rust. I think the solution to this varies per part, varying from an aciditic bath, zinc plating and painting. However for the time being I went with a light coating of WD-40 (which is apparently the original purpose of WD-40). I think if I do this again I’ll have a think about how I deal with this.
I also found that many parts on my bike were broken. I ordered a replacement seat as the plastic holding it together had cracked. A spoke was broken on one of the wheels. The new spokes that I ordered were too long (they must of been the perfect size before, as the new ones were less than 2mm longer than the old) so I’ve reconfigured the wheel for a 4 cross spoke pattern.
The chain, bell, and cabling were all replaced. Along with the handlebar tape.
Finally
While the bike is mostly done now I still need to true the wheels a little better, along with draw up some of the spoke tension. I’m pretty happy with the results. There’s some bits that I messed up or could do better but for my first attempt I think I did well. It’s certainly better than when I started which is the key thing.
It feels like starting blog posts with “so I crashed my bike” is going to be a thing. So anyway, I crashed my new bike. Down a cliff, in the bush.
I think this means it has enough wear and tear on it for a review, but lets starts with why.
There’s several reasons:
Alex has a cool bike
I want to be able to carry more shopping home easier
I’d like to visit further away cafes without having to carry my backpack
Bike camping? Bike camping
I’ve been riding a lot more and can justify the investment
So JSON is great and all. I’m still going to do the rebuild and respray. However JSON can be quite limiting. With no panniers I have to wear a backpack if I need to transport anything. The geometry isn’t well suited for my bad back. I want to ride places that wouldn’t be suitable for JSON.
Alex last year found a great deal. The Cannondale Quick 1. A flat bar bike, nice geometry and Shimano 105 group set for $1,600. My initial thought was “I’ll just copy her”, however it seems that the Quick 1 was sold out in most places.
I went exploring other options. Things that were appealing to me were:
Group sets that weren’t low end (Shimano makes this so so very complex)
Brifters / dropbars
Mounting points for panniers
XL frame size
Hydraulic disc brakes
No suspension
Aluminium frame
Sub $2,000 AUD
This combination was surprisingly hard to find. The two bikes I did find were the REID Granite 4.0 and the Polygon PATH X5. The Granite 4.0 was out of stock in XL and I could only find the PATH X5 online through bikesonline.
I was extremely nervous about buying a bike without giving it a test ride before however good reviews and a promise that it could be returned in 30 days if it didn’t fit it seemed like something worth trying.
I am incredibly happy I did because this bike feels so good to ride. The geometry fits me really well, and it has a Shimano 105 group set, drop bars and hydraulic disc brakes. Assembly was a breeze. Somehow this thing has even survived me riding it off a cliff. Total shipped was $1,834.
The first thing I did was load up the bike with accessories. I’ve splurged a lot here because I want this bike to work for me. I’ve gone with the Topeak MTX pannier rack - allowing for the trunk bag to quickly be put on and removed. However I’ve actually been using Tourbon clip on backpacks. This allows me to stash my laptop and work equipment quickly on the bike and have a decent bag to carry it around the city.
For visibility I’ve fitted Garmin UT800 front light and Gardia R300L rear light. I picked these purely because I wanted to play with ANT+ lights. I really don’t recommend anyone spending this sort of money on lights. At least for me the ANT+ integration is a bit clunky and it does feel very much like a gimmick more than a feature. However what does stand out is the Gardia R300L radar. I didn’t realise how much I’d love the radar functionality. It is able to detect approaching vehicles from fairly far away and in a noisy city environment this is super handy when you don’t notice a car sneaking up on you.
Now the bike isn’t flawless, but it’s pretty damn close. The first is mudguards. For some reason the mounting hole you usually find where rim brakes are is 90 degrees from where I expected. This results is mudguard selection being very limited as a lot of mudguards will want to mount here. The other issue is the rims are entirely nameless. I assume that they aren’t tubeless ready as if they were they likely would be advertising it, so if I do go down that route I’ll probably have to rebuild the wheels.
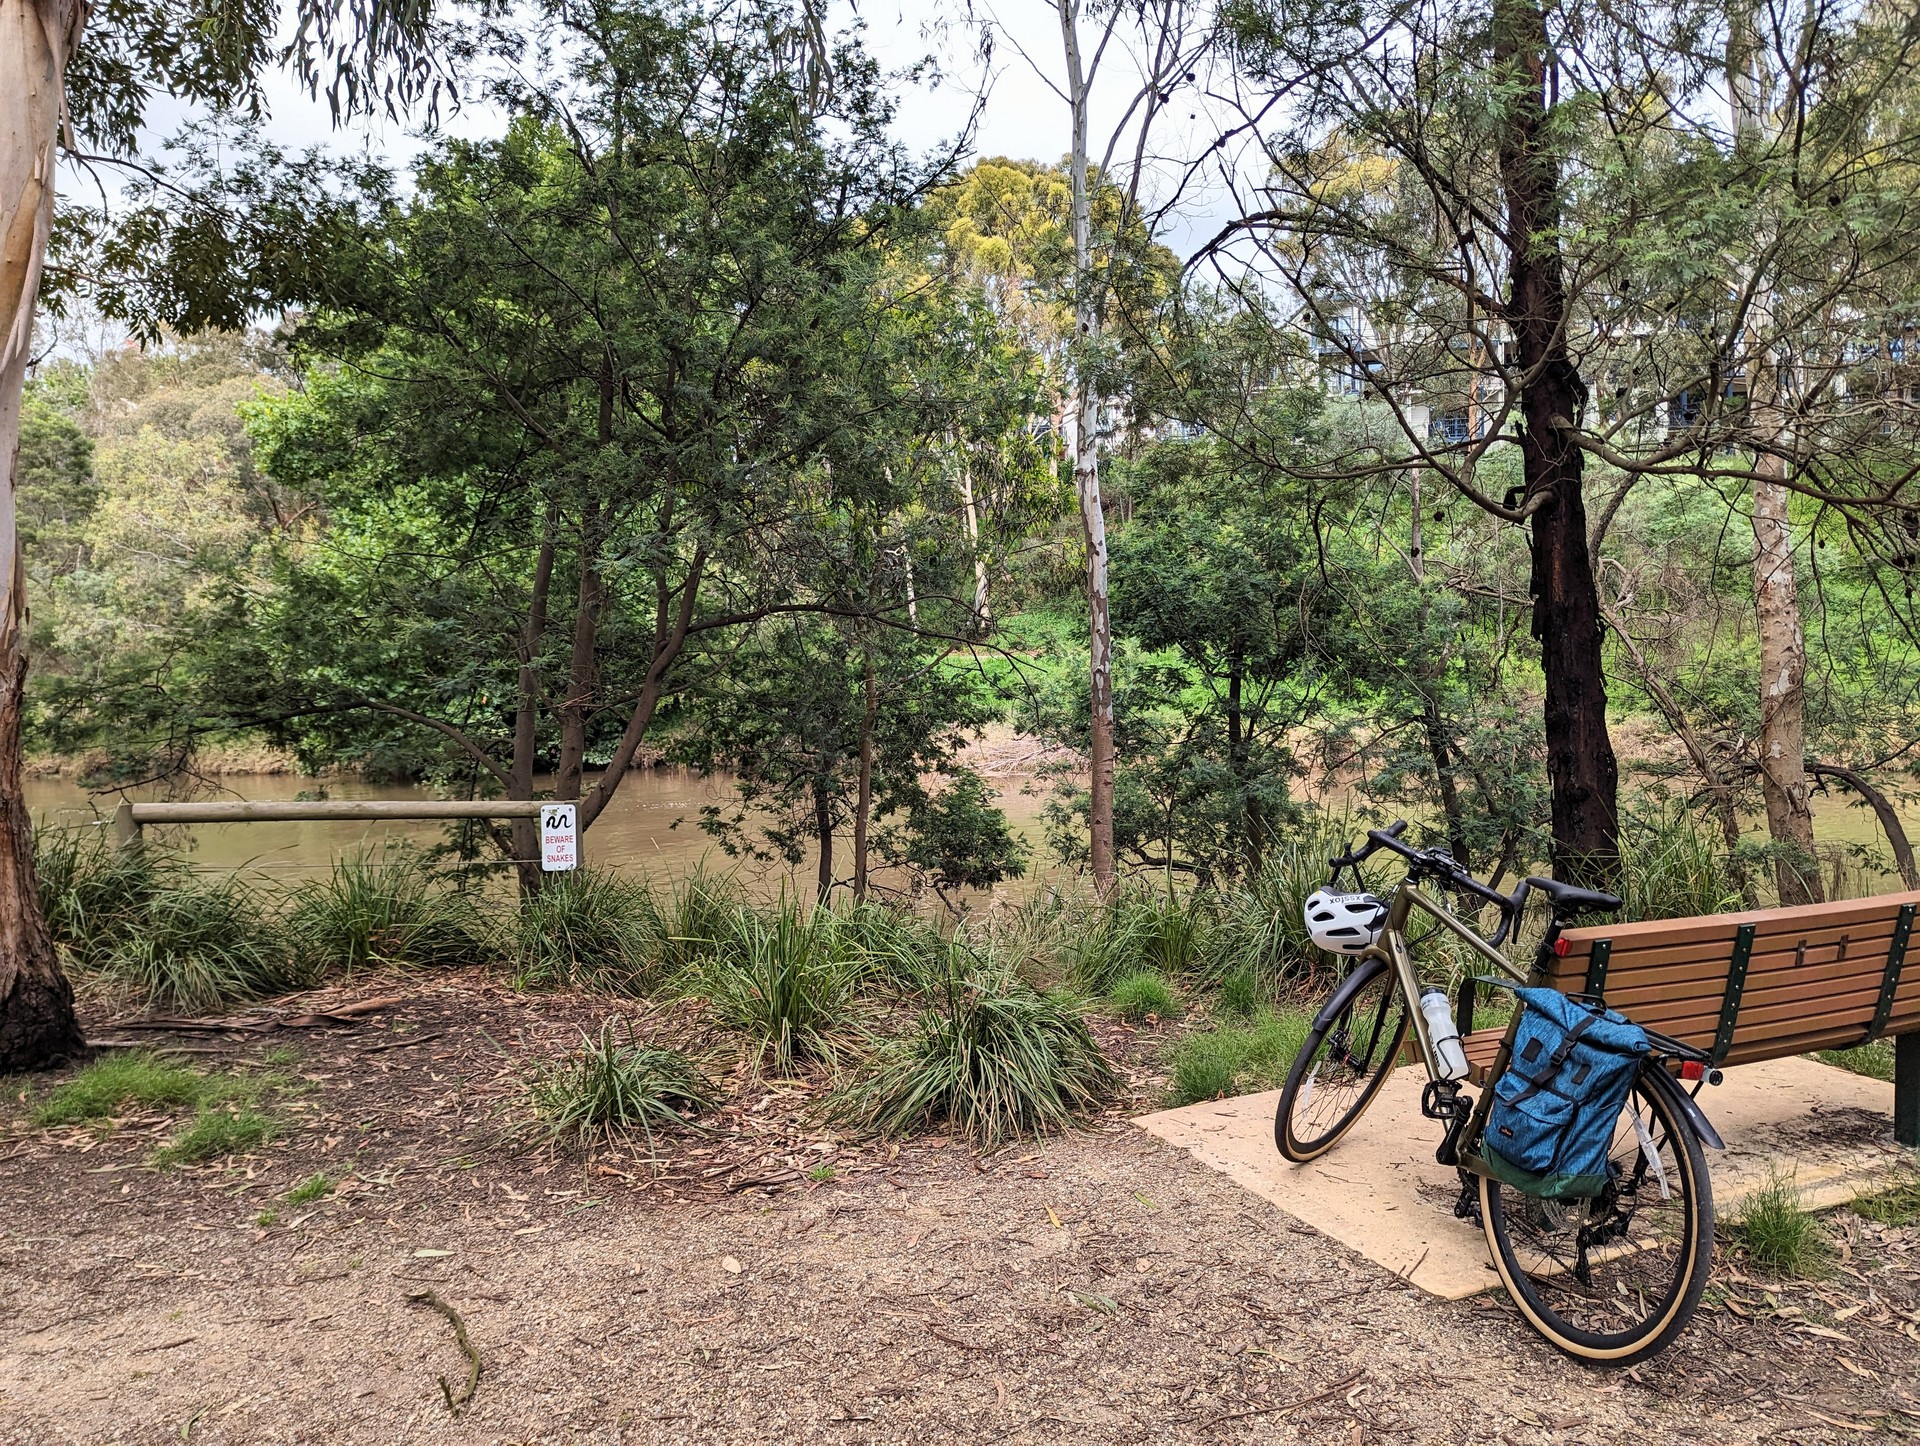
I mentioned bike camping. This is one of the reasons I wanted to get a gravel or hybrid bike. While we have the LandCruiser to explore far away places, I wanted to test the idea of staying at places a little bit closer to home. With VLines fares capped at $9.20 the concept of taking my bike on the train, riding to camp site, and exploring the area without the need of a car seems super compellingly. I’m a bit away starting one of these journeys but I’m getting close, so stay tuned for that.