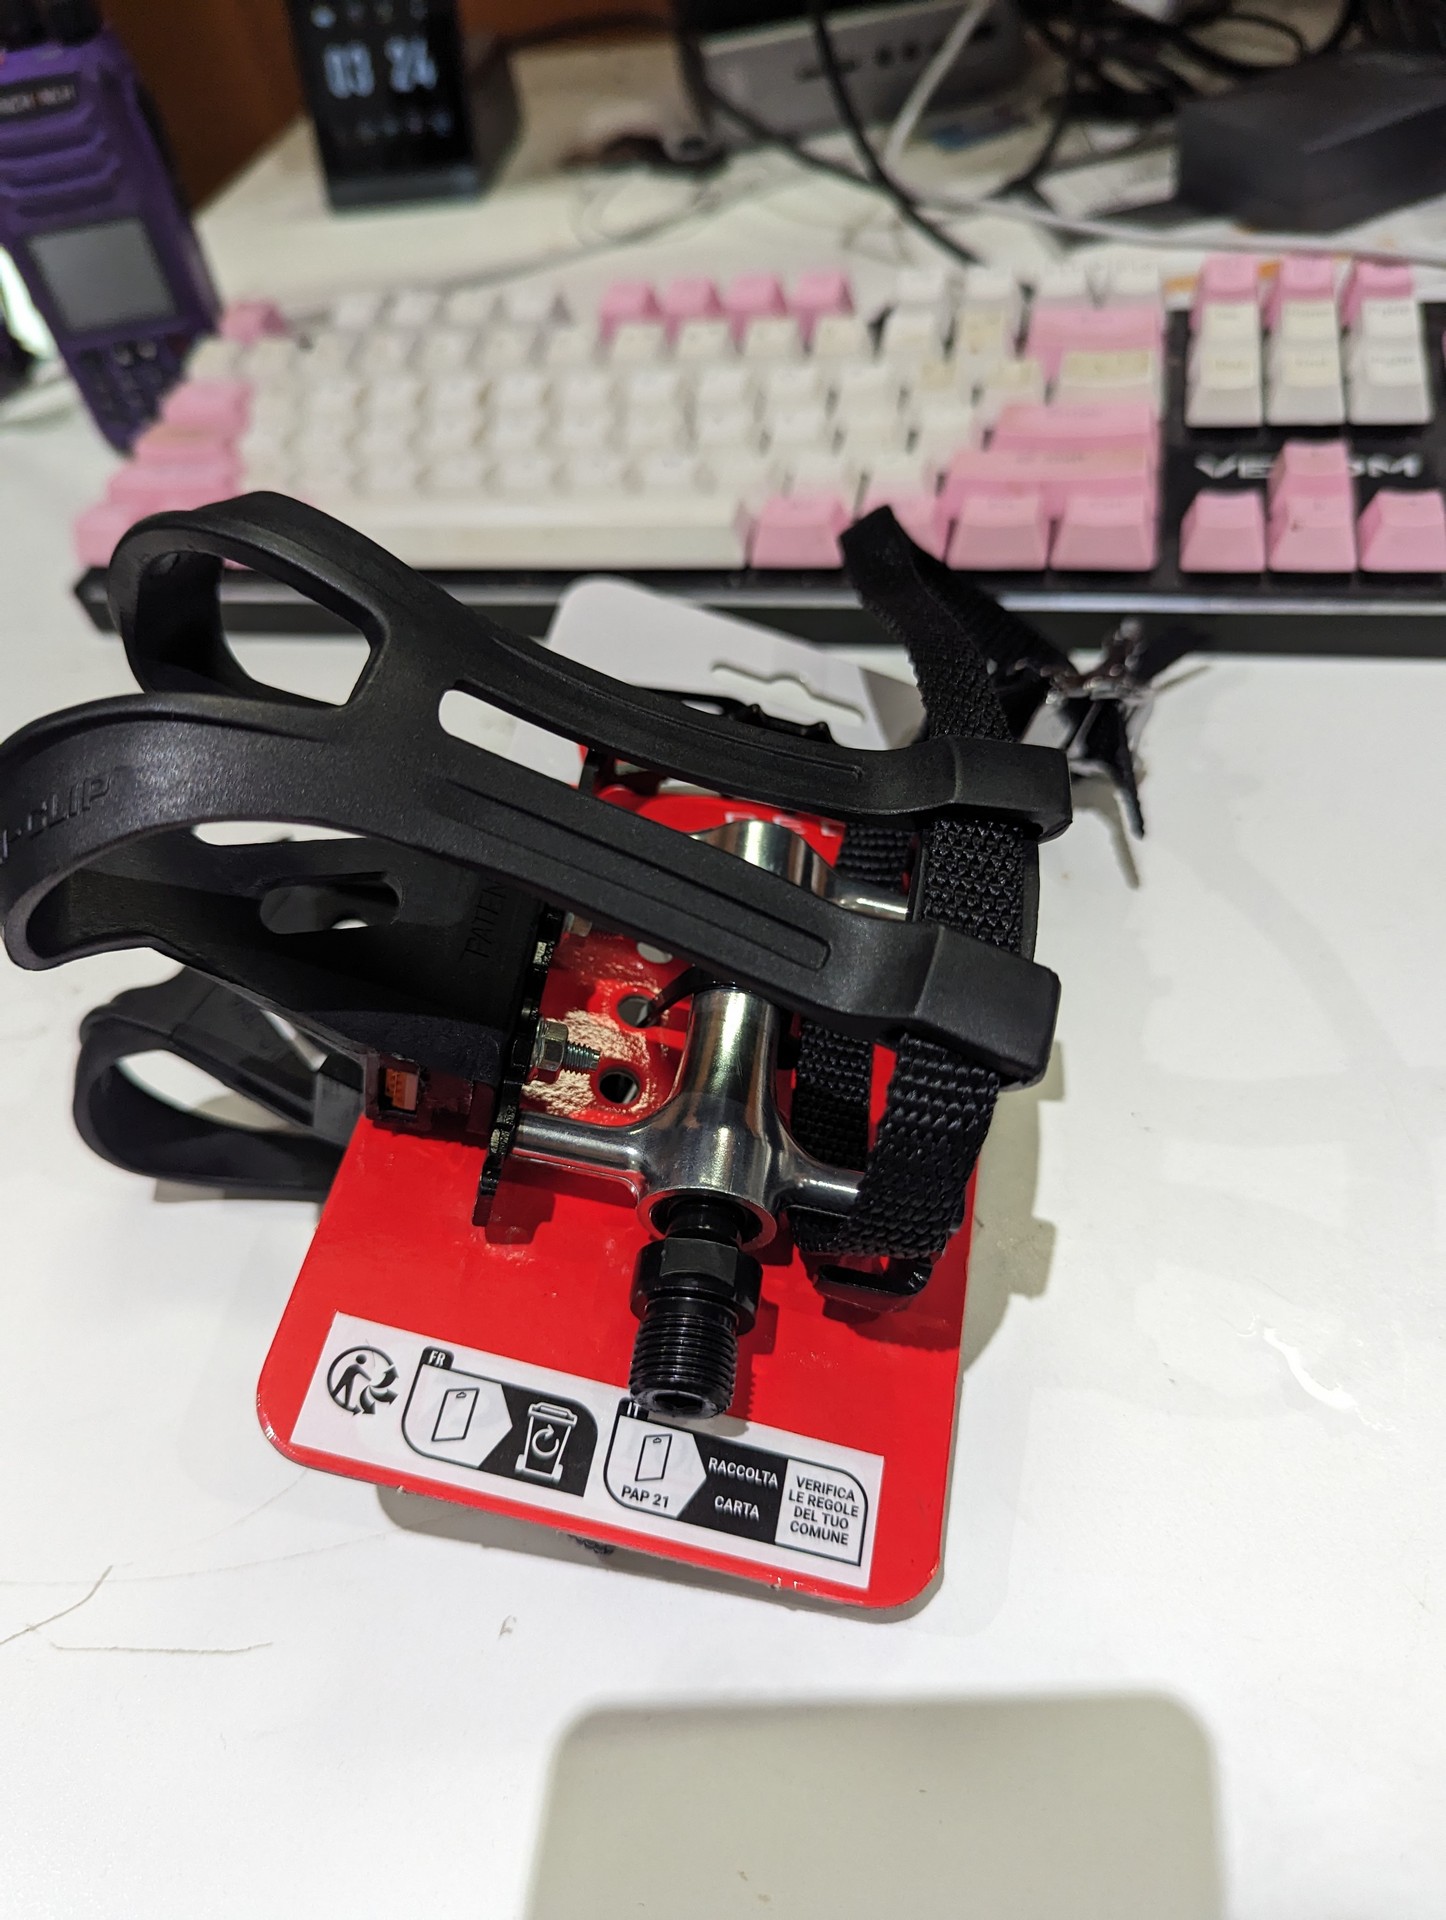
I ordered some old style bicycle pedals for my bike, JSON. These have a black outer body and a silver shaft assembly. They really suit the bike well and come with toe clips which match the pedals of the bike when I originally received it.
Unfortunately when I received the pedals I noticed the shafts didn’t spin very freely and I could feel the bearings biting. These wouldn’t be suitable to ride on. My theory at this point is that these were new old stock and the grease had gone bad. If I could sneak some oil in there maybe they would be fine. There was two problems with this theory - it wasn’t just a grease problem (I should have known this, I think it was just wishful thinking), and removing the dust cover to get to the bearings was a challenging task. The cap was so tightly held in that I ended up breaking the metal body when trying to remove it.
This was a surprisingly difficult question to answer. I wanted this style of pedal, but if all the pedals had the same fault what was I to do?
Searching various places selling these style pedals new they all seemed to share common reviews:
- No bearing - only plastic bushing - broke quickly
- Bearing doesn’t spin freely or is seized
- Pedal broke after short amount of time
I also had a look at eBay for used pedals that would fit my needs. The problem I found was the total shipped price was prohibitively expensive and even if I paid that, there was no guarantee that the bearing races haven’t been badly pitted.
Looking careful I could determine that most of the new products sold likely all come from the same manufacturer with different brands painted on the side. Some models had bearings that didn’t work, some had plastic bushings and some had weak body.
It seems like the pedals I bought fit into the bearings that didn’t work category. Now I don’t know if its because these are old stock and age has gotten to them, or if the manufacturing process is really poor but the bearings out of the box are certainly not fit for purpose.
After a lot of internal debating I ended up with a plan - I would ask for a replacement and attempt to rebuild the bearings.
Rebuild time
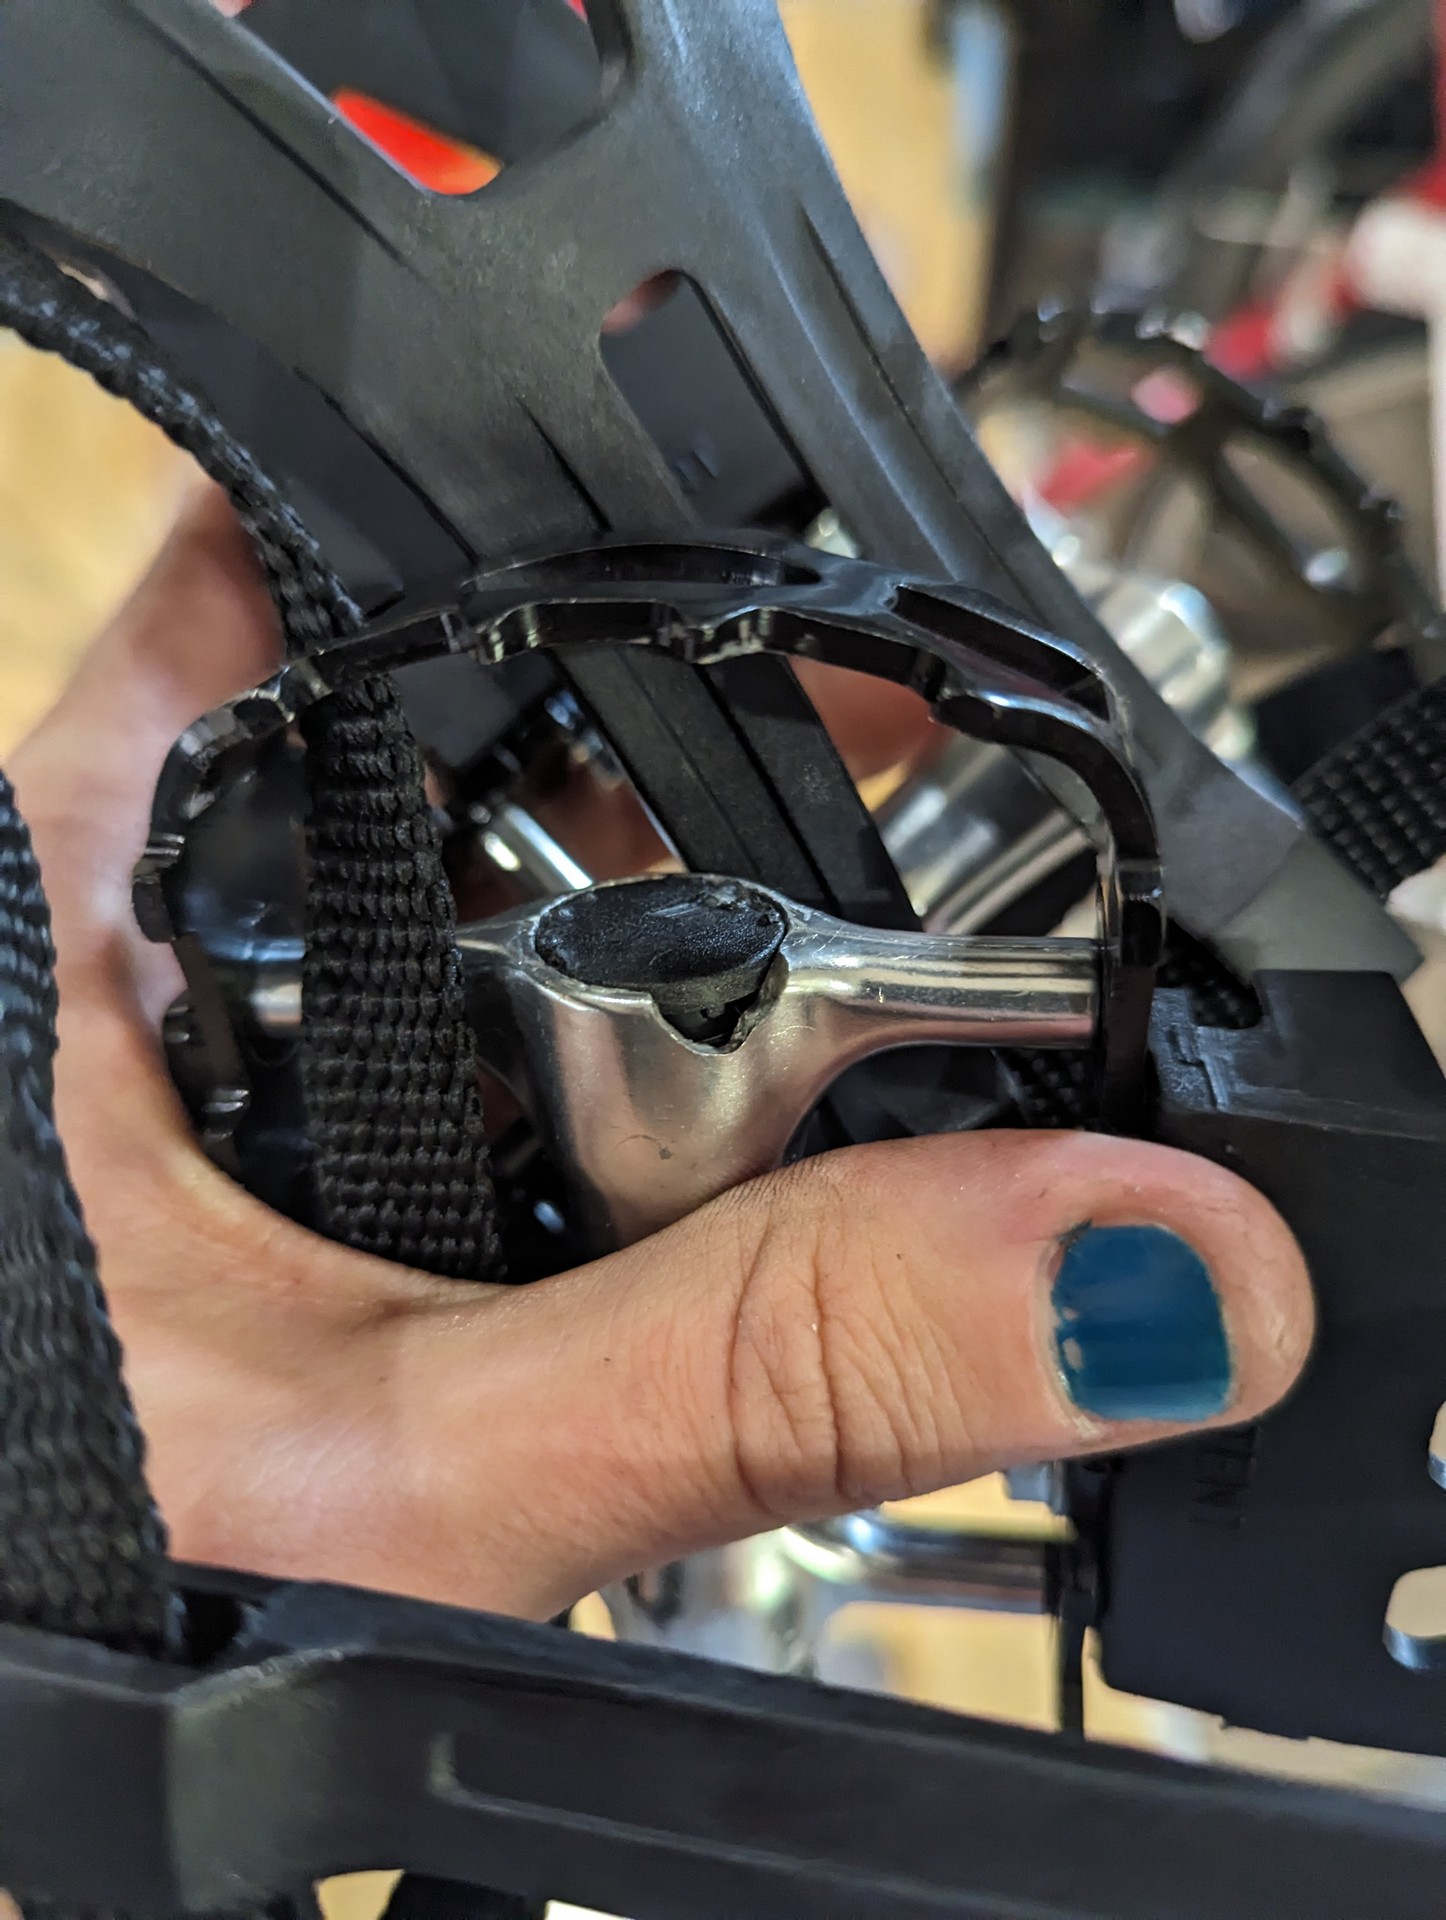
The first step was removing the pesky dust cover. This time I took the approach of removing everything from the pedal assembly first. The rear reflectors can be pushed and levered off while the toe cage can be removed by sliding the reflector out and undoing the two bolts. This making it much easier to work on - plus as I was doing a full rebuild I would need access anyway. It’s a good idea to do one pedal at a time so you have a reference pedal.
If you are trying to get these kind of cheap new(ish) pedals working you actually have a bit of a choice here. I found there to be two problems with my pedals - the grease wasn’t great and the bearing preload was set wrong. You can choose not to do a full rebuild if you are happy with the grease provided - you can just set the preload. This is the easiest option and probably fine for most people. If this is the case - skip to the section labelled “preload”.
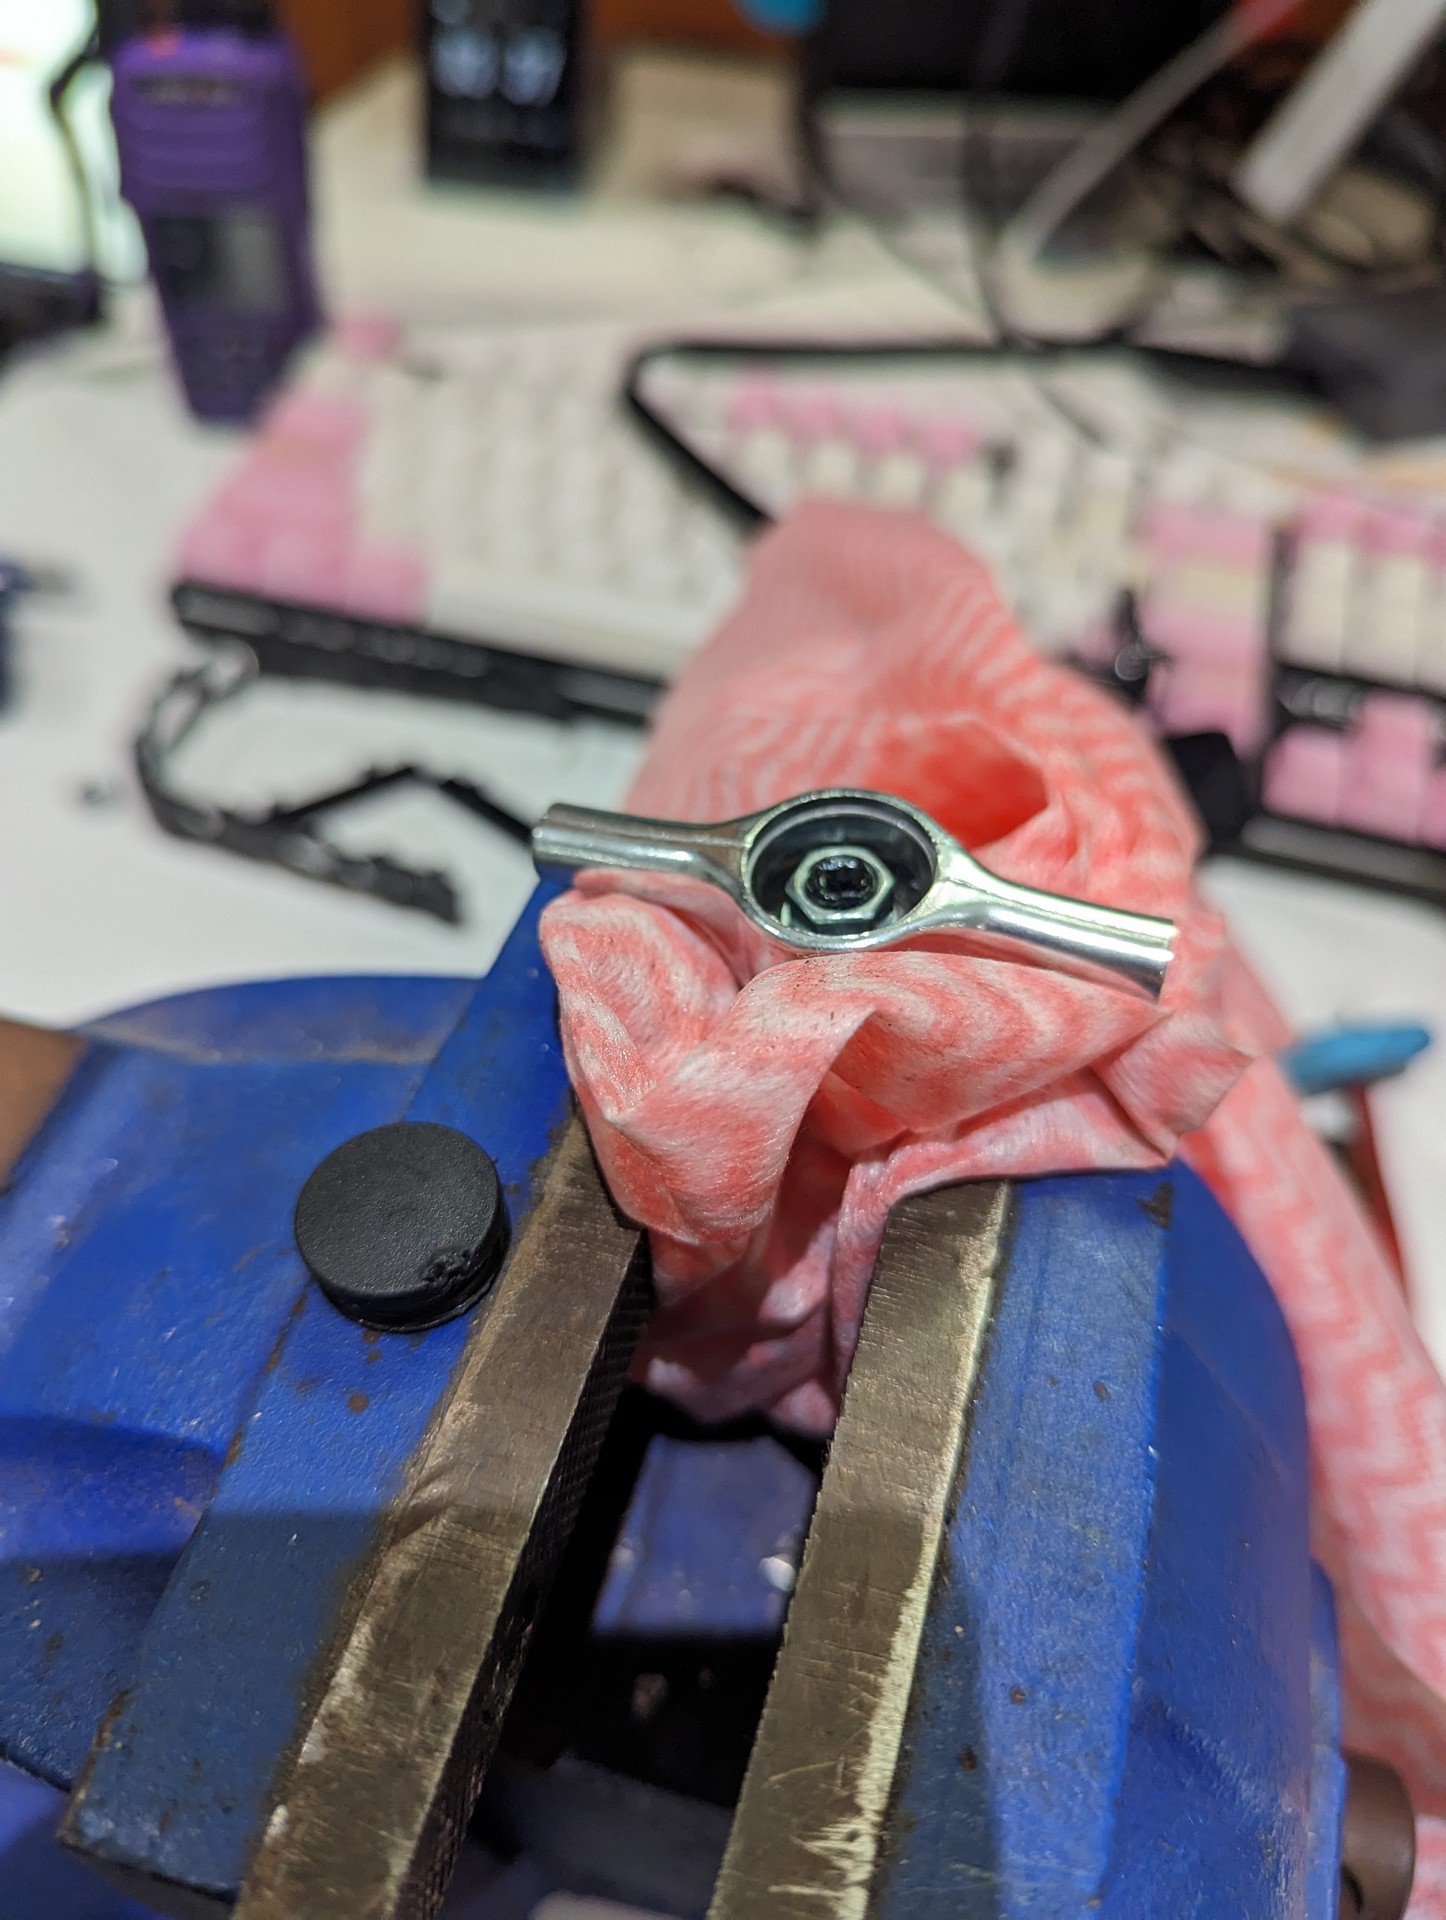
At this point, lay down a towel or a rag. Something that will stop ball bearings from rolling away. Using a 9mm socket and a spanner or shifter on the other end, undo the locking nut.
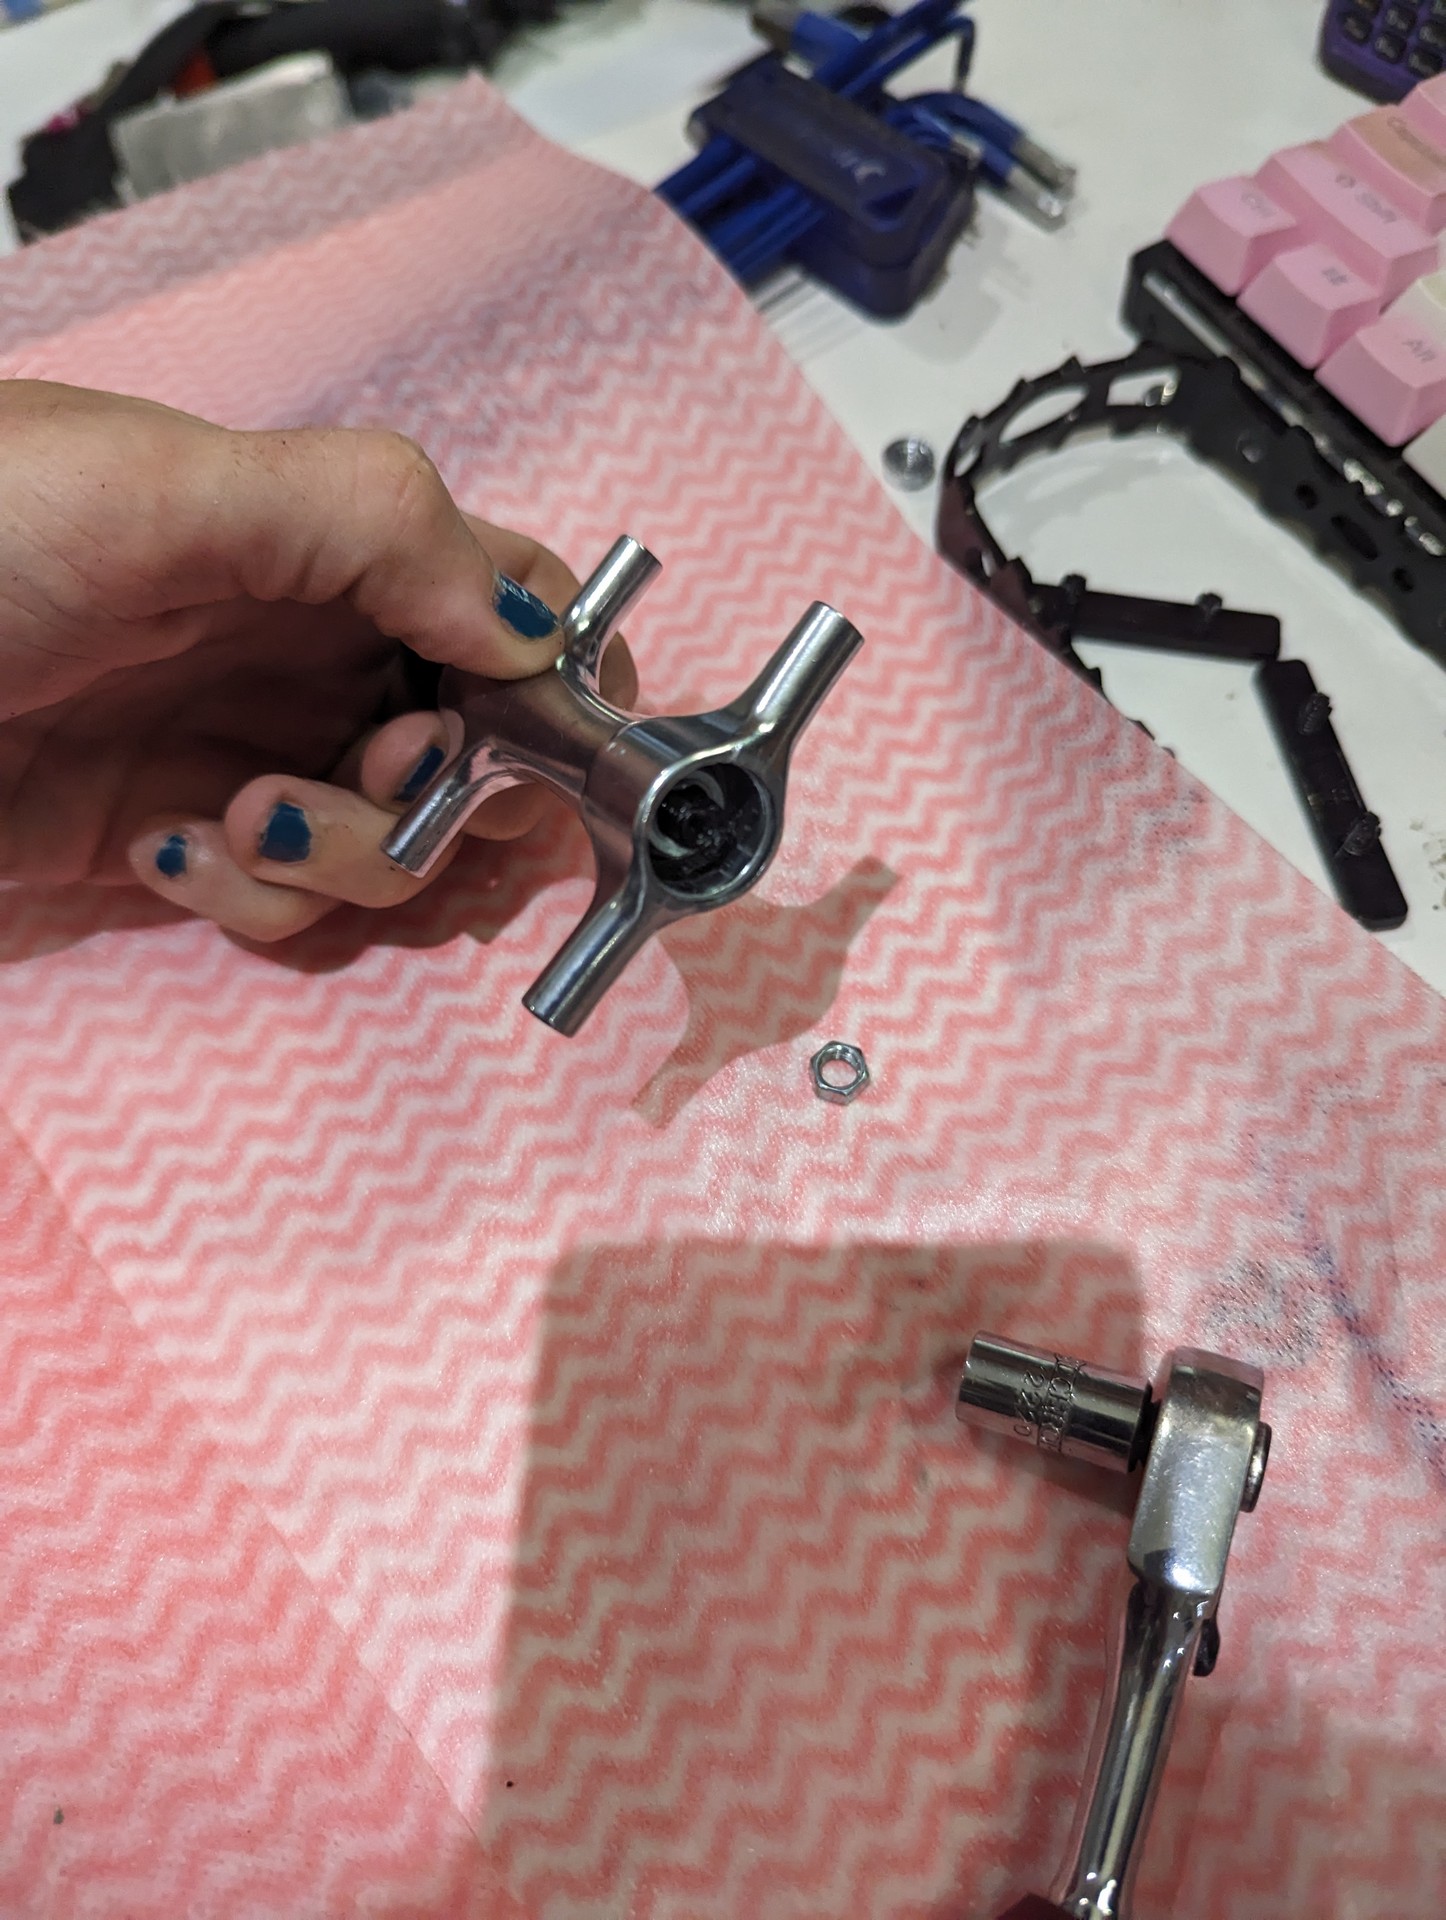
Inside the shaft will a slotted washer followed by another thin nut/bearing race. I didn’t have any thin walled socket that would fit down there, however since the assembly isn’t under any load this nut should be fairly loose. You should be able to use a pair of tweezers to undo this nut. At this point be careful though as you’ll be freeing the bearings. Sit the shaft upright so that the end that usually attaches to the bike is on the table when removing this nut, otherwise the body can slide off the shaft and drop bearings everywhere.
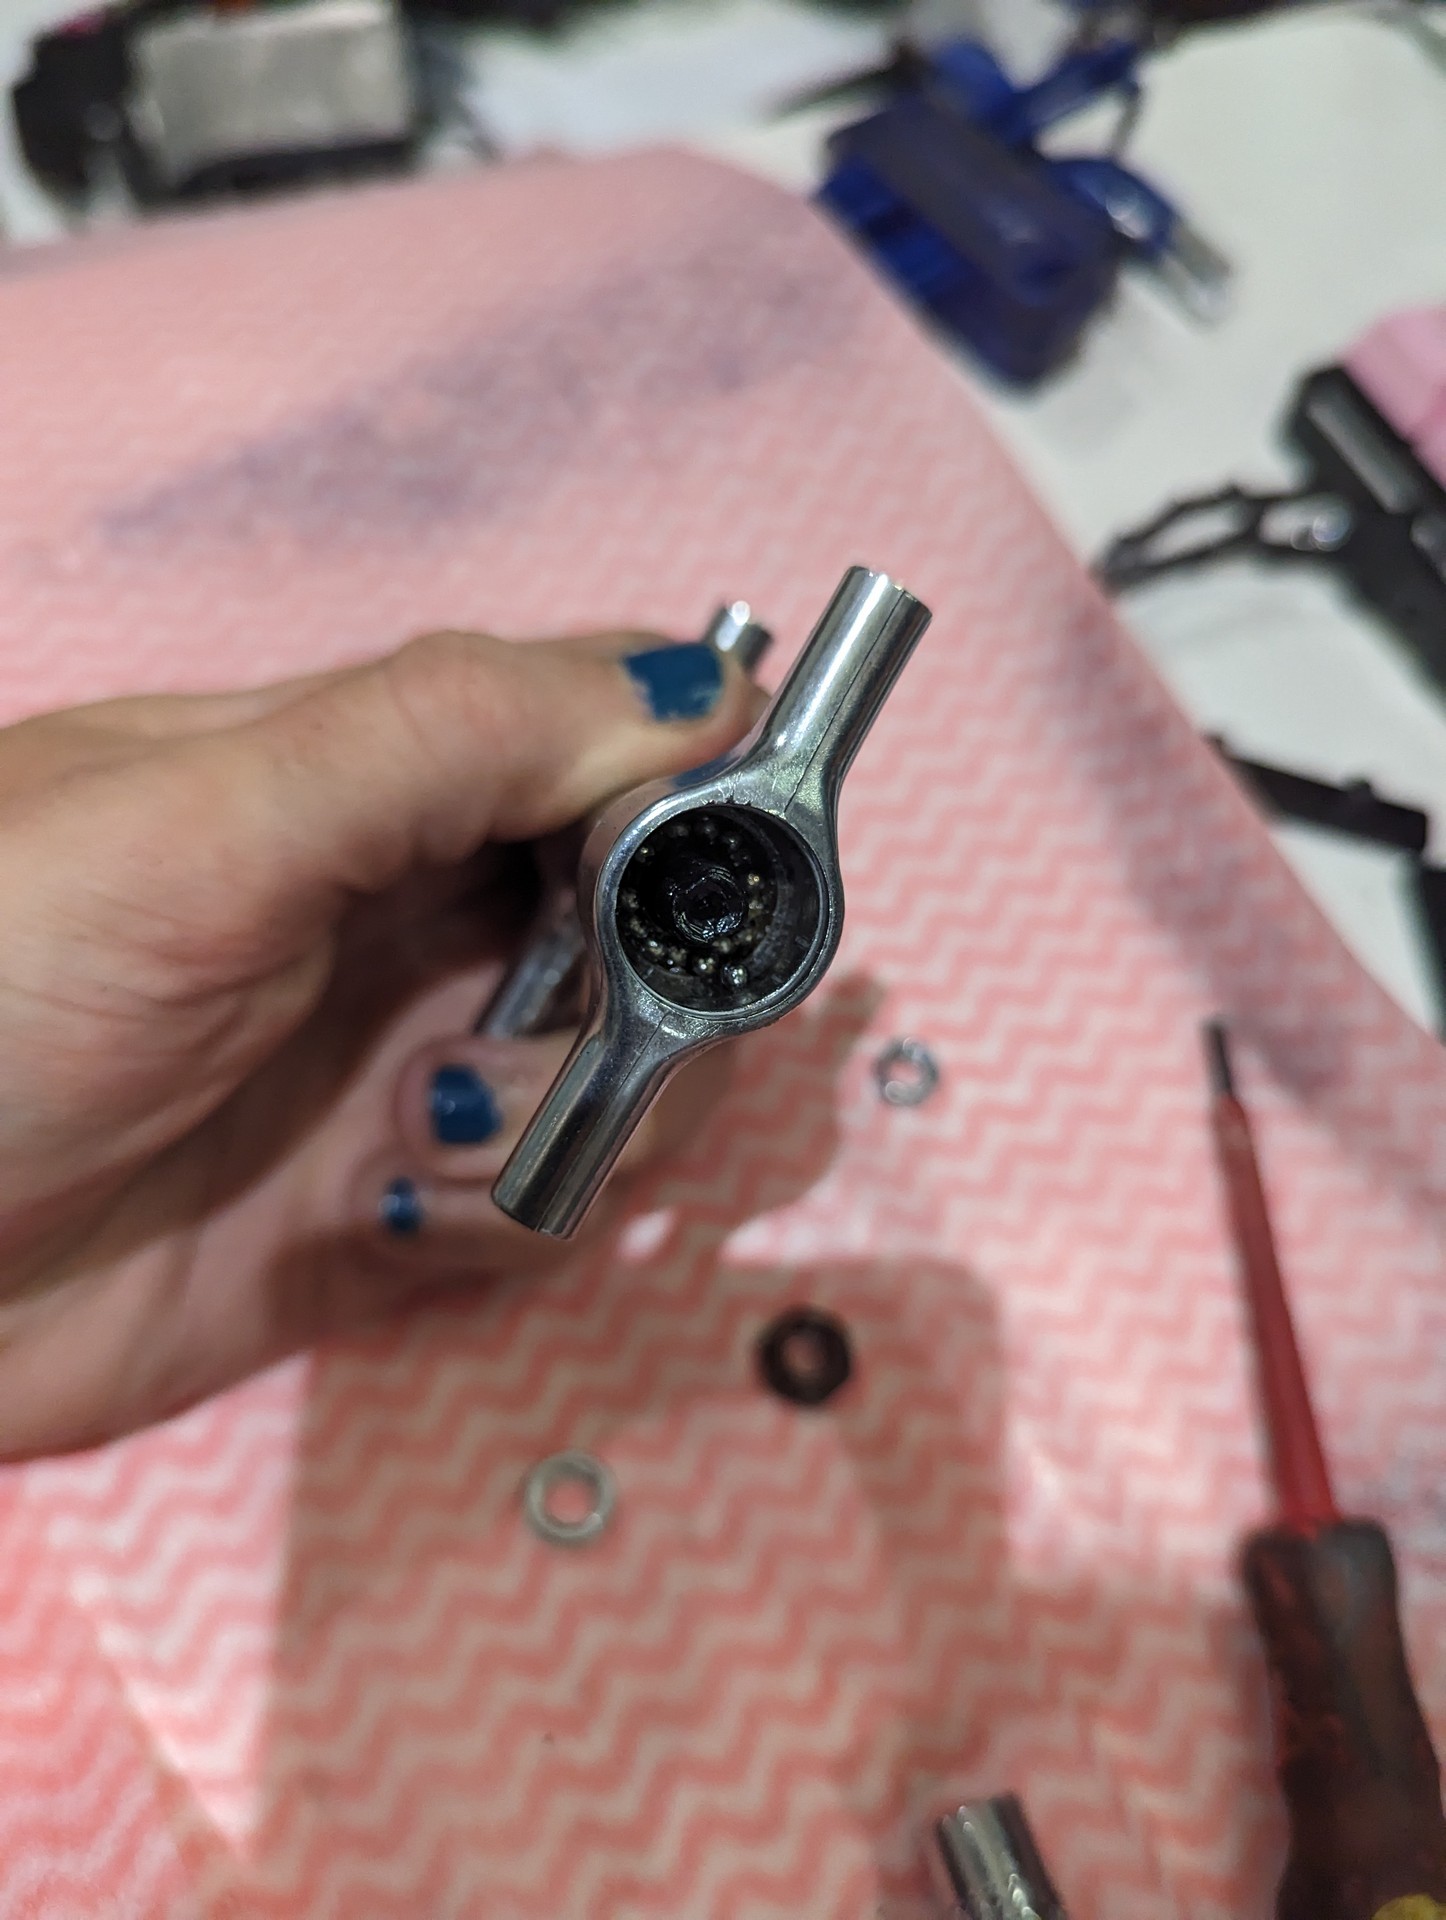
After those bearings are removed I suggest flipping the pedal over and carefully remove the shaft. Mine has a rubber seal on the bike end. Once again remove the bearings.
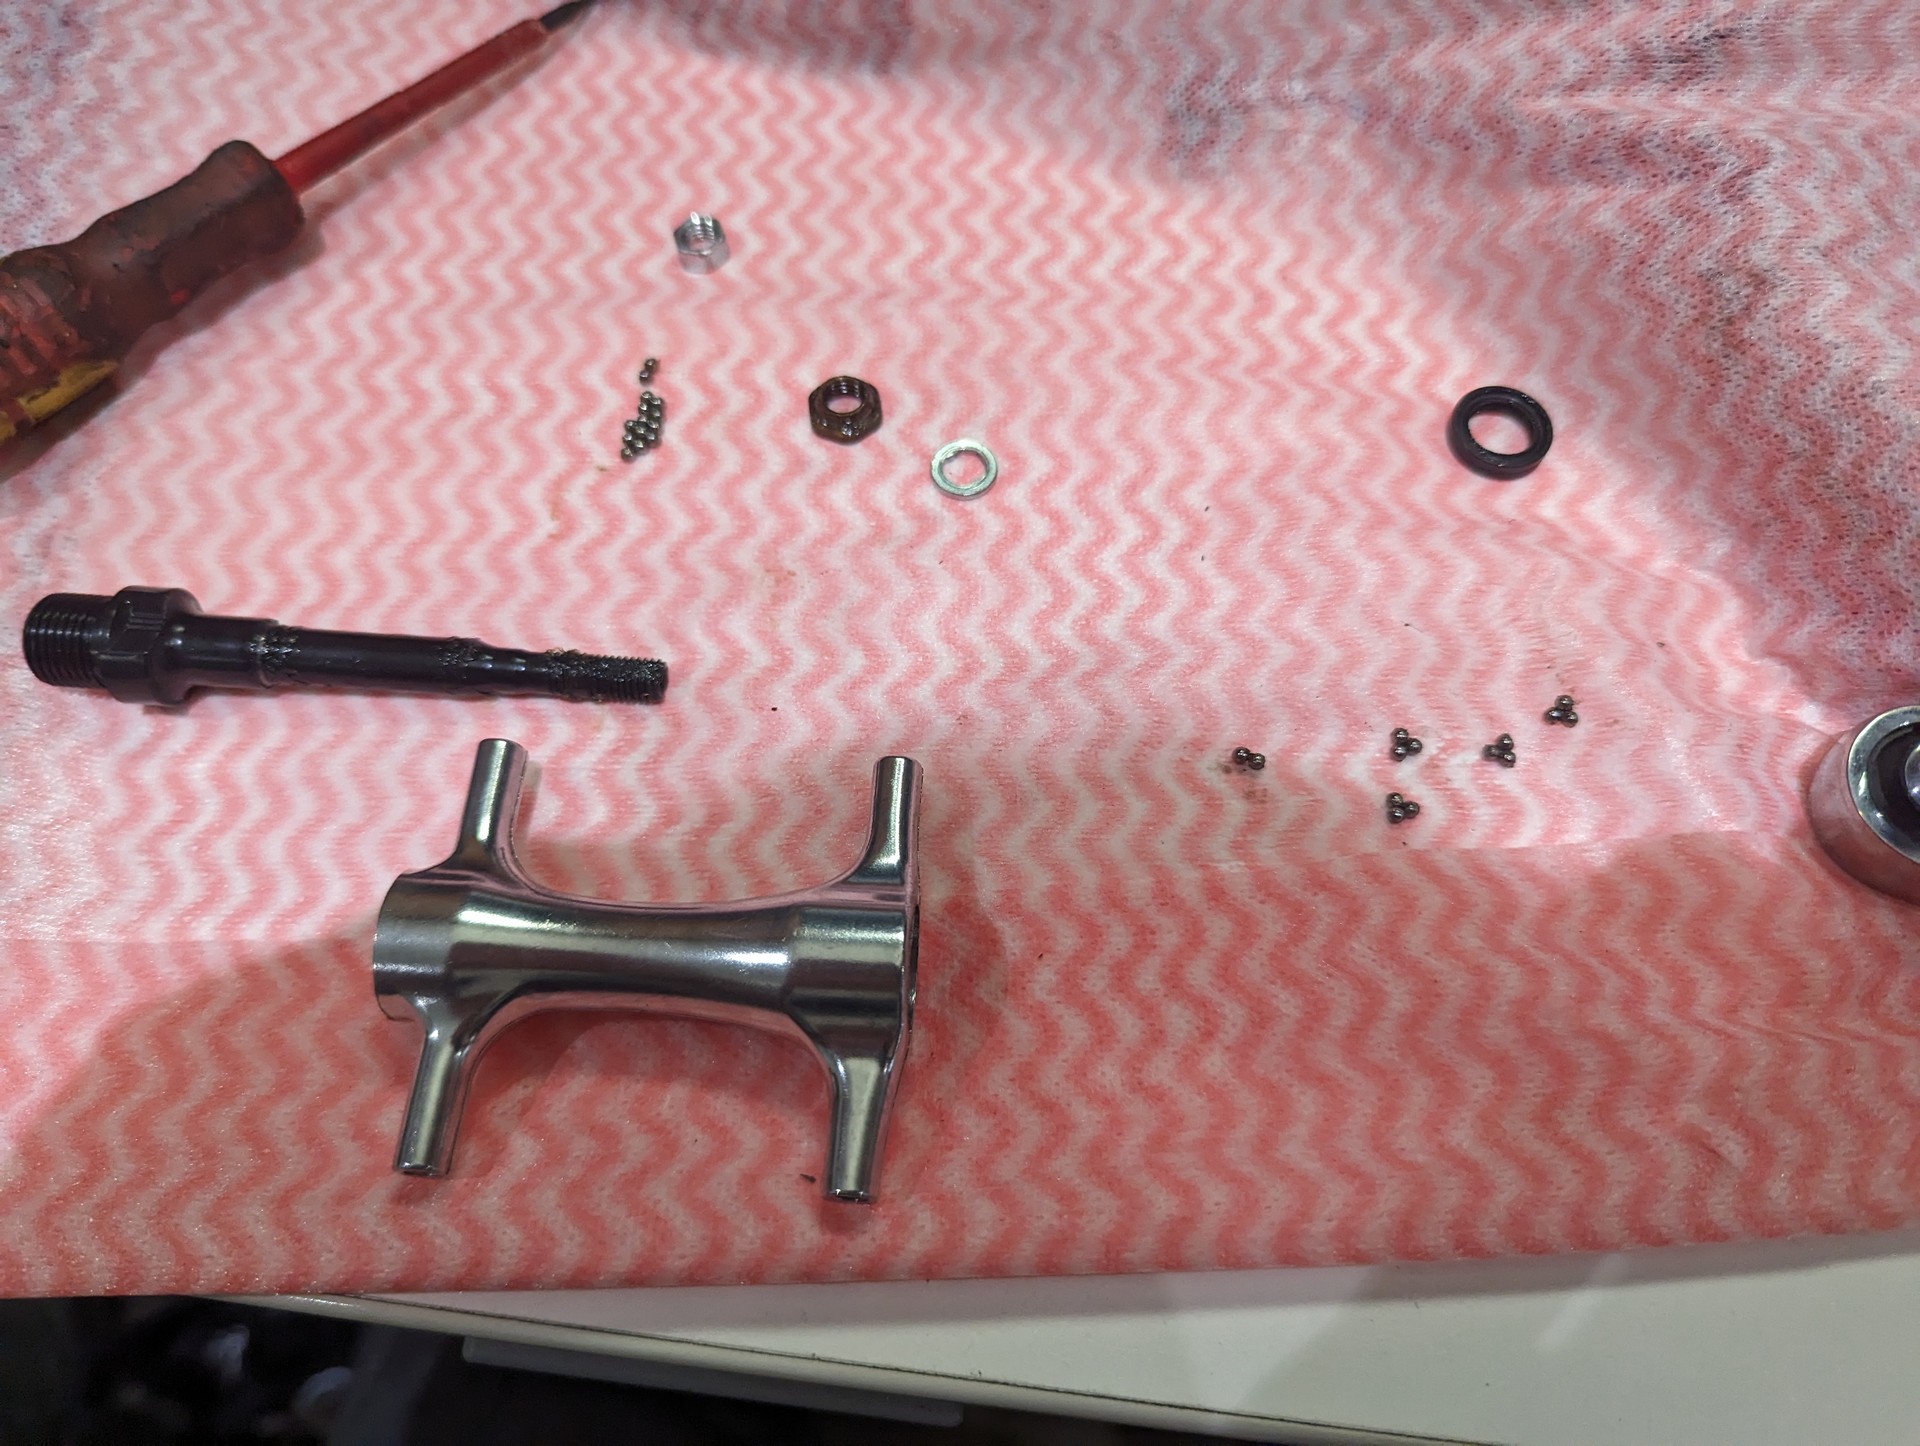
Clean all the grease off the bearings, clean the shaft and housings. Once everything is cleaned the assembly process is much the same as the disassembly process. I used red truck and farm grease. It’s probably fine. Spread grease into the bearing races to hold the bearings in place. Make sure you count the bearings to ensure none are missing or you haven’t put too many in. Remember to install the race/nut the correct way, followed by the washer and locking nut - don’t tighten all the way yet. Just enough to keep the bearings from falling out.
Preload
Getting bearing preload right is critical, and it can sometimes be the most time consuming part of this process. At both ends of the shaft is a effectively a cup and a cone. By tightening up the nut/race we are removing some of the space the bearings have to wobble around.
Ideally we want there to be no wobble or play. However if we tighten up the assembly too far the bearings will be pressing into the metal, causing a lot of friction and preventing the shaft from spinning. Too tight will cause damage to the bearings and the races. The goal here is to have the assembly as tight as possible without impacting the friction of the bearings.
Tighten up the race/nut with the tweezers. I suggest tightening this up until the shaft doesn’t spin freely anymore. At that point back it off until the shaft spins freely again. Now with the 9mm socket, tighten up the locking nut. When you do this, additional pressure will be added to the race. It’s likely the shaft might have too much friction at this point. Undo the locking nut again, and adjust the race/nut to loosen the race. I was doing probably 1/16 turns when I was adjusting mine, so very small adjustments everytime. Check for play as your doing this. The shaft shouldn’t move in or out, and there should be so side to side wobble.
It’s sometimes hard to strike a good balance. I would favour a bit of play over additional friction on the bearings if thats the only choice.
Reinstall the dust cover. I found it quite hard to put in and resorted to the vice. I didn’t want to use the vice as it’ll be putting pressure on the bearings and shaft but I found it the only suitable way to get the cover in. Reassemble the outer body, straps and reflectors.
Results
Was it worth it? Well they certainly spin more freely on my desk, but I’ll have to have them on the road for quite a bit before I can give a final verdict.
In the meantime, here’s my partner comparing one I rebuilt vs the original.