What is it?
The VK3FUR packet system is located in Richmond, Victoria, Australia (QF22me). It provides several packet services on 2m FM (145.175MHz) and 70cm FM (439.100 MHz).
APRS packets are digipeated between 2m and 70cm. It also supports sending APRS-IS messages to 2m.
2m FM 145.175MHz - 1200 baud
- VK3FUR-3 - APRS (+ crossband digipeating with 70cm + APRS-IS messages within 100km of VK3FUR-3)
- VK3FUR-3 - Zork text based adventure game (shared with APRS SSID)
- VK3FUR-10 - Winlink radio email
- VK3FUR-11 - F6FBB bulletin board system
Currently no forwarding/routing from F6FBB exists.
70cm FM 439.100MHz - 1200 baud
-
VK3FUR-3 - APRS (+ crossband digipeating with 2m) -
IP packet - route via 44.136.124.193 - email for an IP address assignment
70cm FM CATS 439.175 MHz 9600 baud
Temporary cats.radio i-gate is in operation at 1W output power.
How to use it?
I use Linux kernel AX25 + direwolf software modem. This typically involves starting direwolf with -p and using kissattach to connect it to the kernel. You can find some config notes here.
Linux kernel 5.19 introduced some improvements to handling AX25 connections. I highly recommend using Linux kernel 5.19 when connecting to AX25 services
APRS
For APRS just use APRS like you normally would. The digipeater functions will digipeat on appropriate paths (eg, WIDE1-1, WIDE2-2).
Zork / F6FBB
For Zork and F6FBB you need an AX25 client that supports calling into stations. I’ve found using direwolf as a soundmodem, Linux’s AX25 stack, and axcall a good combination.
axcall 1 VK3FUR-1
Everyone’s radio and software stack is different but I put together a quick GitHub gist that shows how to setup a UV5R + DigiRig and Linux to connect to the BBS here.
Winlink
Make sure you select AX25 in your Winlink configuration and connect to VK3FUR-10
IP
Remember to keep within the amateur radio licensing rules. This means ensuring no encryption is used over the air
For IP packet you’ll first need an IP address. At the moment I have no good way of assigning these - so reach out to me to get an IP address allocated.
Assign the IP address to your ax25 network interface then add a route to the gateway address 44.136.124.193.
To route the entire internet via AX25 you could do
ip route add 0.0.0.0/0 via 44.136.124.193 dev ax0
or to route a single server
ip route add 1.2.3.4/32 via 44.136.124.193 dev ax0
Hardware / Software details
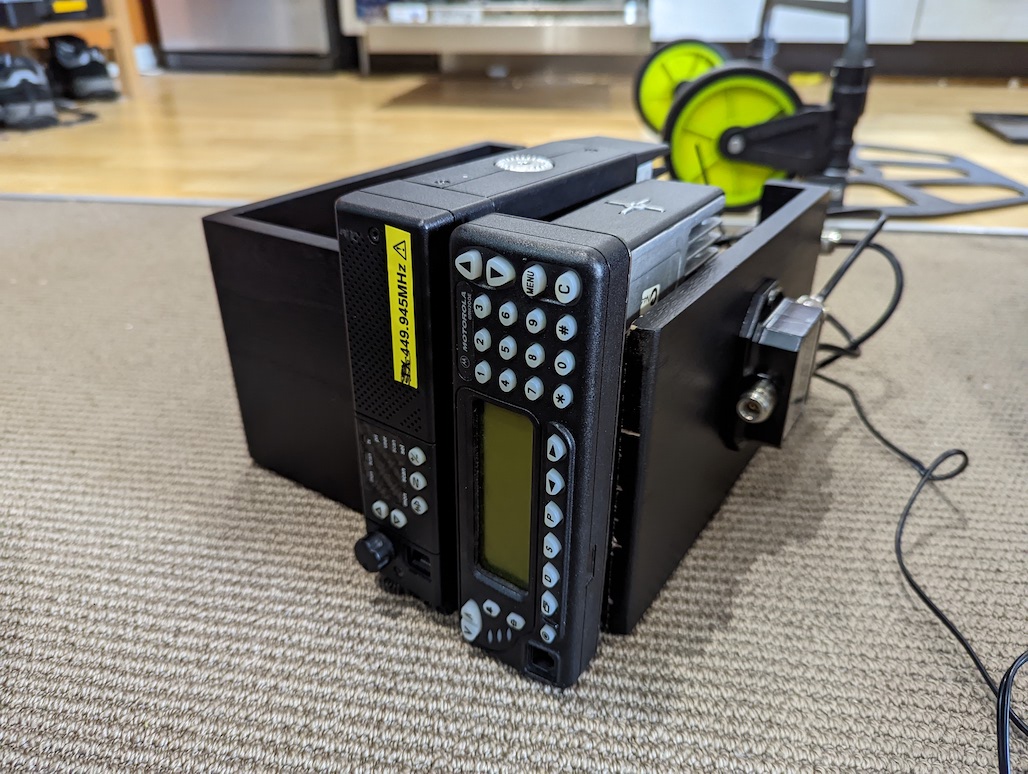
The system currently runs off a Raspberry Pi using debian, direwolf, f6fbb, axwrapper and ax25d. Two recycled radios, a GM300 (70cm) and a GM1200e (2m) provide RF. Each radio puts out around 10W into a small vertical antenna affixed to the top of our apartment building.
As there was a desire to use a single antenna for both 2m and 70cm a duplexer was used (CF-4160N Comet Duplexer). This allows one antenna to be used for two different bands (or you can use it in reverse and have two antennas for one radio).
DigiRigs are used to interface between the radios and the Raspberry Pi with hand built interface cables - though prebuilt cables do exist. The interface cables lower the audio output volume to a range suitable for the DigiRig and connects up the required PTT pins. No other modifications were required to these radios.
If your setting up your own station make sure to adjust the TX audio levels. Direwolf has a test mode direwolf -x that generates a test signal. You can listen to the signal with another radio. Adjust the TX output to the lowest, then turn it up until it starts distorting or doesn’t get any louder - then adjust it to be a little lower than that. (yes I know this isn’t the perfect way to adjust the output level but it’s good enough)
The 70cm radio isn’t quite as loud as it should be but its still within acceptable limits to use around the city.
How to build it?
This section isn’t going to be an in-depth tutorial on how to setup a packet system as everyone has very unique requirements but rather an overview of the steps one should take.
For my setup I specifically used Linux native AX25 stack as it seemed like the easiest option. However there are other options like NOS / JNOS.
-
Configure your radio for the desired frequency and interface it with either a TNC or a softmodem like Direwolf.
-
Setup your TNC and make sure your OS can use it - send some test packets (you can echo out KISS frames to the serial port as a quick test)
For Linux this also means configuring
/etc/ax25/axportsand usingmkiss+kissattachto make multiple ax25 interfaces. If you have a single radio you can skipmkissand usekissattachdirectly. -
On linux for things like zork you can use ax25d and axwrapper to listen for AX25 connections on a SSID
-
F6FBB compiles easily for Linux and will listen on kernel level AX25 for connections. The F6FFB website has some fairly good documentation
-
For Winlink you need to get approval to run a Winlink node - once you have that these instructions are a good start.
-
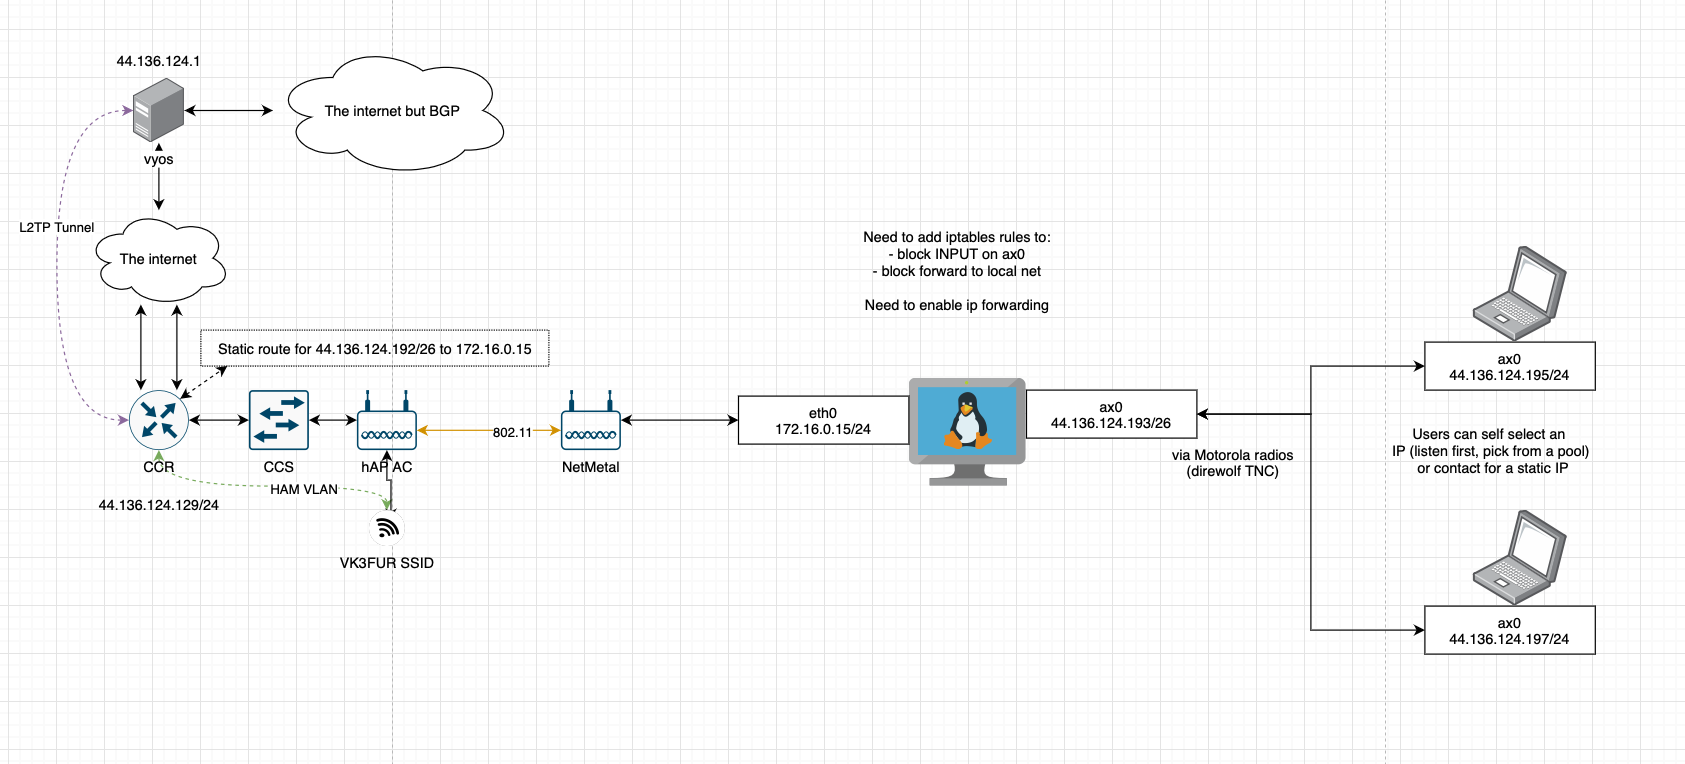
For IP packet it can get a bit complex and requires a bit of knowledge about routing to figure out. Start by getting an IP allocation from AMPRnet, working out how you are going to route it (BGP, VPNs, ect…). Make sure you configure all the route tables along the path and ensure your AX25 node has
net.ipv4.ip_forwardsysctl enabled to allow routing. Also consider things like NAT and firewall rules. On linux you can treat the ax0 like a normal network interface with the exception that it only does IP, no ethernet.It’s a good idea to draw out a map of the network when designing this part. Here’s the map I made.
-
Build startup scripts to configure everything on bootup This was probably one of the more frustrating things to sort out. As I was running a single direwolf instance for two radios I needed to use
mkissto split the pty terminal into two ax25 port. As I wanted to host different services on each ax25 port/radio I ended up with a script likecd /dev; M=$(readlink -f /tmp/kisstnc); PTYS=$(/usr/sbin/mkiss -x 3 $M |tail -1); n=0; for p in $PTYS; do ln -fs $p /dev/ptyr.$n; n=$(($n+1)); done /usr/sbin/kissattach /dev/ptyr.2 UHF /usr/sbin/kissattach /dev/ptyr.0 VHF /usr/sbin/kissparms -c 1 -p UHF /usr/sbin/kissparms -c 1 -p VHF -
Setup automated backups!