Me vs. tree branch - Garmin incident detection (I guess Bike Brakes Part 2)

So my next blog post was meant to be on how the brake install went. The good news is the brakes work great - I’ll get into more details on that later. HOWEVER while riding out to somewhere nice where I intended to take some nice picture I had a bit of an incident - so lets talk about that first.

I split off the Bay trail to grab some coffee, eat some food and slap on some sun screen. While attempting to rejoin the bay trail I found myself a little bit confused as to the route and ended up on a footpath rather than a shared path. I spotted where my turn was meant to be and while focused on that it hit me. Well more specifically I hit it. A low hanging branch.
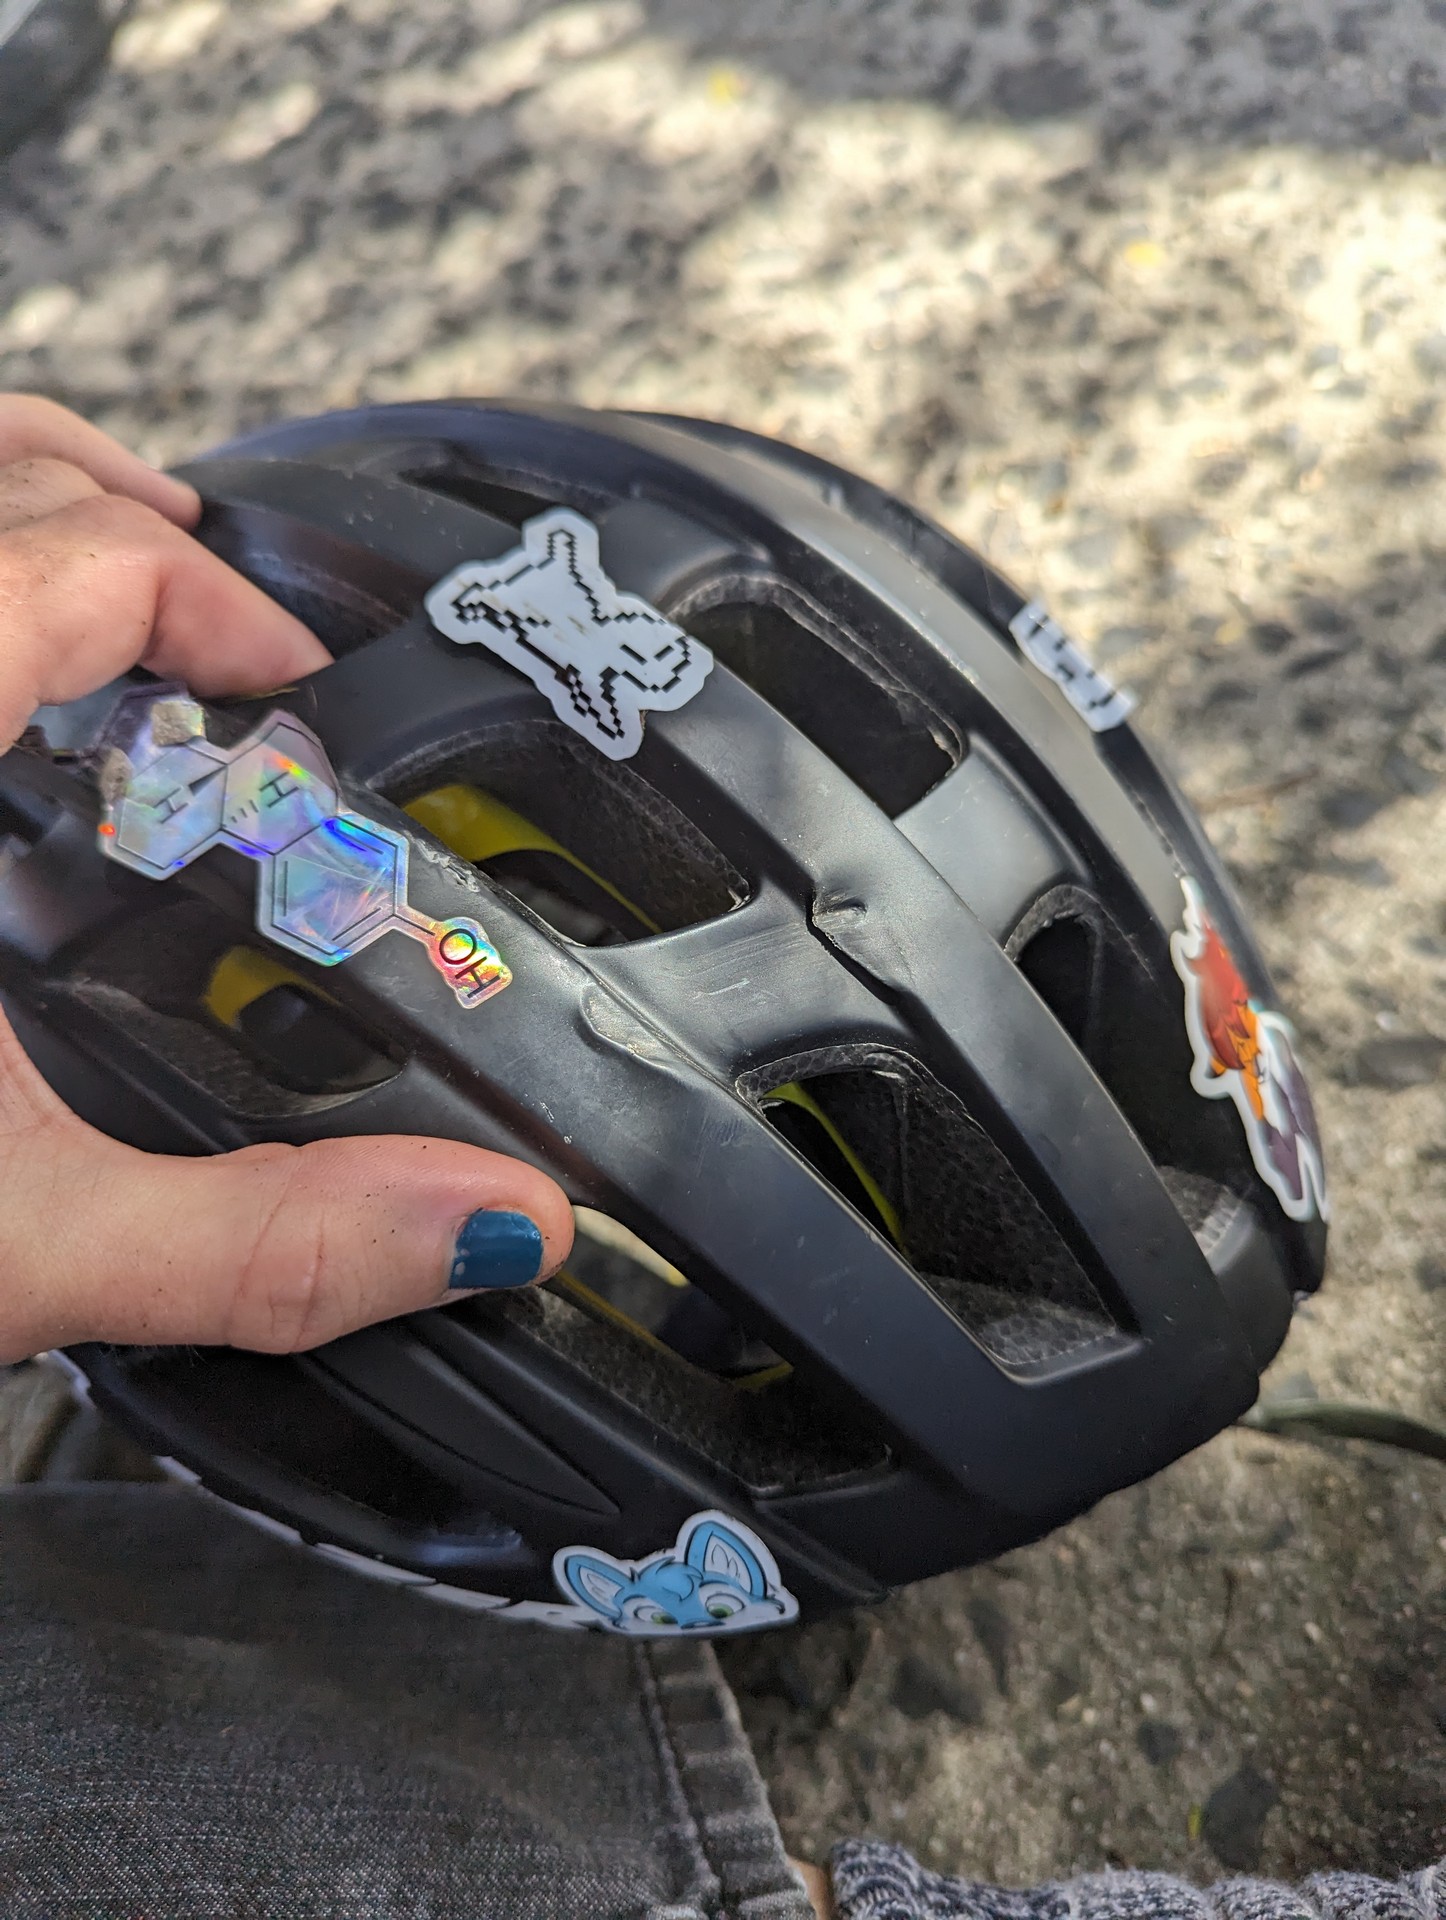
Helmet which has a large indent from impact of a tree branch

I’m not sure if I didn’t see it, correctly identify it’s height, or if I stood up to ride, but I hit it - likely at around 12km/hr. Lucky I wasn’t going faster. Next thing I know I was on the ground wondering wtf just happened. I remember seeing my Garmin count down from 6 seconds (I believe it starts at 30 seconds so there’s 24 seconds somewhat unaccounted for). Since I was on the ground, still processing everything and unsure if I was ok I let the timer count down.
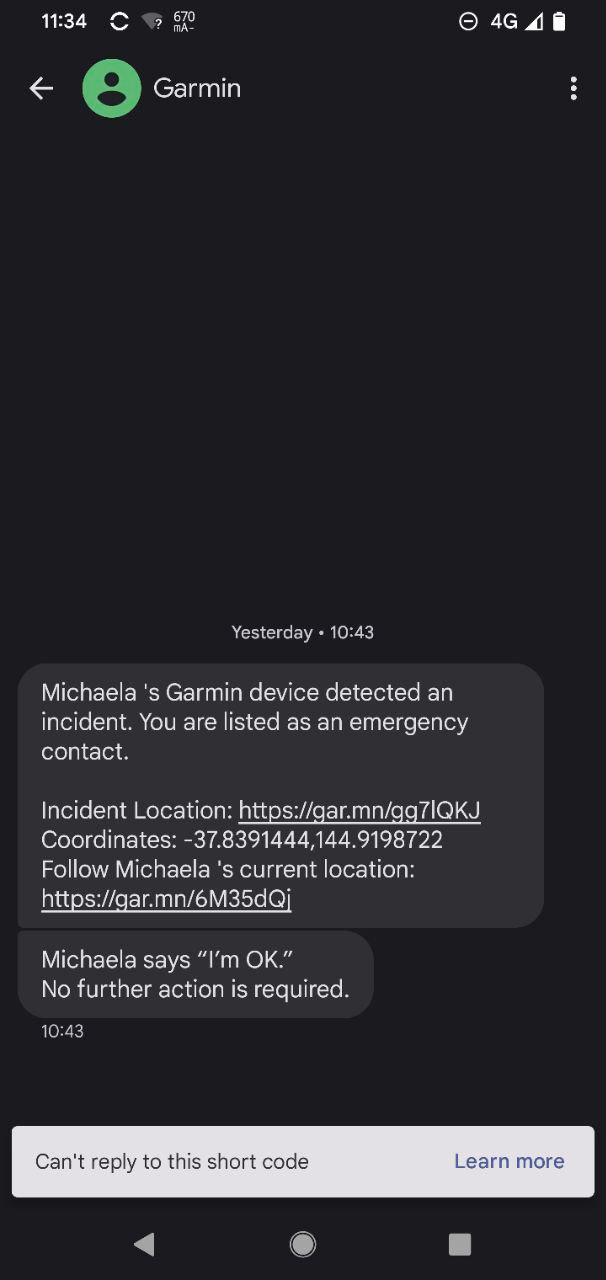
SMS from Garmin with a link to incident location

This triggered an SMS with location details and starts live location sharing with my partner. After I had worked out that I was somewhat ok I stopped the incident on Garmin, and sent a message to say I was fine.
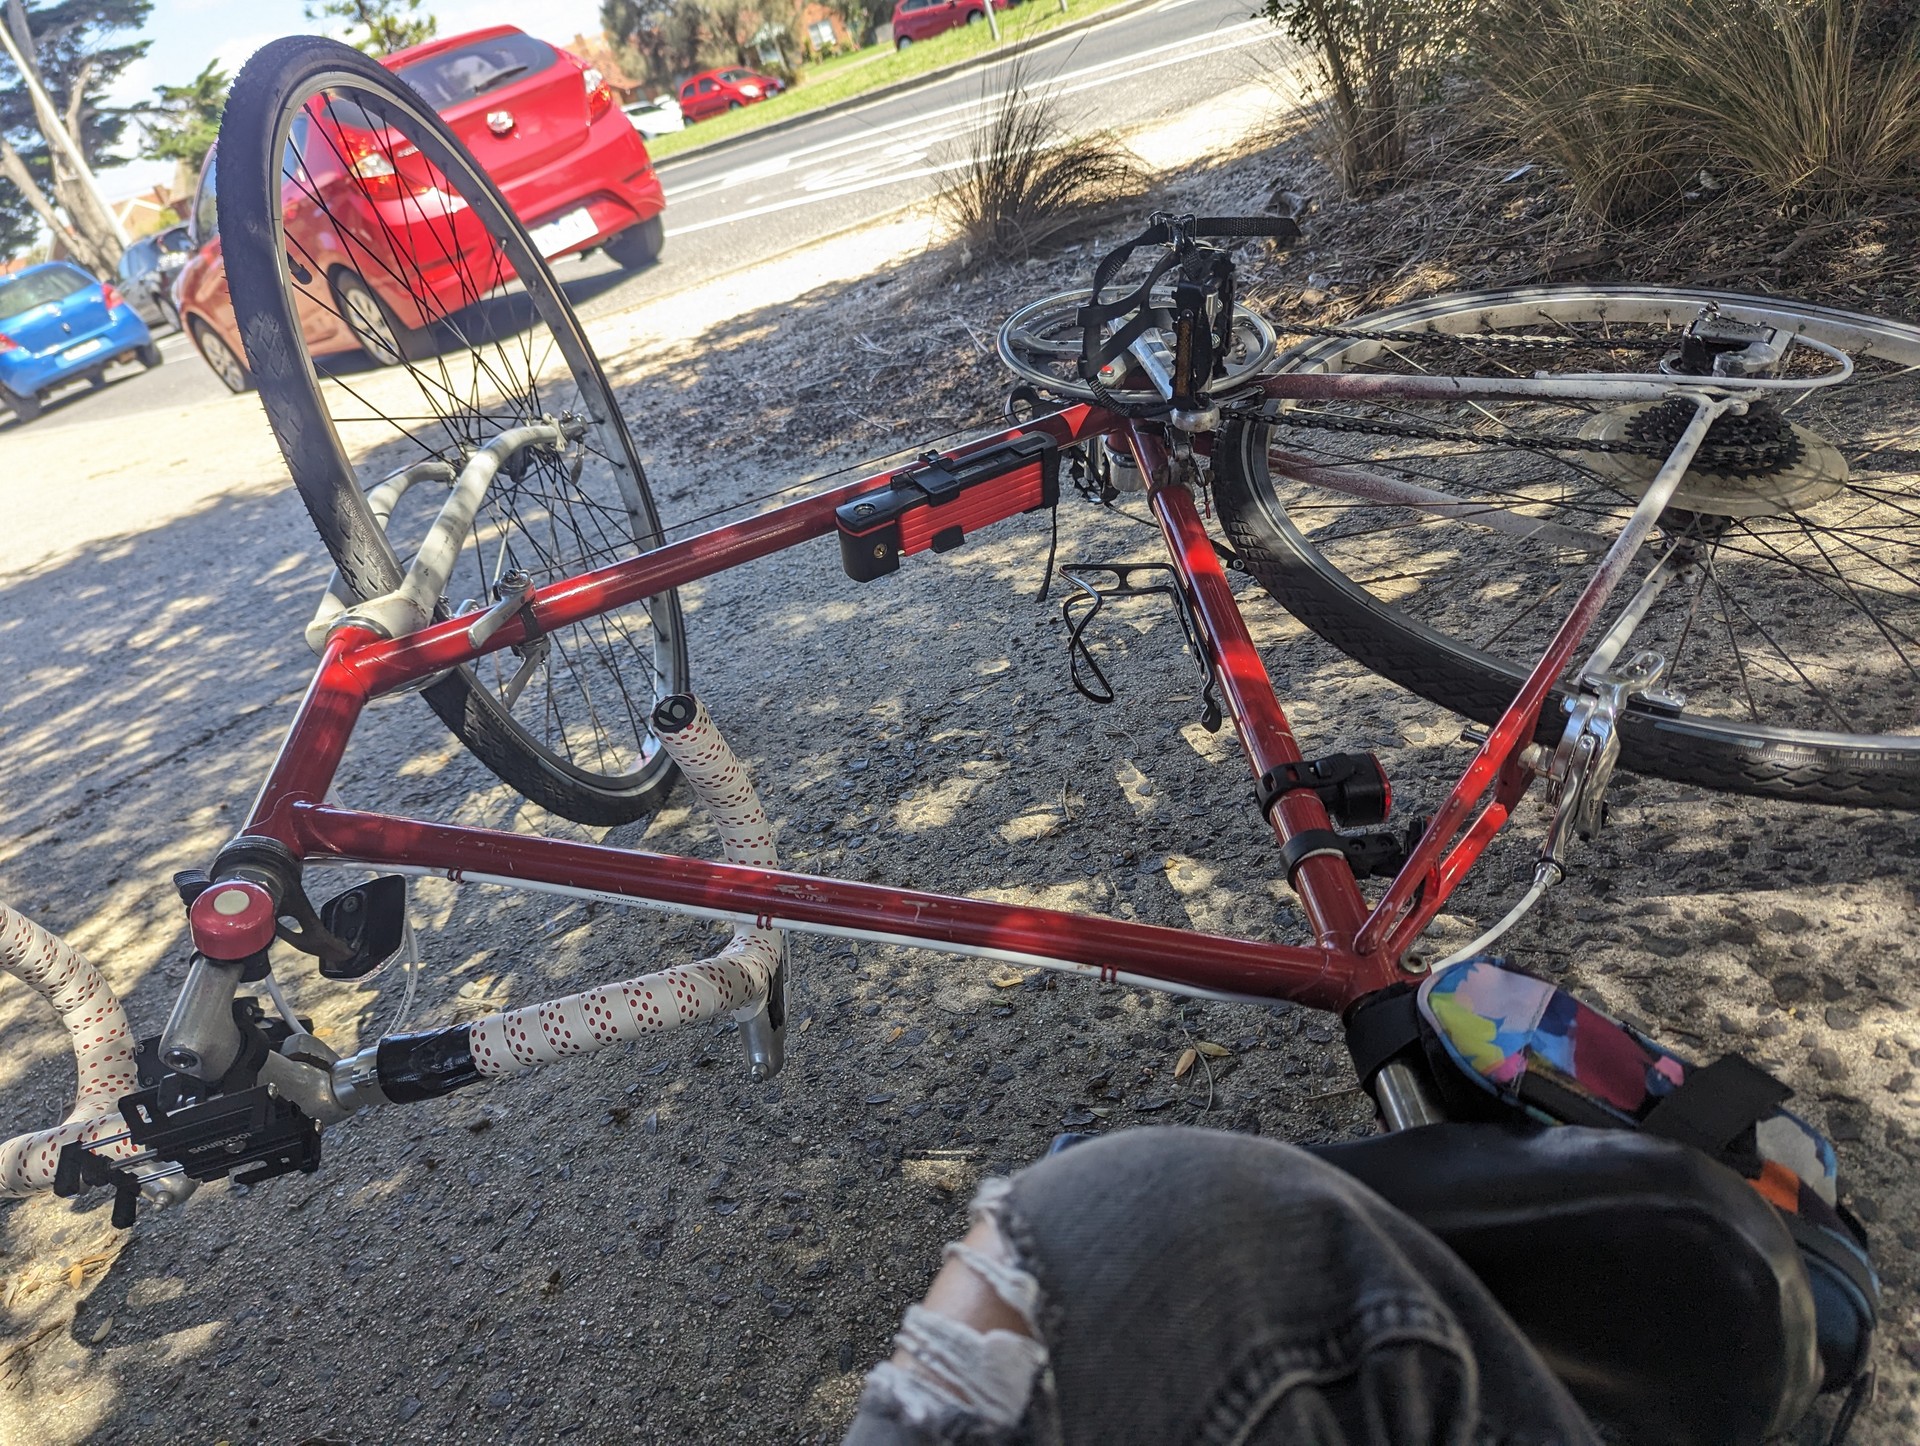
My bike on the ground after crash with my ripped jeans

Since I’ve had my Garmin Fenix 6S Pro I’ve recorded 585 activities and only 2 other times have I had incident detection trigger when I was fine. One time was when my watch band broke, and the other was mounting a curb and coming to a hard stop. Both of these are some what reasonable that incident detection triggered.

I am very glad for this system, as had I passed out it would have been over half an hour before someone would otherwise notice (this is the time I sat next to my bike recovering)
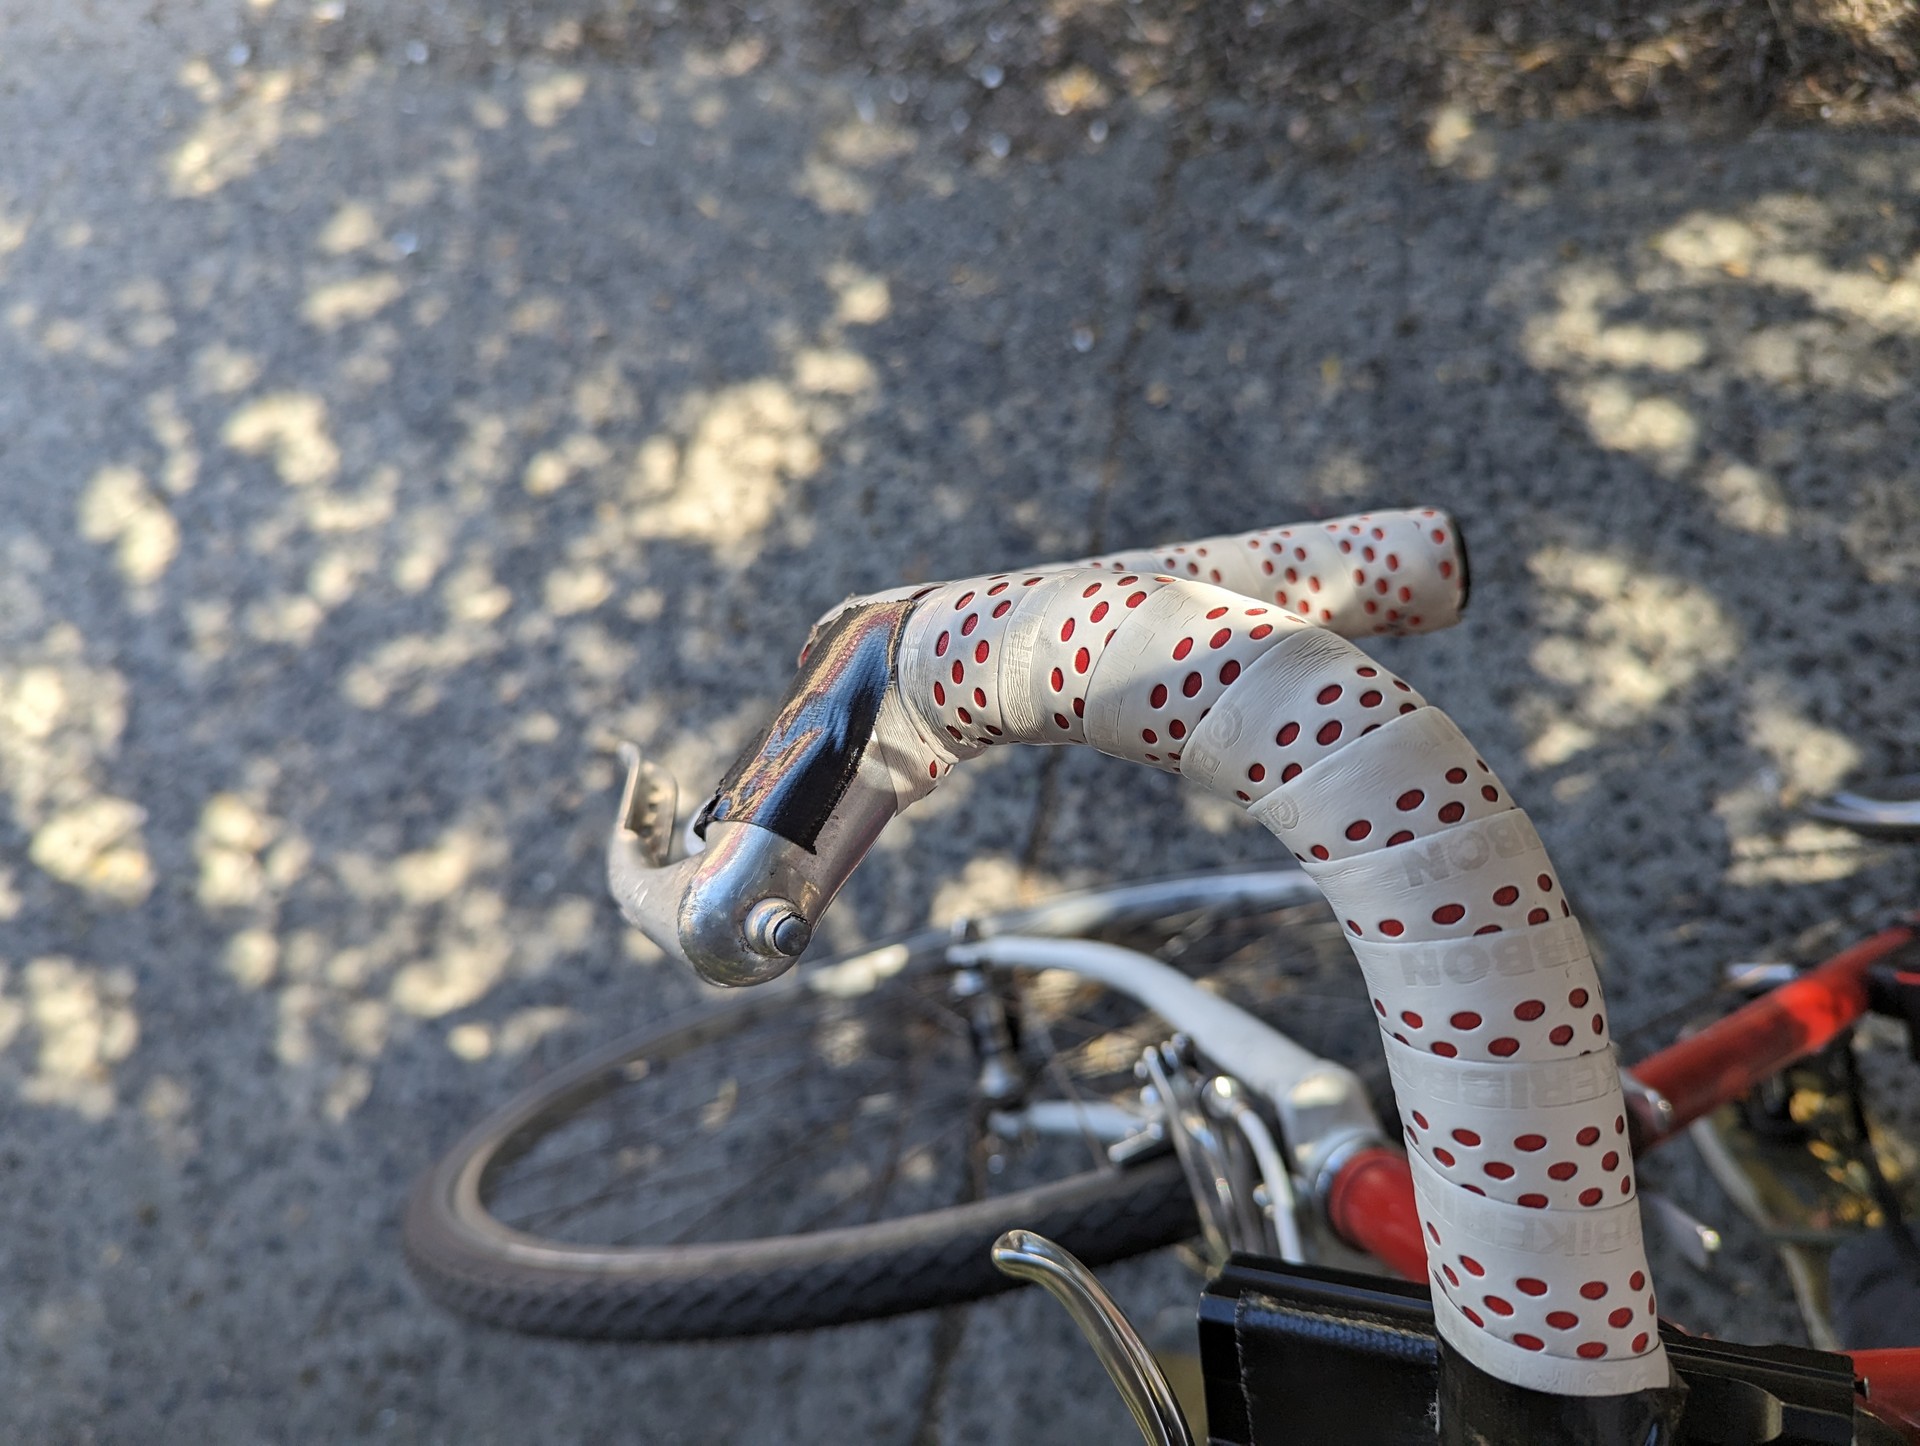
Folded in brake levers from the crash
Unlike myself the bike only received a small amount of damage. Brake lever scratched and rotated in and handlebar alignment off. Brake callipers needed adjusting but otherwise everything seems fine. After doing some field repairs I eventually made it to the park I was aiming for.

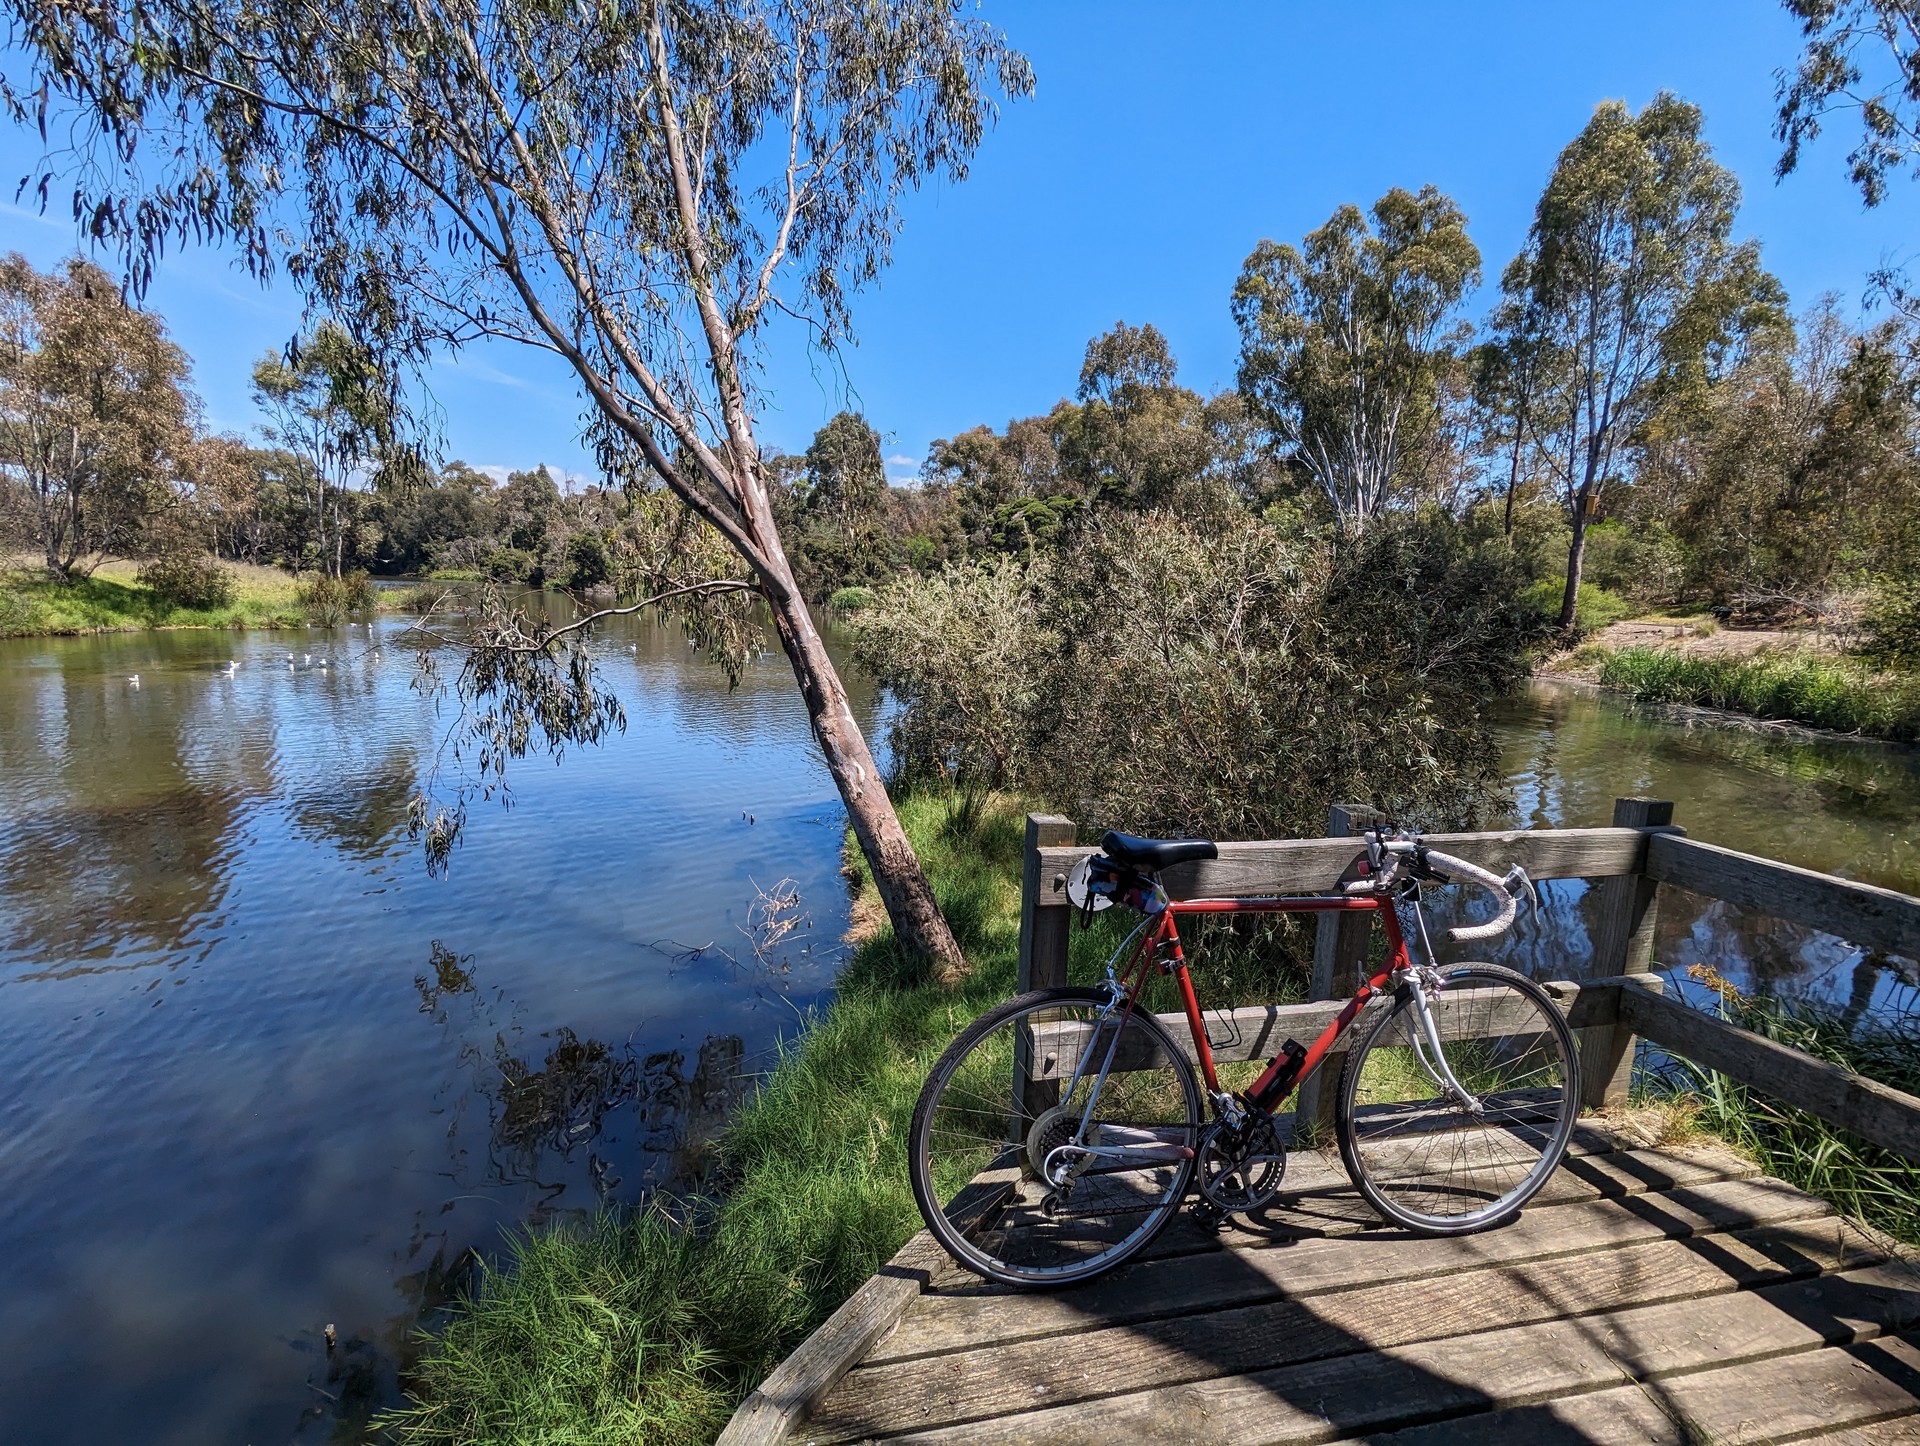
Bike parked next to the lake on a raised deck overlooking the water and island
I even rode home the route I planned, however I was feeling very sore when I got home. I’ve got some scratches and bruises but I think I’ll be fine in a few days.

Given I was riding as an alternative to running for recovery purposes I’m not happy about the incident.

So with that out of the way, let’s talk brakes.

Inline brakes
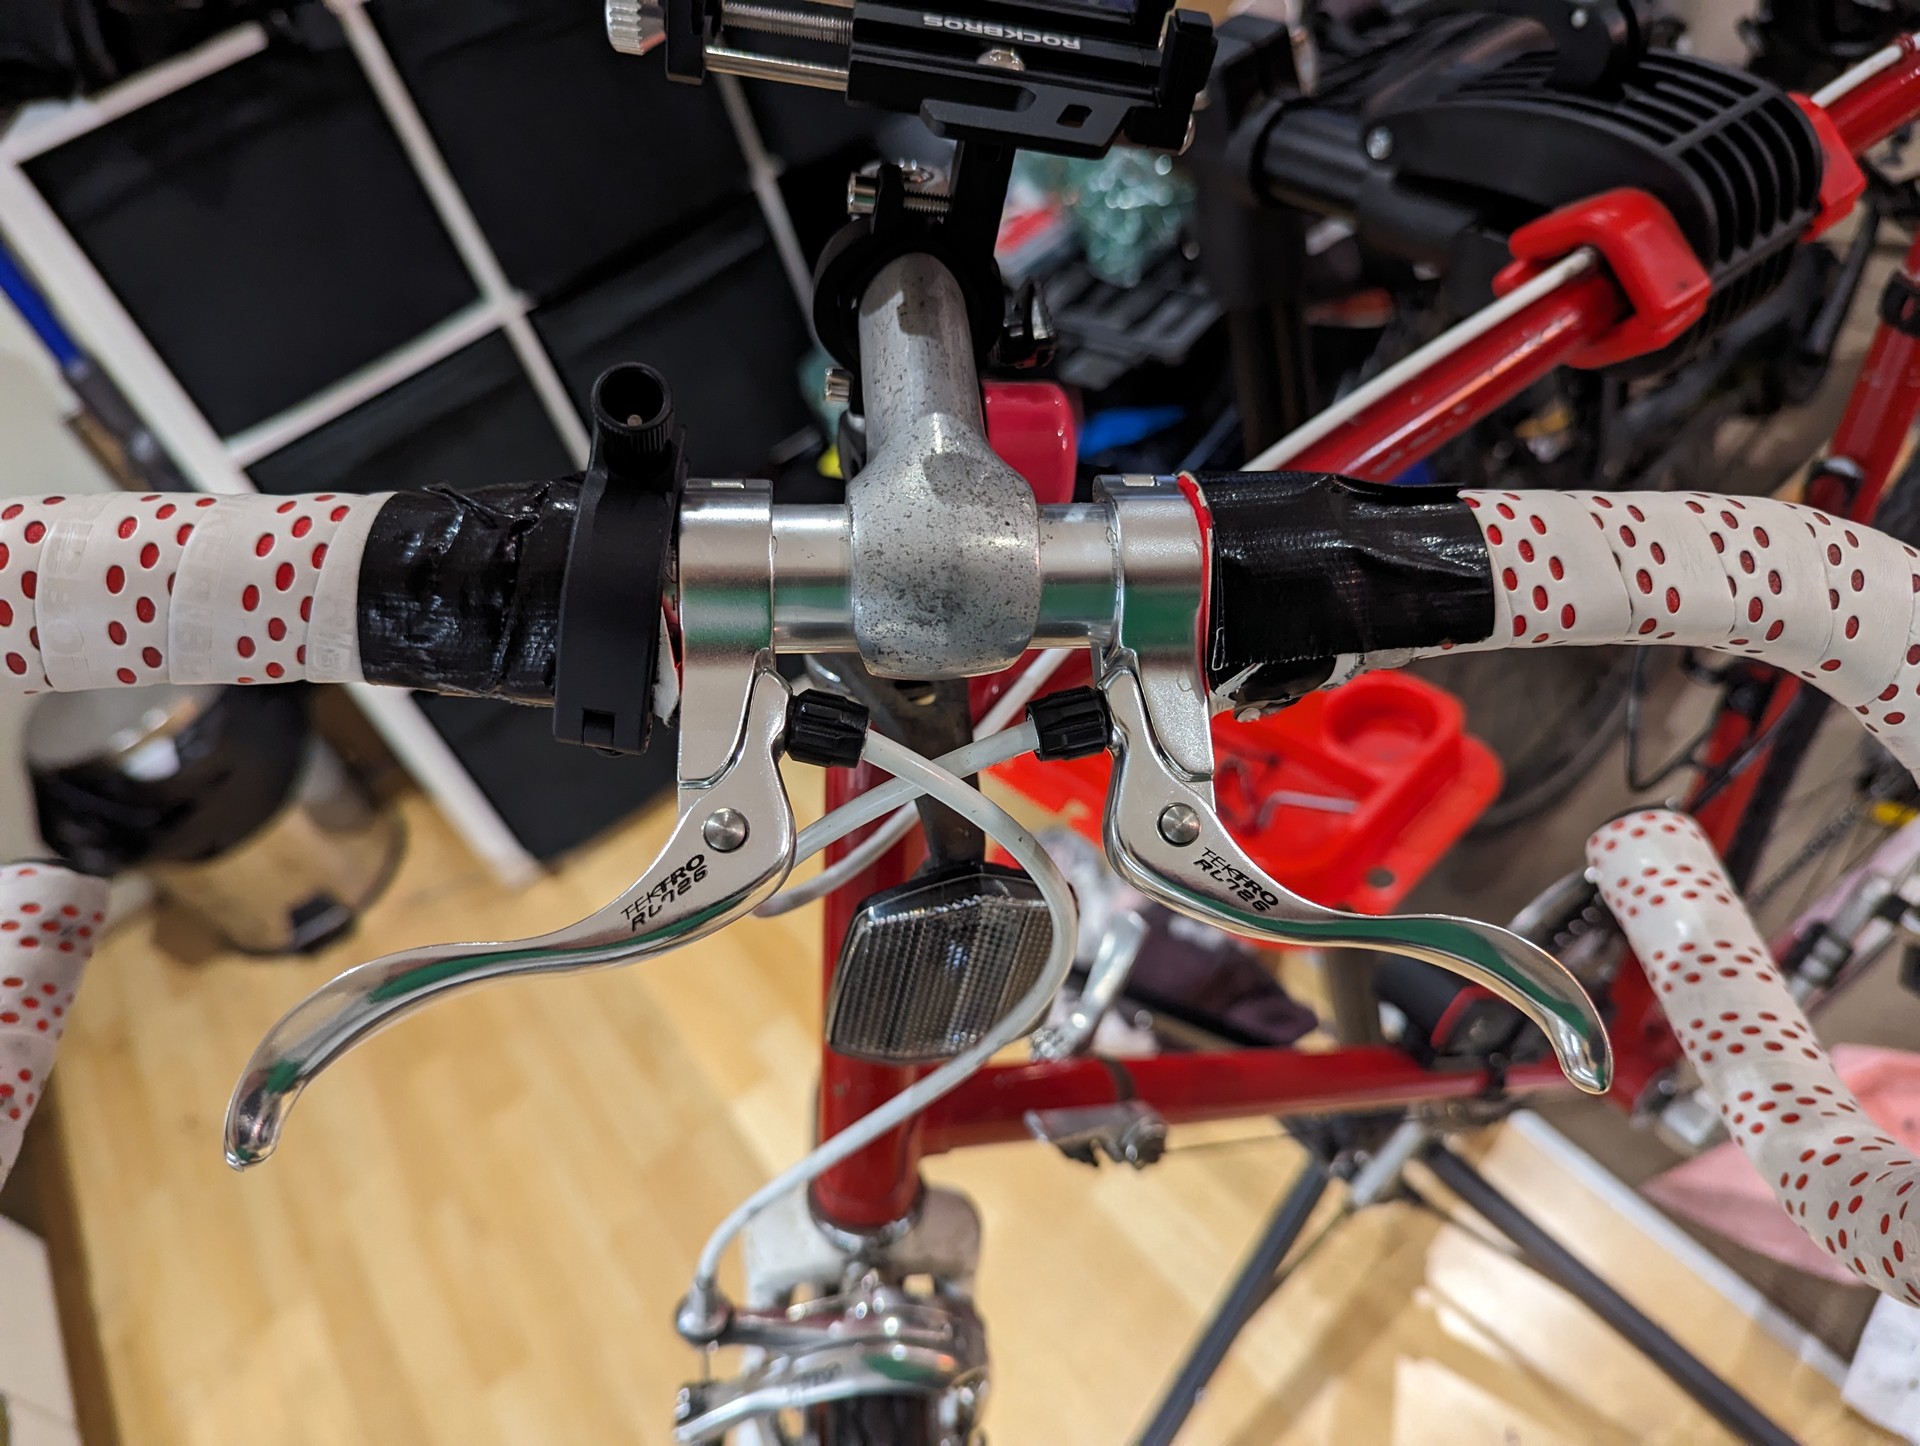
Inline brakes installed on the dropbars

These were a breeze to install. I’m missing some end caps here and the grip tape ends is a temporary thing while I work everything out. The hardest part was working out how to mount my light given all the space is taken now by the brakes. I have end caps in storage but I wanted to test everything out first.

First off, the myth that inline brakes make the system spongy is clearly false. If you go back to part 1 of this series you’ll see that the brake cable is uninterrupted for inline brakes. There is no reason why adding inline brakes would make the system worse. My suspicion is that people think that inline brakes are spongy is that they are often installed on brake systems that are already spongy. The inline brakes themselves have a lot of pull - keep this in mind.

While I still haven’t gotten used to their presence, I have already adjusted my riding style. I’m sitting in a much more comfortable position while casually riding and not having to get into the drops to slow down. This is great in the city. I still find myself sometimes moving my right hand down to the original lever out of habit, but a lot less now. Tight corners are now much easier to manage.

And the back brake is getting a lot more use now - since I don’t have to get into the drops I now apply a lot more even braking. Where this is extremely useful is red lights and other stops. Previously I would brake to slow down, stop braking, move my hand to the gear lever to move into the lowest gear, then move my hand back to brakes to come to a complete stop. Now I can use my rear inline brake while changing gears with my other hand and perform the action all at once.

Dual pivot brakes

I ended up with the Tektro R559 dual pivot long reach brakes. The frame / wheel combination I have means that I’m on the higher limit of typically short reach brakes and the lower limit of typical long reach brakes. If I ever buy a new set of callipers again I might try to gamble on short reach brakes. Currently though the long reach brakes do give me the option to switch in a 700c wheel….

So while you can sometimes pick up traditional nut style brakes, it’s more common to find recessed style. These have a shorter shaft and a long recessed nut that is used to hold the brakes in place. I purchased these brakes knowing that the recessed style wouldn’t fit my bike out of the box.

There’s some solutions to mounting these brakes though. The most common is to drill out the back hole (usually using a right angle drill for the rear brake) to allow the recessed nut to fit.
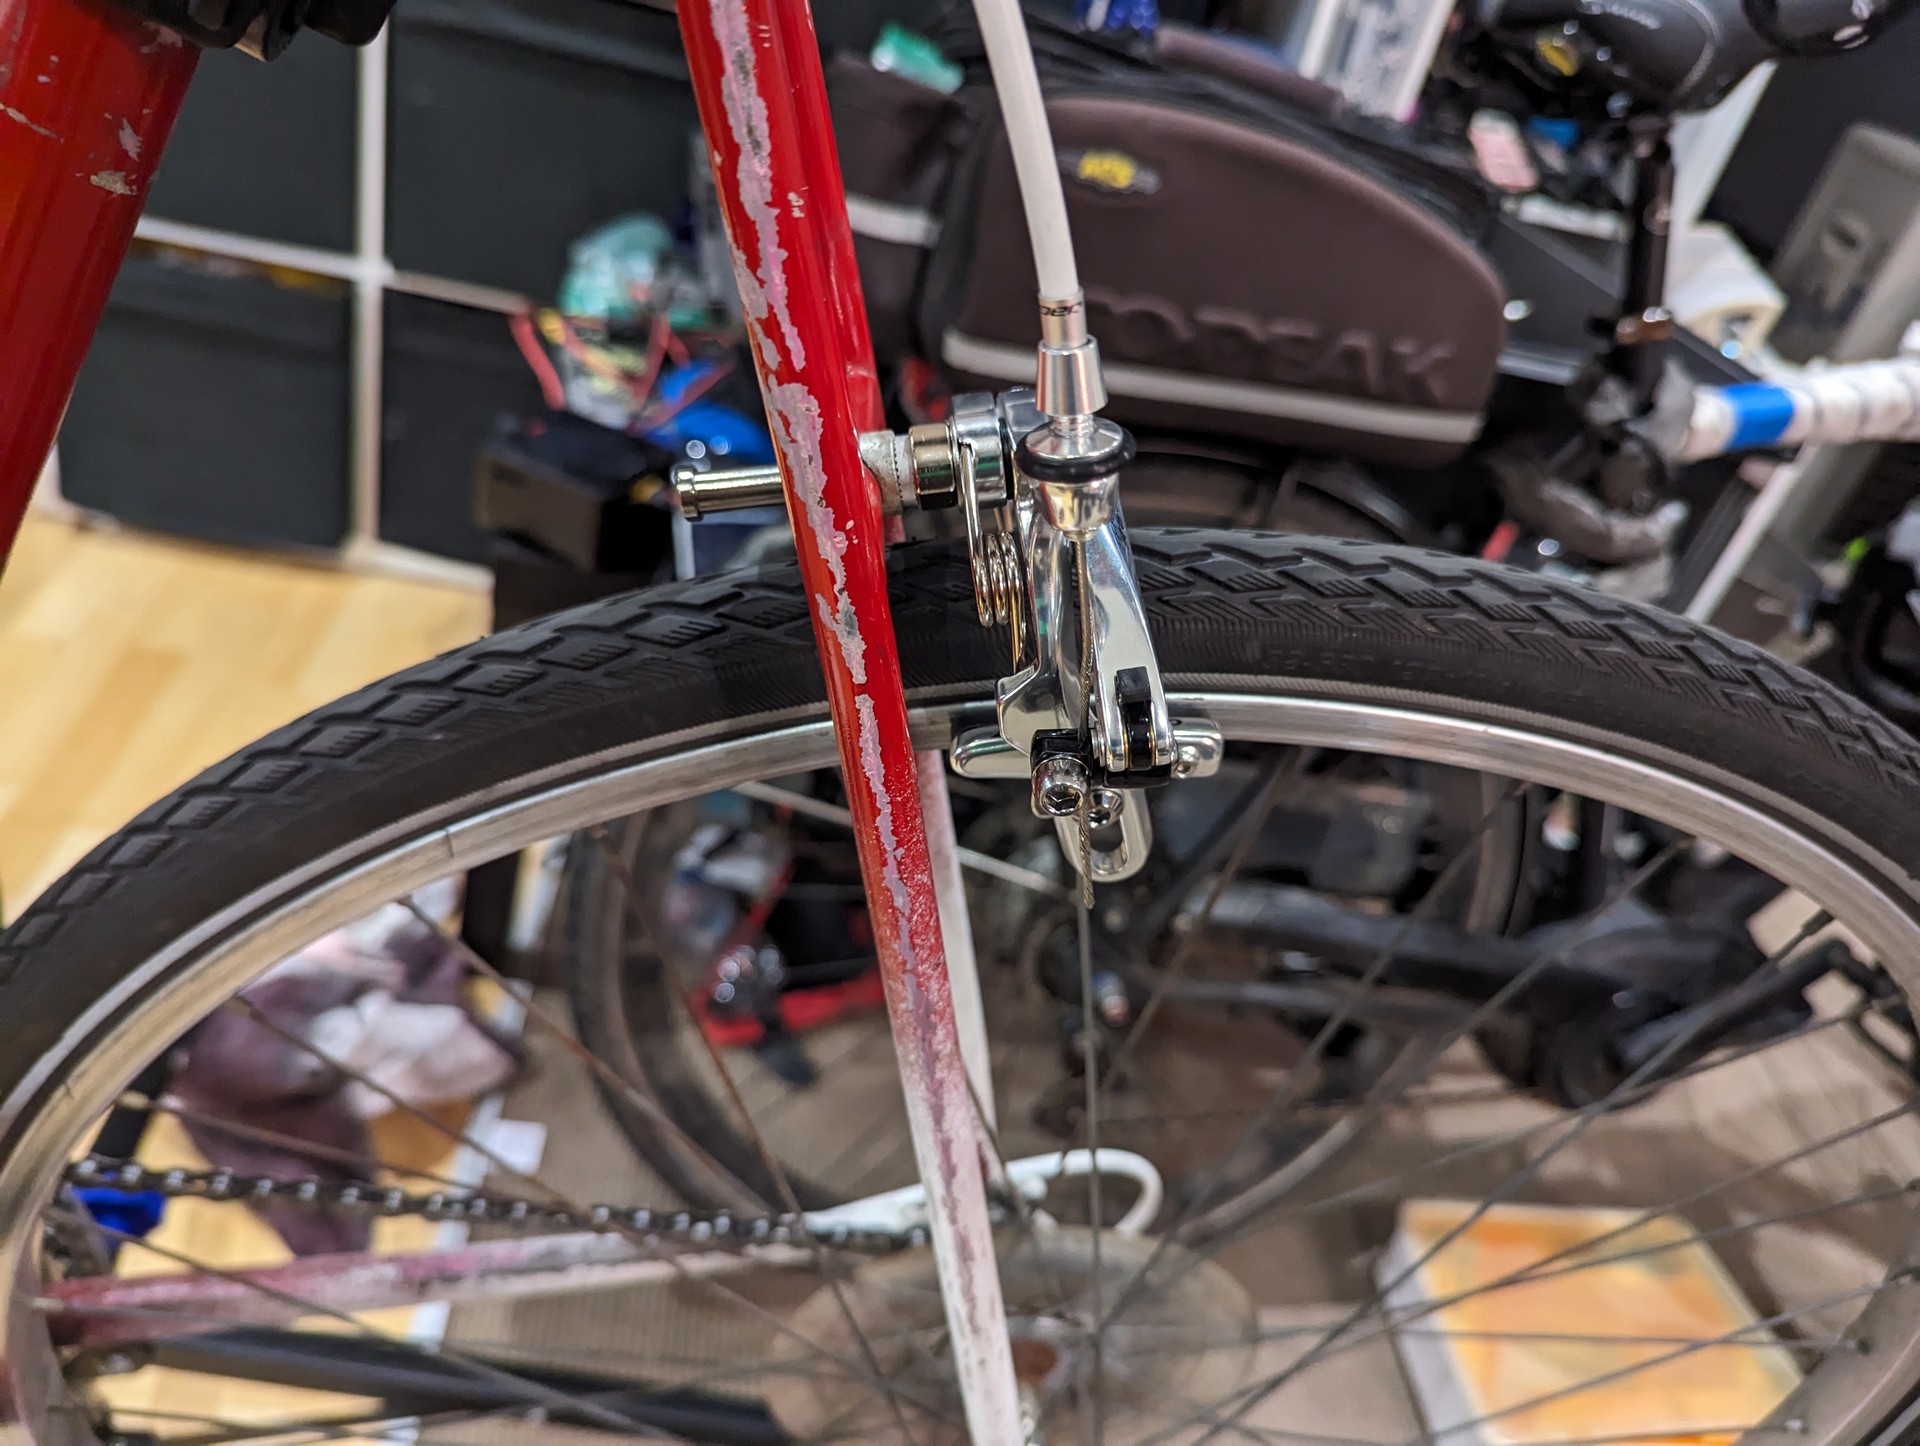
Rear of the bike showing that the front brake has been installed on the rear

The other option that’s also sometimes available is to use the front brake (has a longer shaft) on the rear brake. How do you install the front brake then? For me I was lucky enough to be able to fit the nut through the bottom of the forks. This only gives half the mounting distance than typical however I believe it’s plenty.
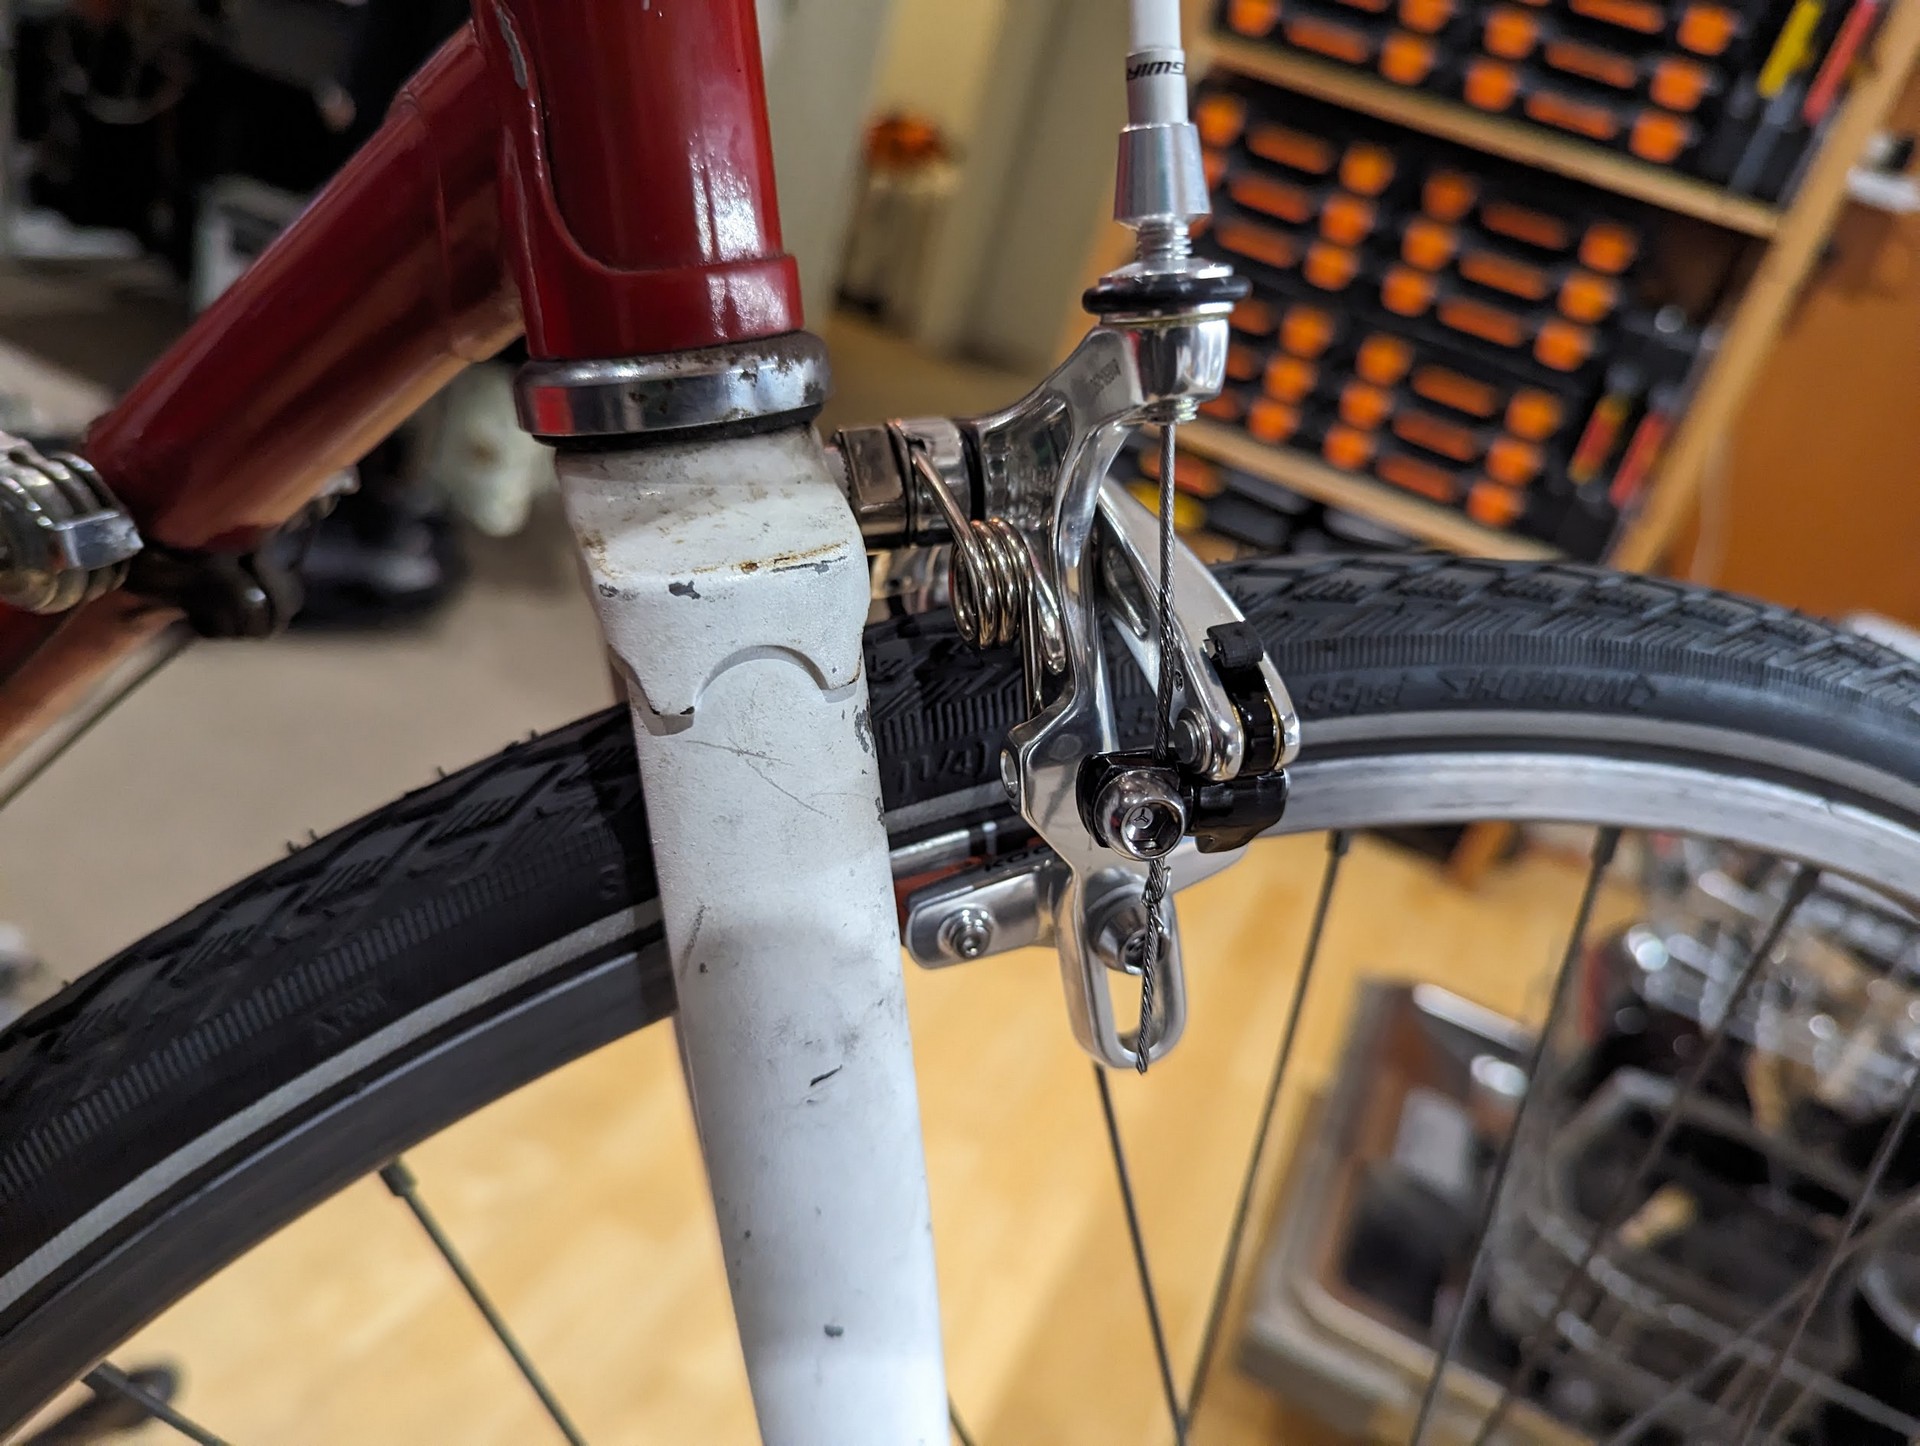
The rear brake being installed on the front showing no protrusion out the back of the fork as its been locked of from within the tube

For both the rear and front shafts I found I could only use one of the wedge locking washers, but once again - I feel like this is plenty. If this doesn’t provide enough friction the outcome is that the brakes could become unaligned and start rubbing while riding. It’s not catastrophic failure.

I’m happy with having the brakes mounted this way as it means I don’t have to make permanent changes to the bike frame and if I want to I can reinstall the original brakes.

Other changes

I’ve installed some new toe cage peddles. I was a bit nervous installing these again as they can add a certain amount of risk in casual riding, but I’ve been pretty happy so far with them. They certainly look the part. Unfortunately the NOS I purchased, the grease had gone bad. I’ve tried my best to get some oil in there, but I’m going to either flush out all the grease somehow or do a rebuild. Neither of which I can do easily right now.
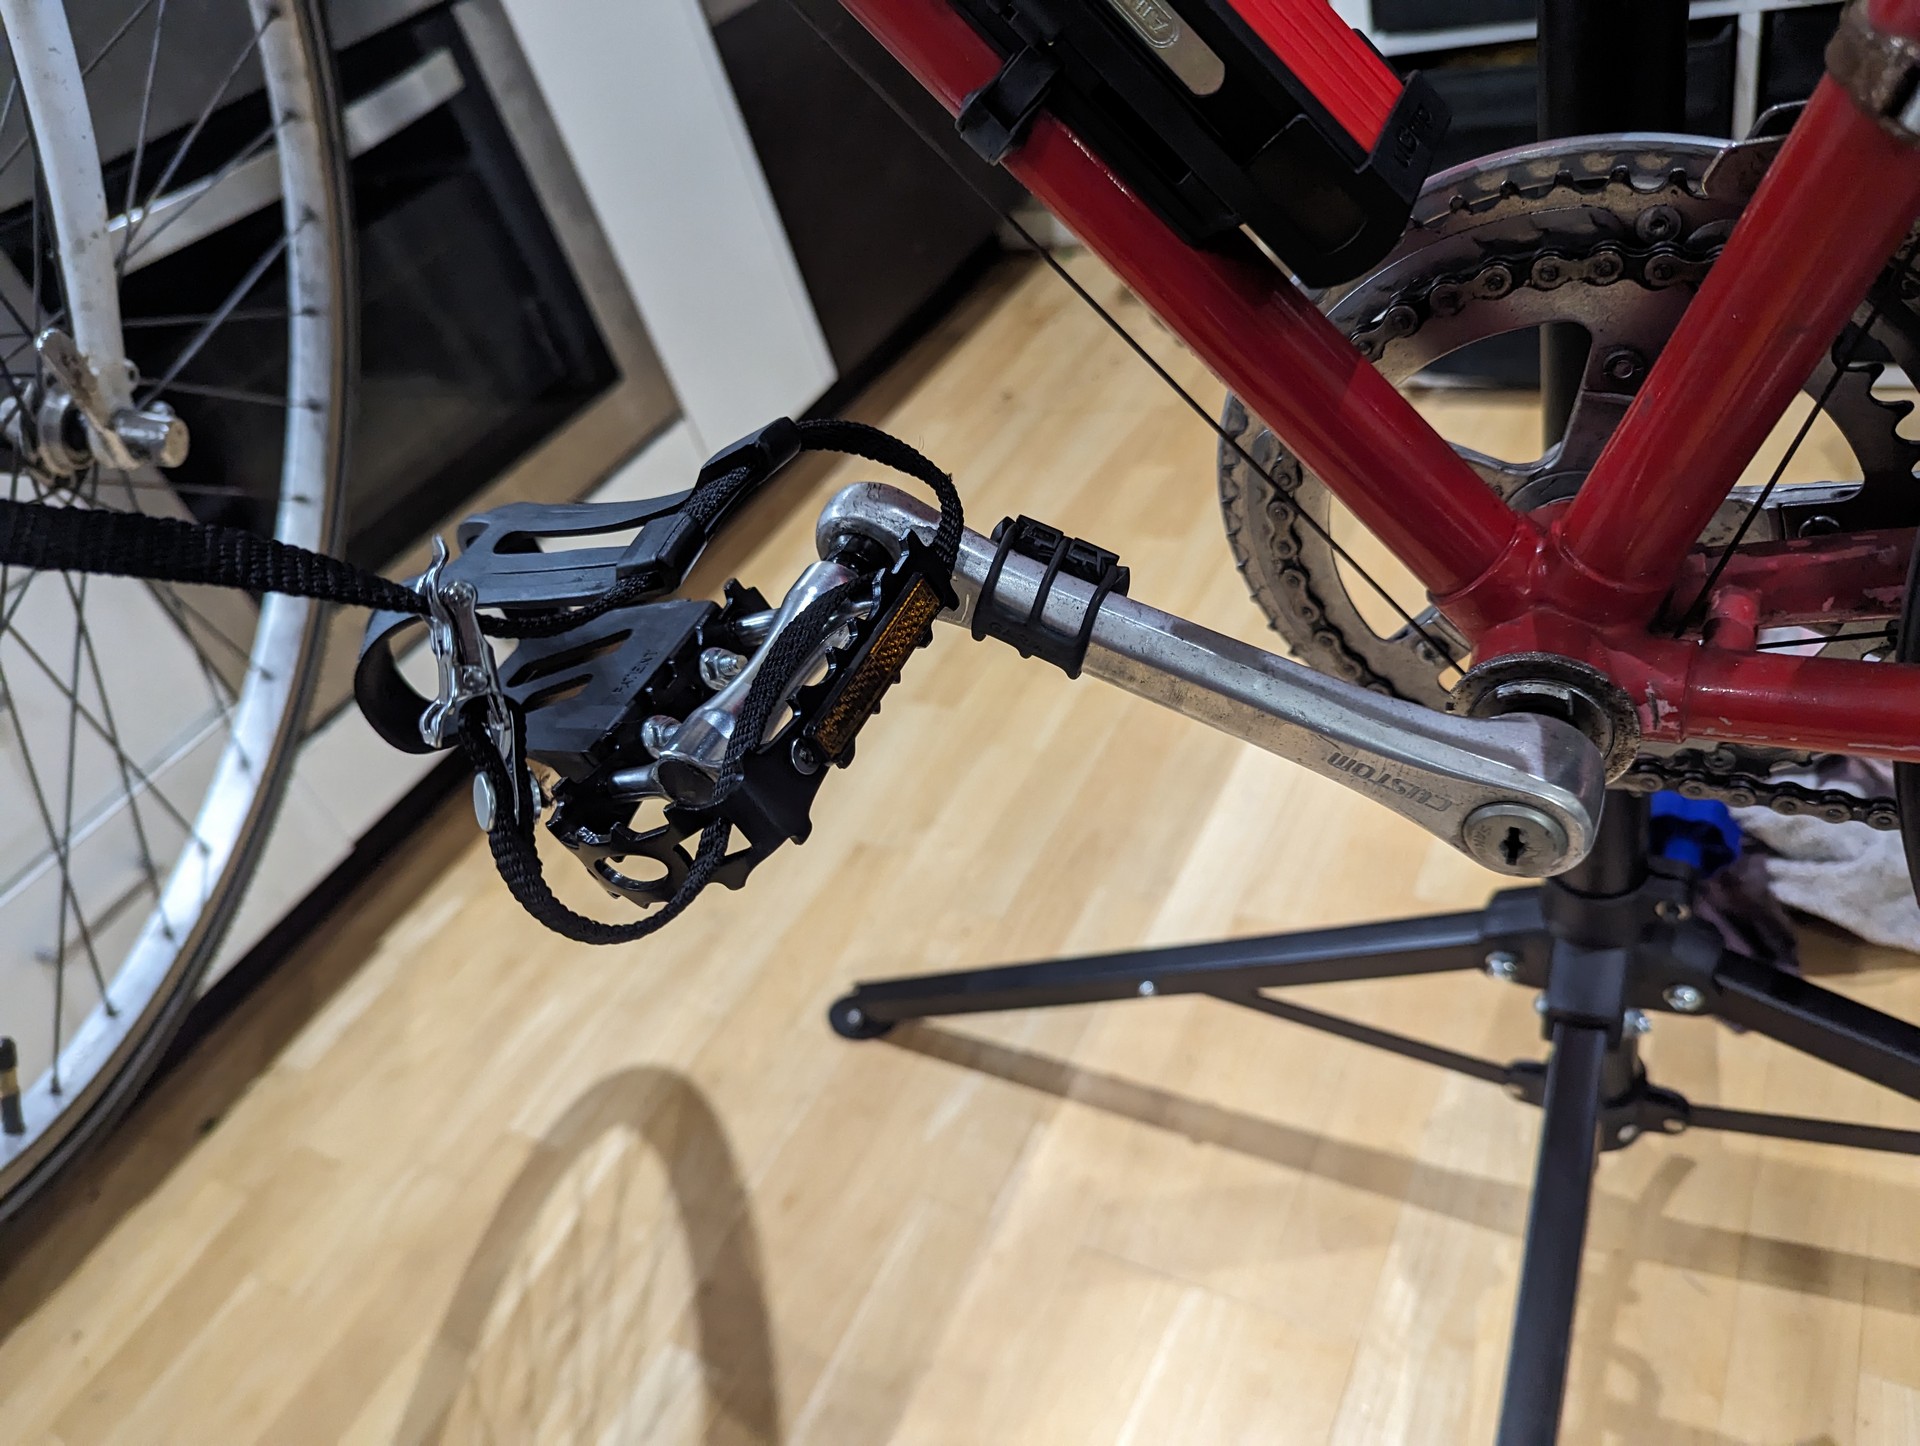
Basket cage peddles

Lastly I’ve updated my Kmart bike lock to ABUS. Hopefully no one steals my lock. This lock feels very over engineered but I like it. It’s spring loaded and pops out when you unclip it.
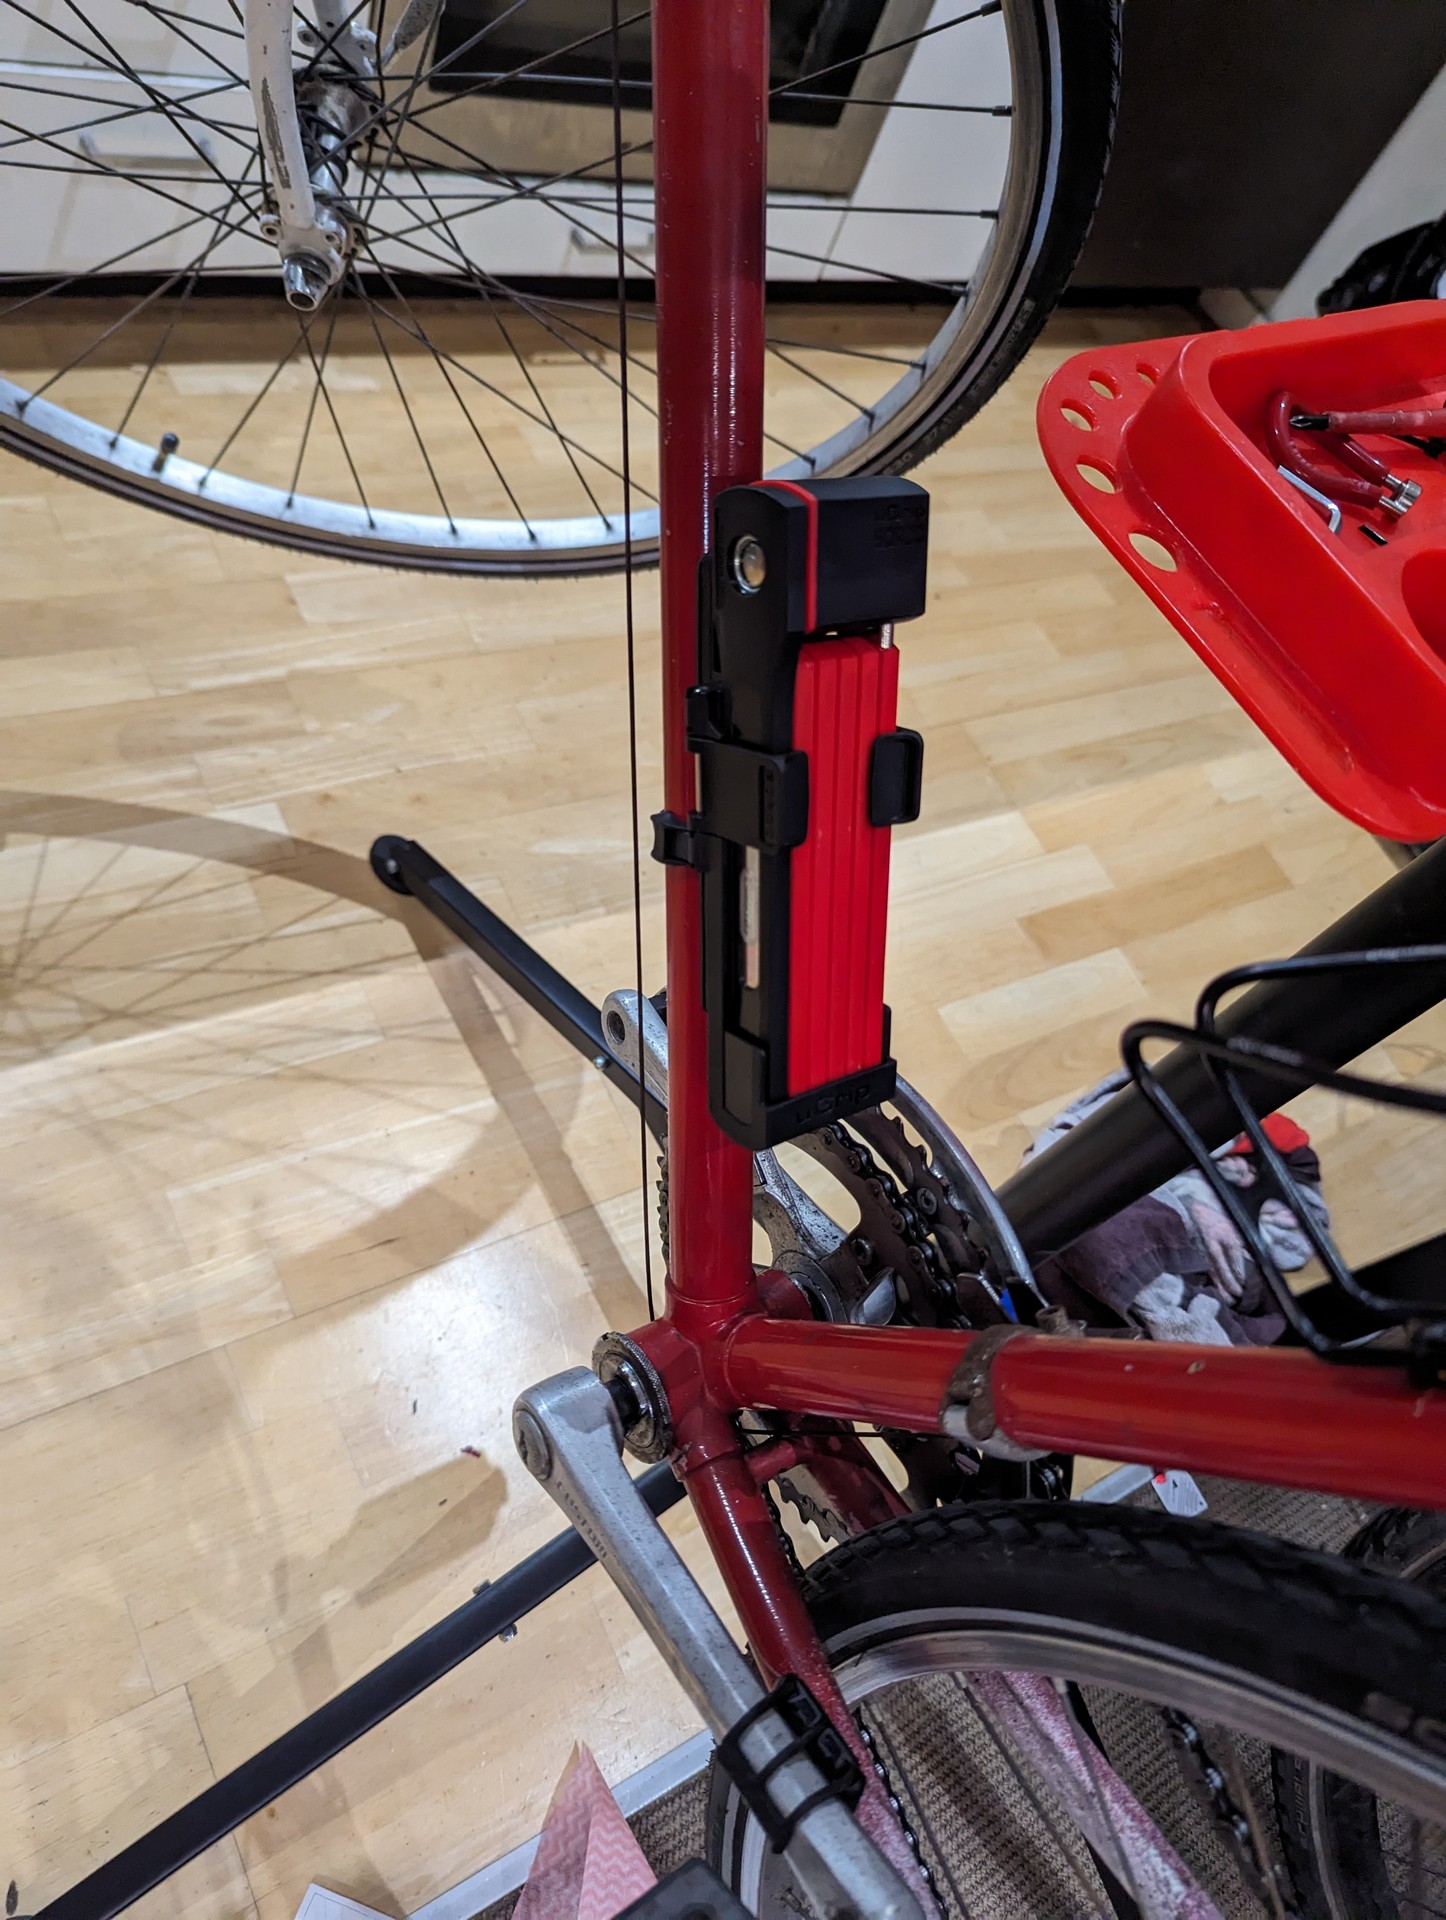
ABUS folding bike lock installed in one of the bottle cage mounts

That’s all the upgrades I want to do for now. Sometime next year I plan to strip all the parts off, de-rust, de-paint and give it a brand new paint job.
Bike Brakes Part 1

I’m currently waiting for my bike parts to arrive today, but in the meantime I thought I was explain to y’all the plan.

JSON My red vintage road bike

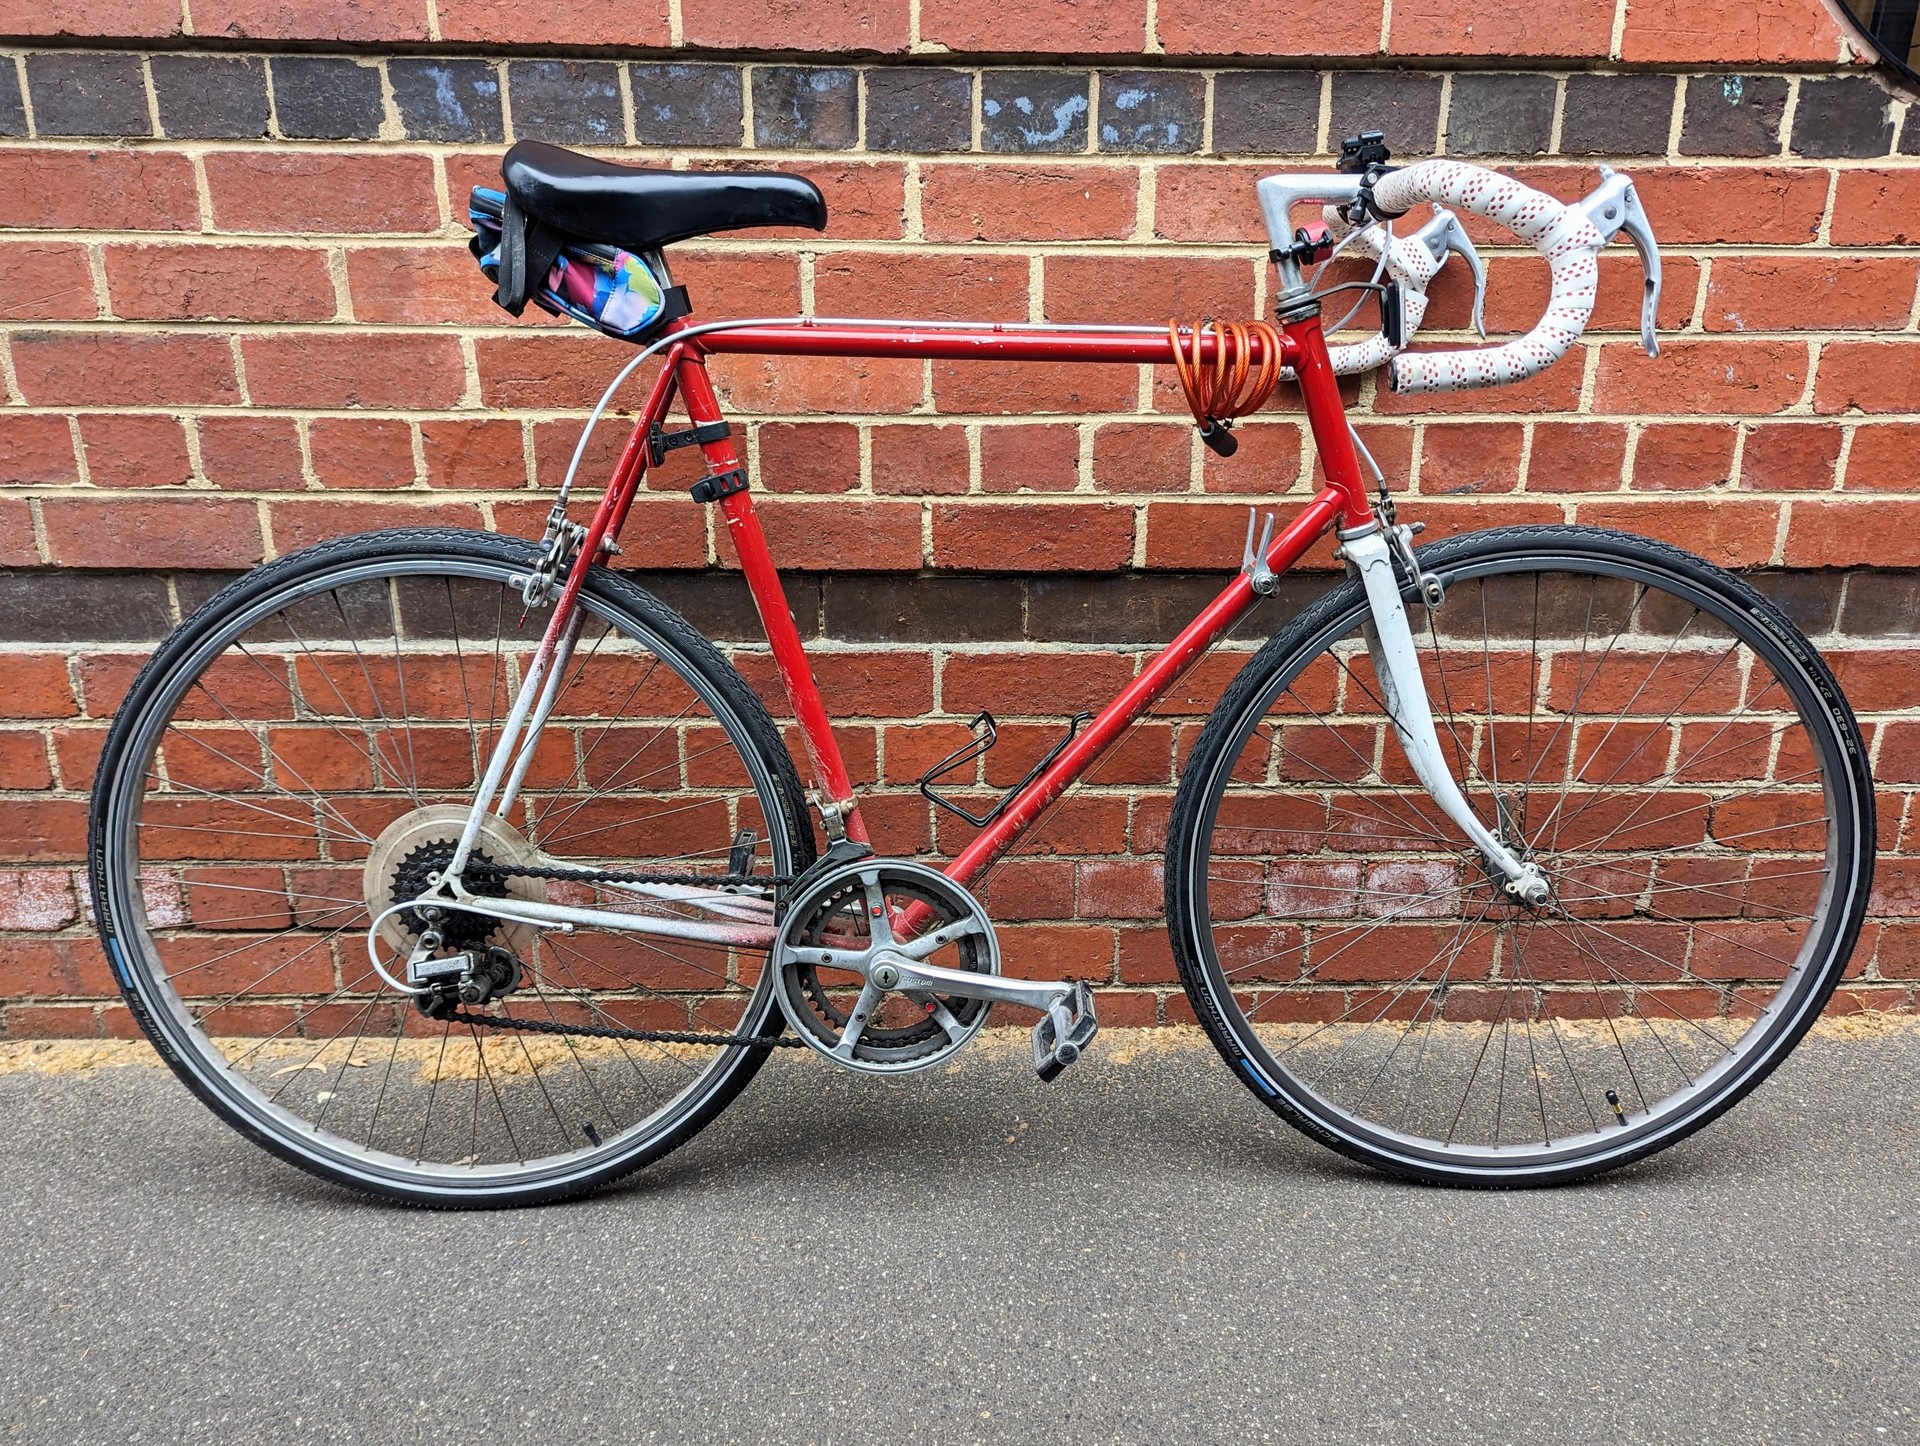
JSON is my road bike. I use it to get to many things. It now gets very regular use, sometimes short rides, sometimes ride that I consider long. JSON is a vintage road bike, I don’t know when it was manufactured or by whom. Given it has Suntour 7 derailleur I’m guessing mid 80s. While these bikes are amazing (please try one), given the age they do come with some design problems. The biggest has to be braking. While I like to keep things fairly original on the bike, given that I doing more and more city and busy area riding I want to make the bike a little safer.

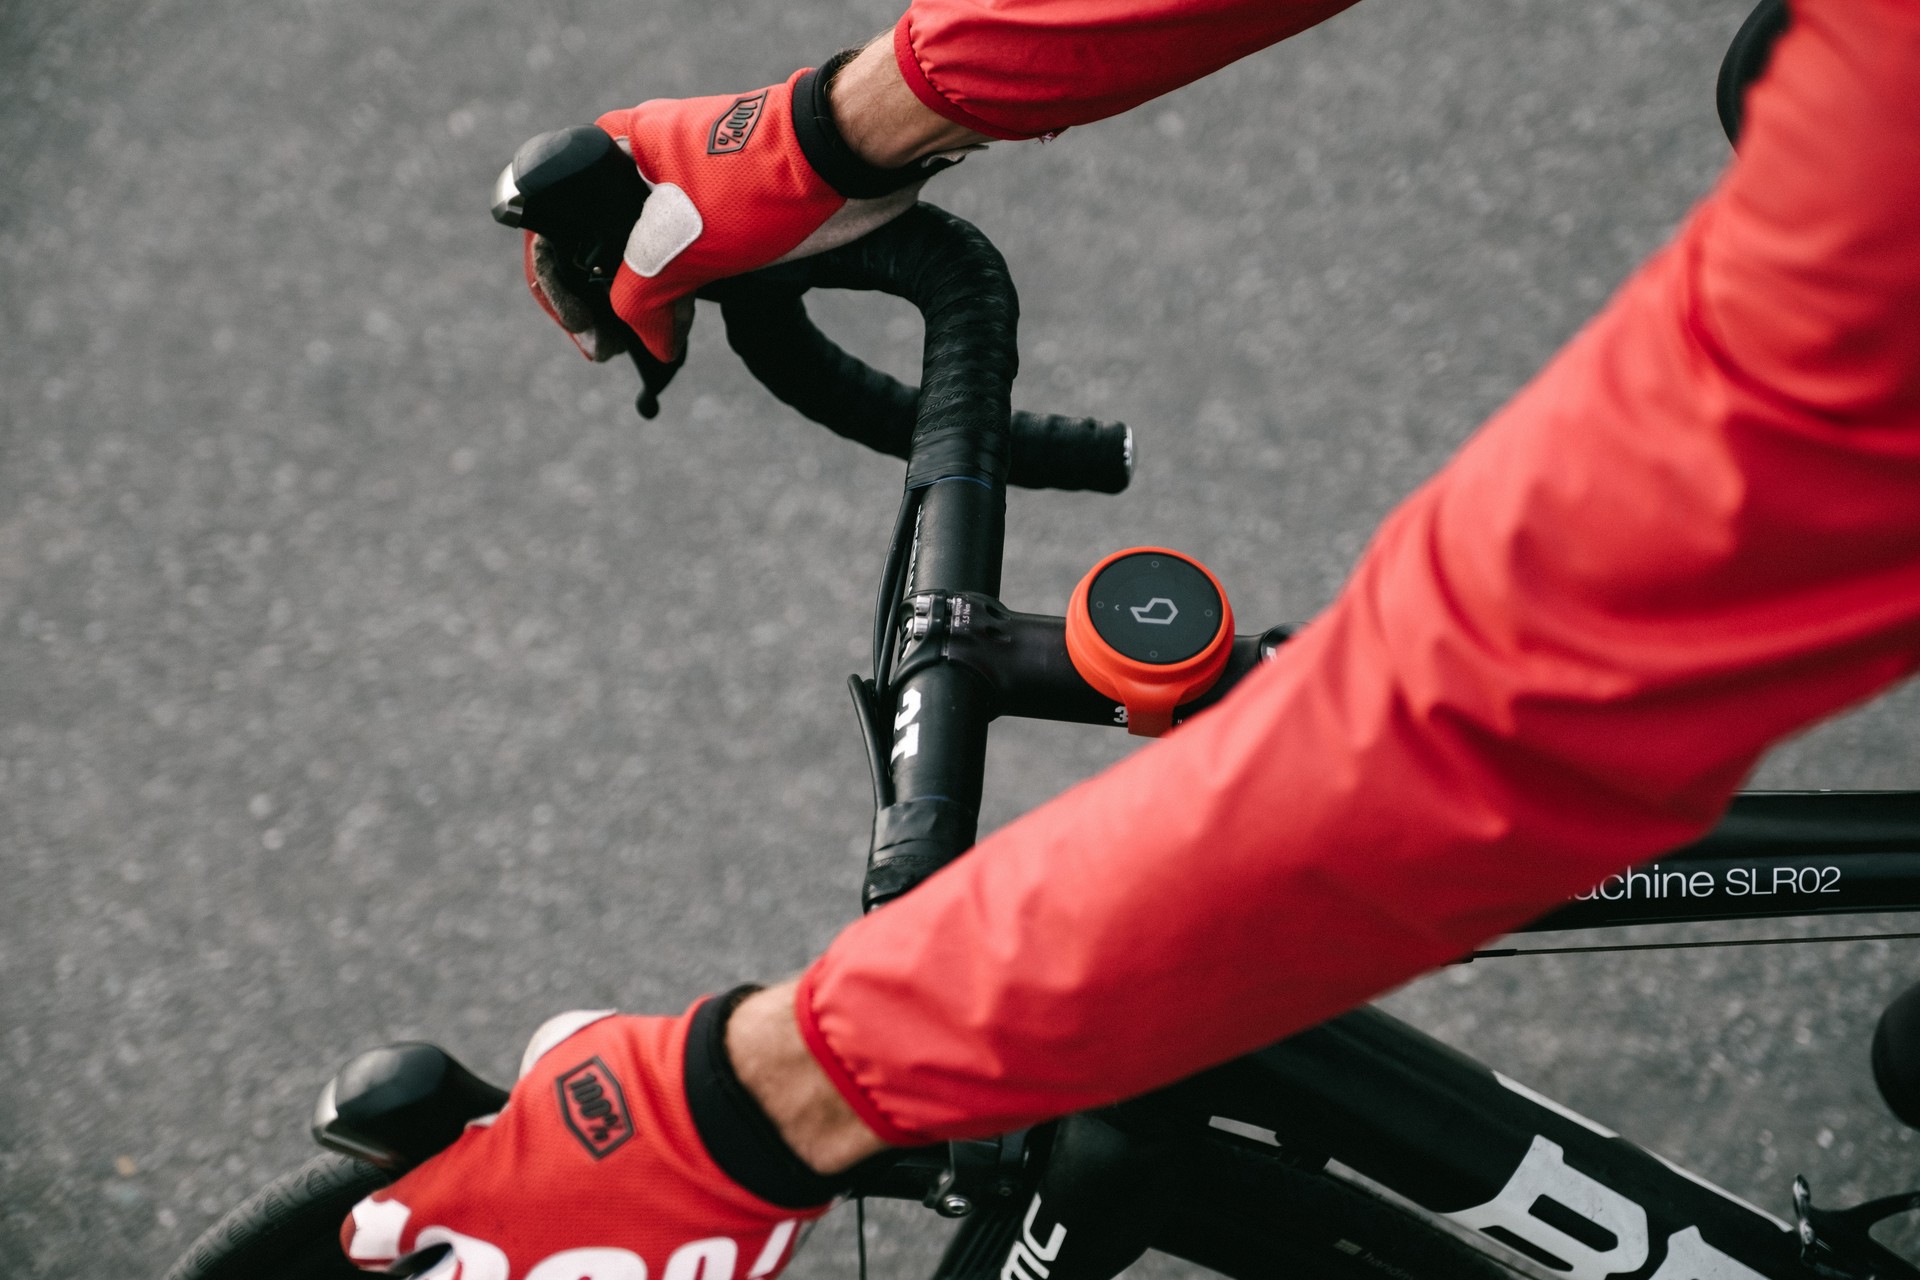
Now the brakes work just fine on JSON. The major problem comes with where the brakes are. If your not familiar with road bikes, those curved down parts of the handlebars are called the drop bars. The idea is that when you want to ride fast you “ride in the drops” - that is move your hands to the bottom of the handle bars to get a lower position. In contrast if you want a more comfortable ride you might ride on the “tops” or like the picture below is doing riding in the “hoods”. The hoods in a modern road is the combination gear shift and brake controls - well the hood is actually just the cover on top….

Photo by <a href="https://unsplash.com/@beeline">Beeline Navigation - person riding in hoods position on bike</a>

I however don’t have a modern bike, so I can’t ride on the hoods. Even if I did ride on the sides I don’t get enough lever force to correctly apply the brakes. This means that if I want to brake I have to be in the drops. When I’m riding around the city or busy path ways I’m often sitting upright to get better visibility and stability at the lower speeds. At the moment I have to choose between being in the drops for braking, or upright for visibility and flexibility - often I end up riding in an awkward halfway position with one hand in drops and one hand not.

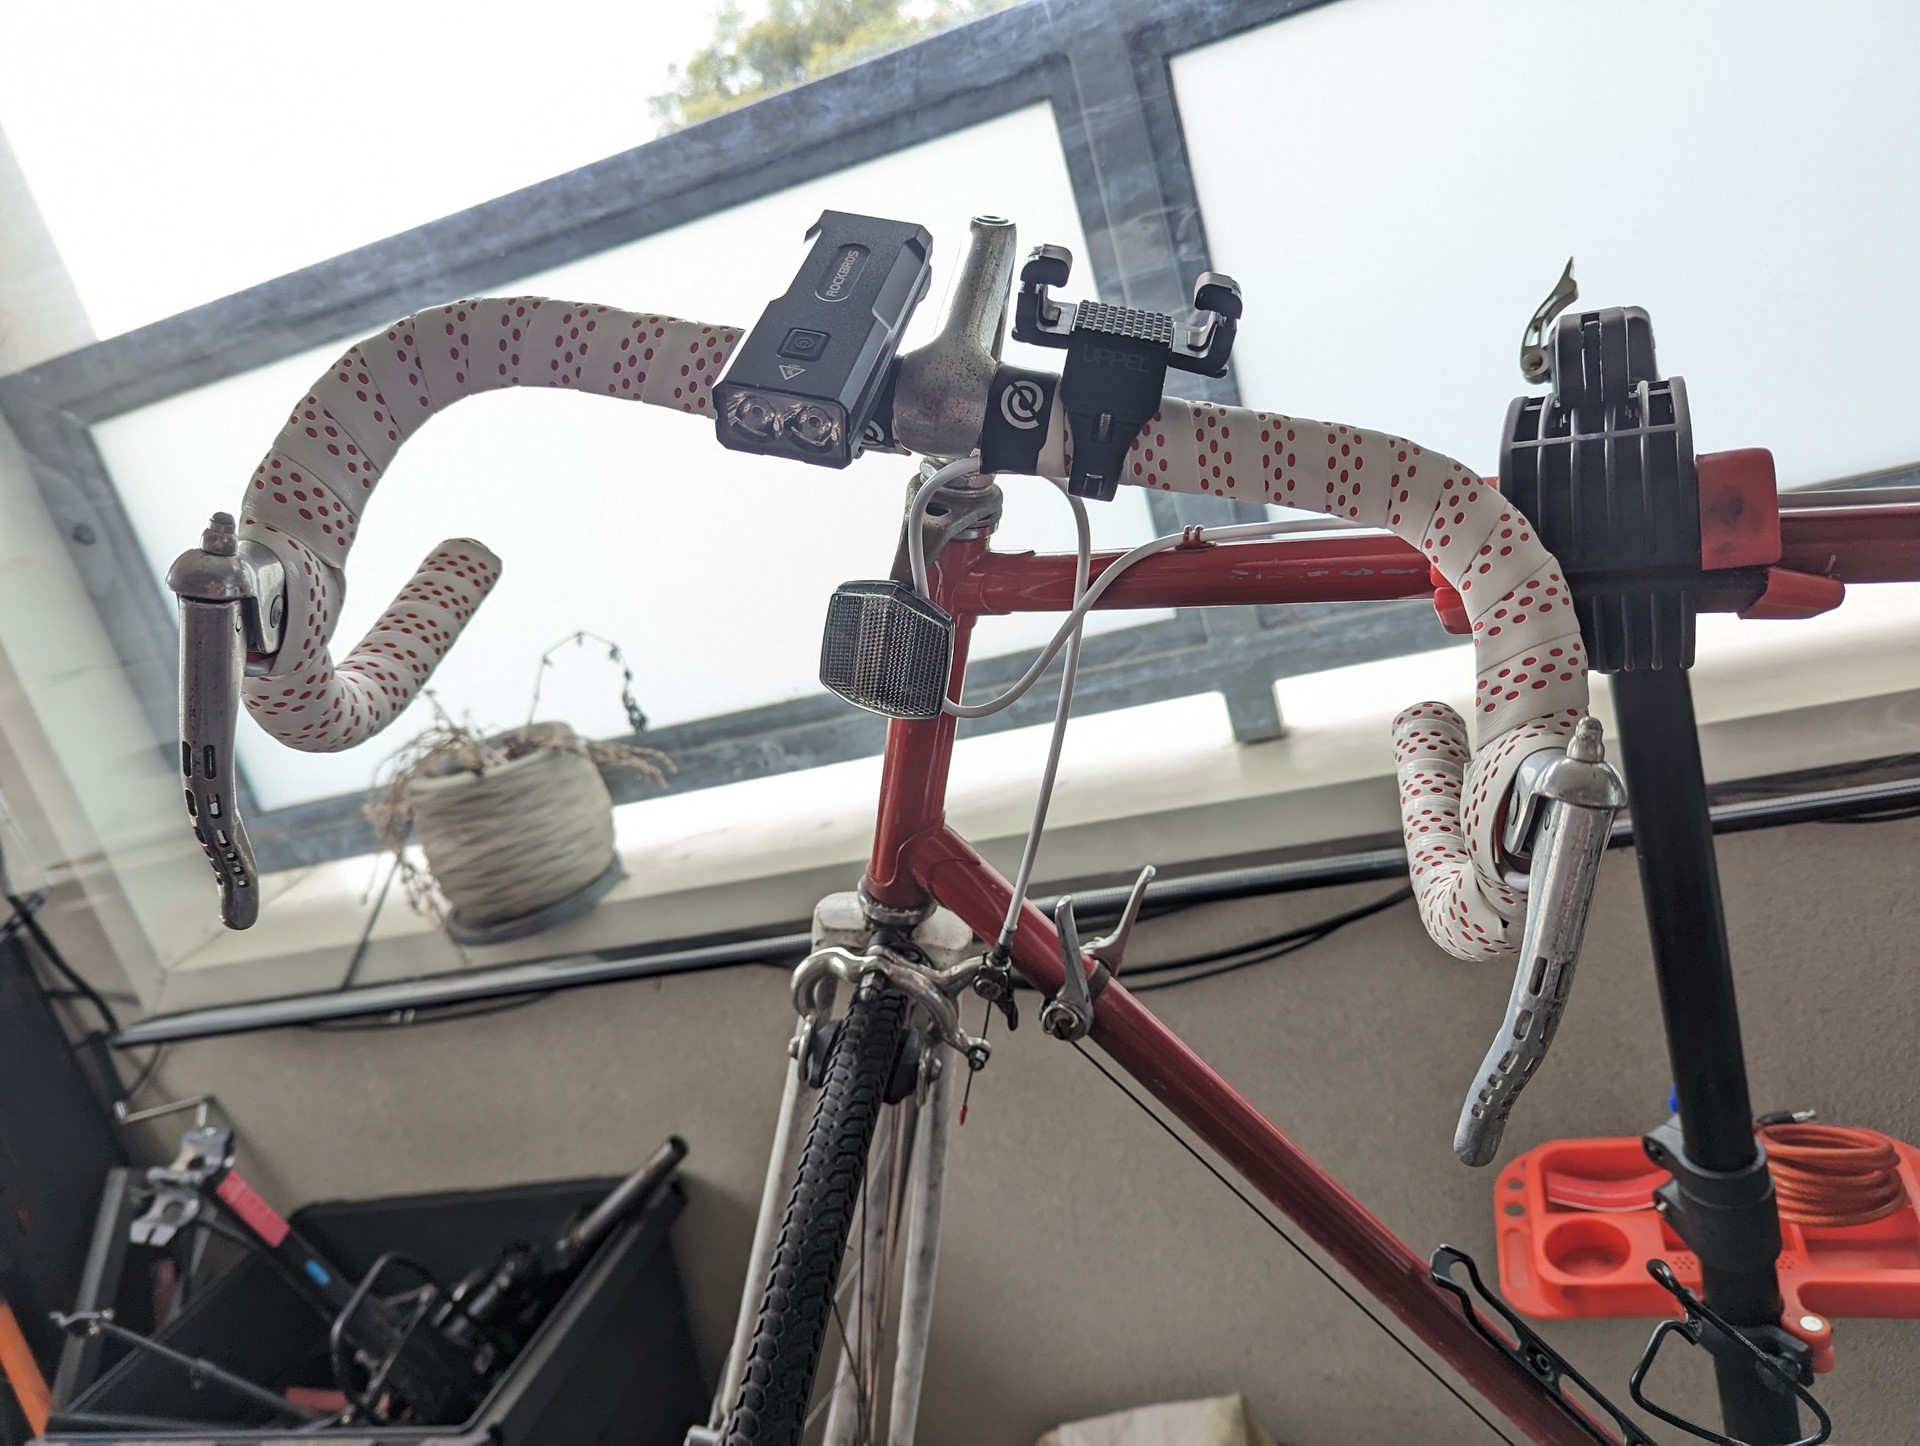
Handlebars of my bike showing the vintage brake levers
We have options though! What I plan on installing is what are called inline or interrupter brakes. These are an additional set of brakes that you can install. The idea is that these will sit on the top of the handlebars so that I no longer need to go into the drops to brake.

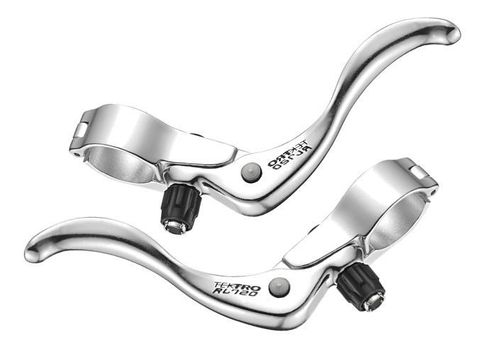
Two inline brake levers not installed

But how do you install an extra set of brakes when there is only one cable? That’s where the inline part works, but lets first look at how a normal set of brakes work.

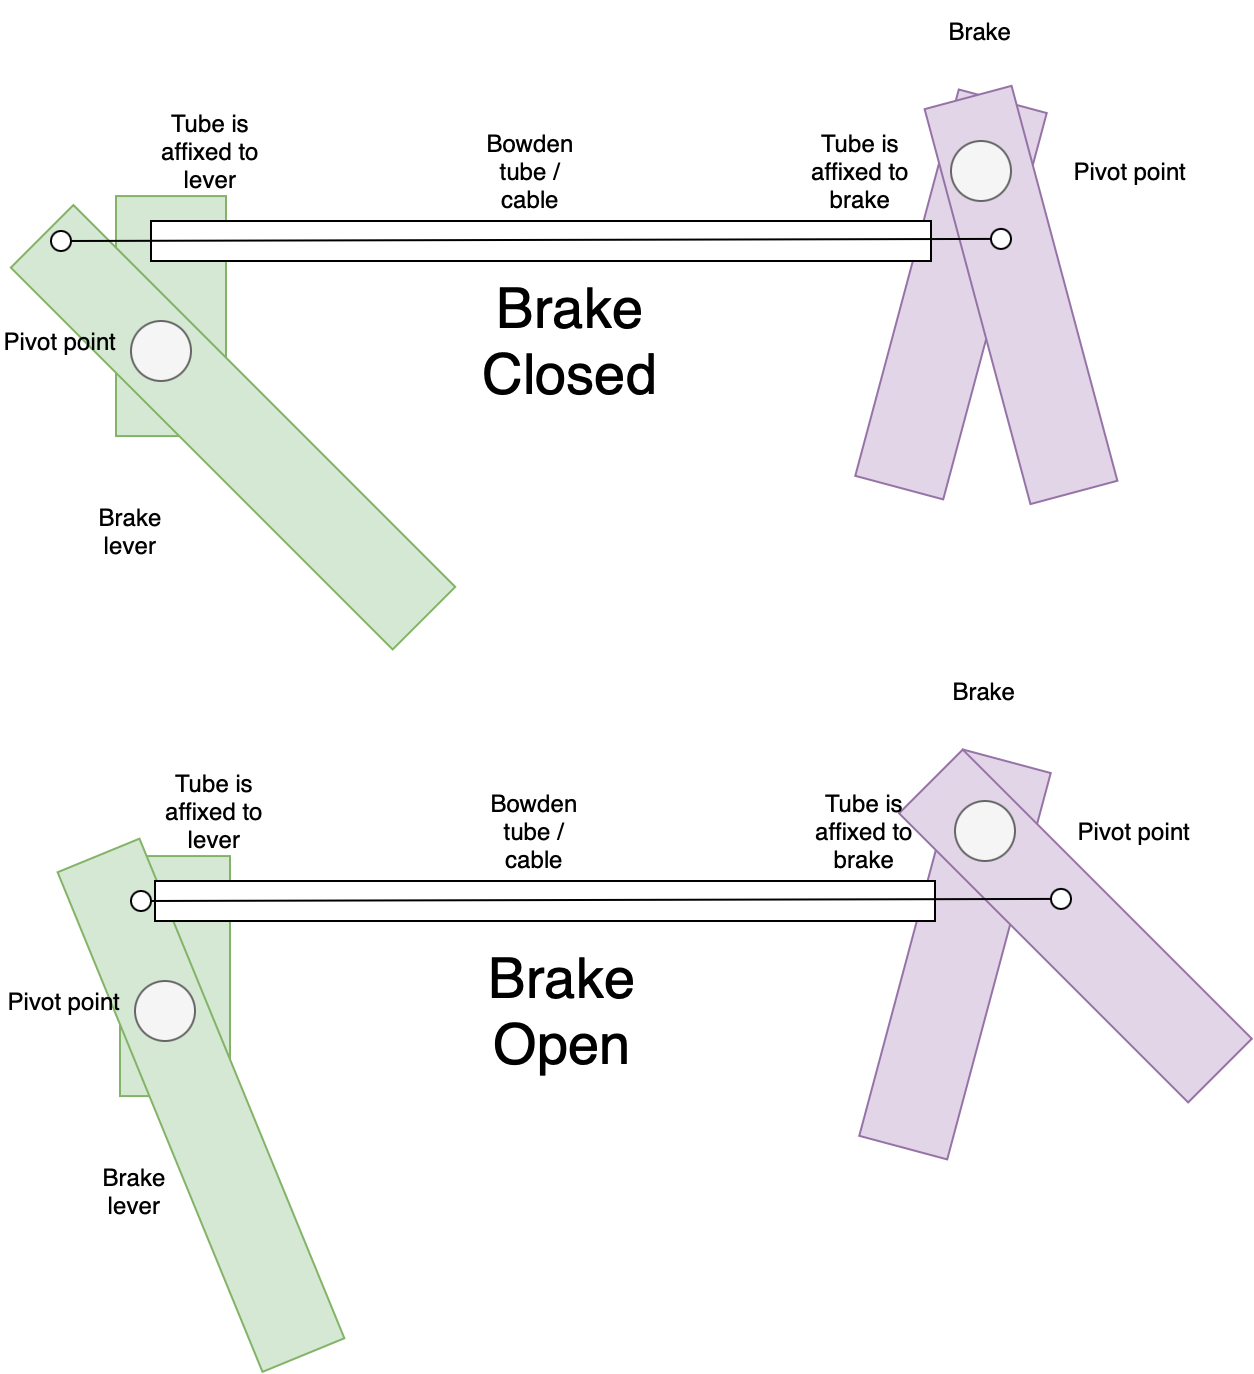
Diagram showing brake lever pivot points, fixed bowden tube and brakes. When the brake is closed the lever pulls on the wire in the bowden tube which in turn pulls the brakes shut

I’ve tried to create a crude diagram of brake fundamentals for bowden tube brakes. A bowden tube is, well a tube. It has a wire running down it. If the tube is fixed in place at either end you can push and pull the wire and the wire will push and pull from the other end. The final part is some pivot points, so when you pull on the brakes it pulls some wire out of the tube, that pulls the wire down on the brake end which squeezes the brakes together. Ok I get how bowden tubes work, what does this have to do with inline brakes….

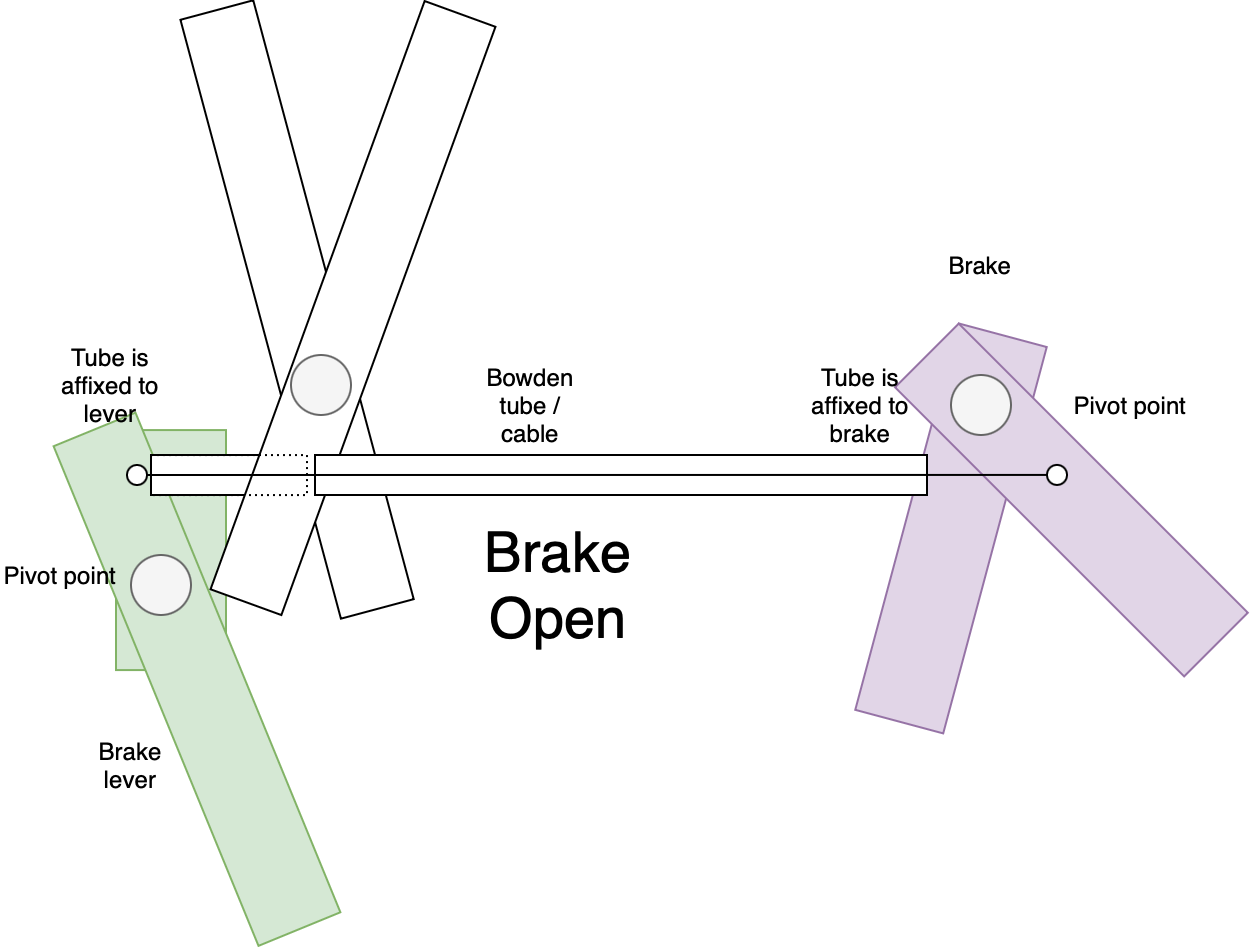
For inline brakes the brake levers connect the outside of the bowden tube. The actual cable is unimpeded and the other brake will work as normal. Hence the inline part. In this diagram the left bowden tube is physically attached to the lever arm behind, and while the right part of the bowden tube outside is connected lever arm on top.

The bowden tube has been split into two sections. The inline brake is in this section. When the brake is open there is no gap between the sections

When we squeeze these levers together like you would on a brake the two bowden tube segments pull apart, widening the gap between the two bowden tubes.

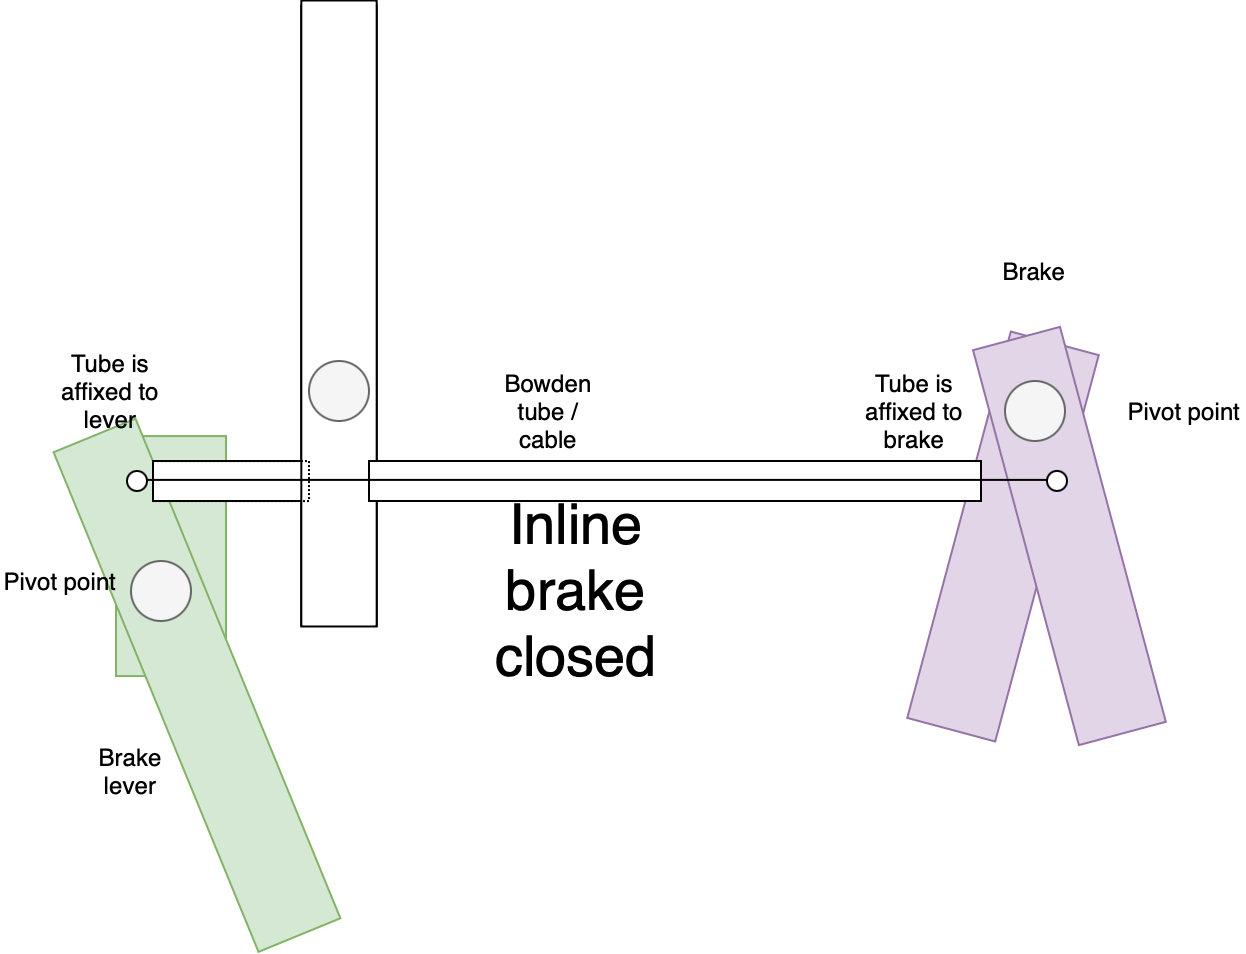
Now that the brake is closed the gap is opened up, pushing the two bowden tubes apart. The wire length remains the same causing the brakes to close.

The wire has to remain the same length however it now has further to travel, so this causes the wire to pull on the brakes…. hopefully bringing the bike to a stop. I’ve kept the wire the same length in these diagrams. I’ve also left the bowden tube the same length as well as that can’t shrink - so if we created a gap in between the tubes, where does that length go? We’ve effectively lengthened the bowden tube. In the real world the bowden tube gets slightly pushed aside, you do need to account for the movement in the bowden tube when it comes to routing and taping the tubes.

Installing these takes up handlebar space. I’ve already moved my phone mount to the stem, however I might need to rethink my bike light.

Finally, lets talk brake callipers. While braking on JSON is fine, I do want to make it better. Especially when I loan out my bike to someone else to ride. It currently has its original single pivot brakes, and the springs are a bit worn. Coupled with wheels that are over due for trueing it can lead to a fairly mushy experience if your not used to it.

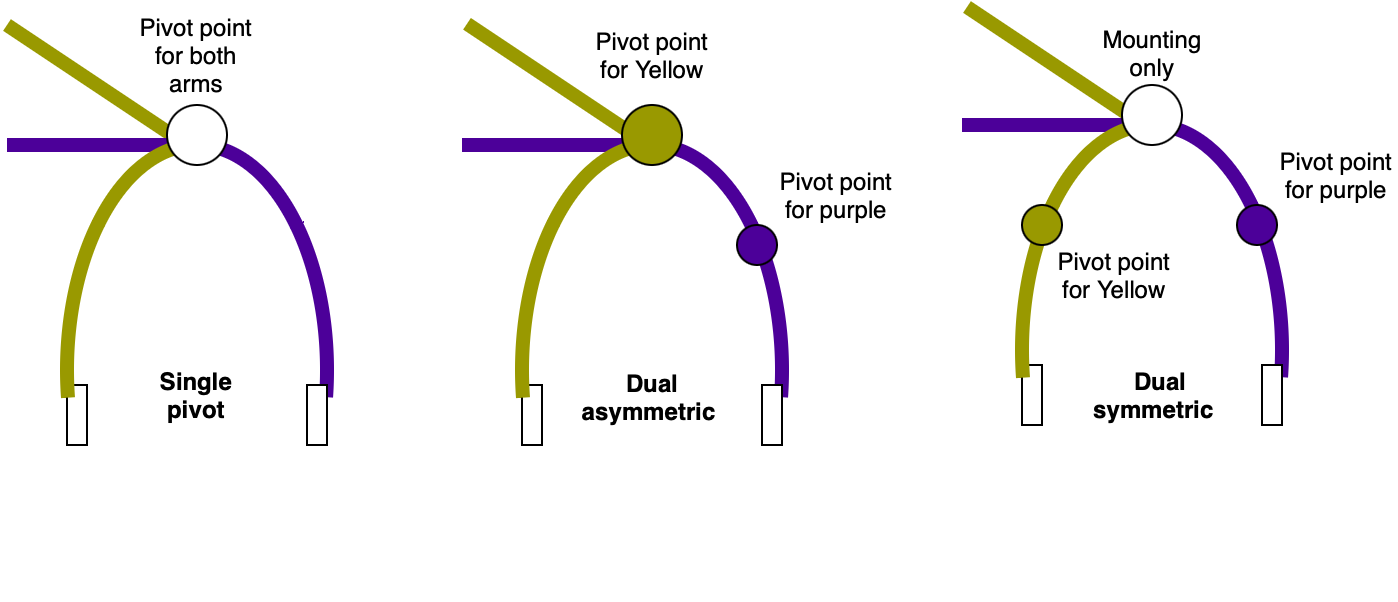
Comparision of single pivot, dual asymmetric and dual symmetric brakes. Single pivot has a single pivot point at the mounting point for the brake. Dual asymmetric has an additional pivot point for one side of the caliper. Dual symmetric has two pivot points for the brakes along with the mounting point
So there’s two advantages to switching to dual pivot brakes. One is that due to the new location of the pivot point there is more mechanical advantage on the brakes, allowing them to activated easier. The other advantage for me is that they easier to center, align and most importantly have a brand new spring that isn’t worn out - allowing for much closer adjustment to the rim. I’m also going to try some new brake shoes as well. The current ones are most certainly not original, so I don’t mind changing that out.

That’s the plan.