So my next blog post was meant to be on how the brake install went. The good news is the brakes work great - I’ll get into more details on that later. HOWEVER while riding out to somewhere nice where I intended to take some nice picture I had a bit of an incident - so lets talk about that first.
I split off the Bay trail to grab some coffee, eat some food and slap on some sun screen. While attempting to rejoin the bay trail I found myself a little bit confused as to the route and ended up on a footpath rather than a shared path. I spotted where my turn was meant to be and while focused on that it hit me. Well more specifically I hit it. A low hanging branch.
I’m not sure if I didn’t see it, correctly identify it’s height, or if I stood up to ride, but I hit it - likely at around 12km/hr. Lucky I wasn’t going faster. Next thing I know I was on the ground wondering wtf just happened. I remember seeing my Garmin count down from 6 seconds (I believe it starts at 30 seconds so there’s 24 seconds somewhat unaccounted for). Since I was on the ground, still processing everything and unsure if I was ok I let the timer count down.
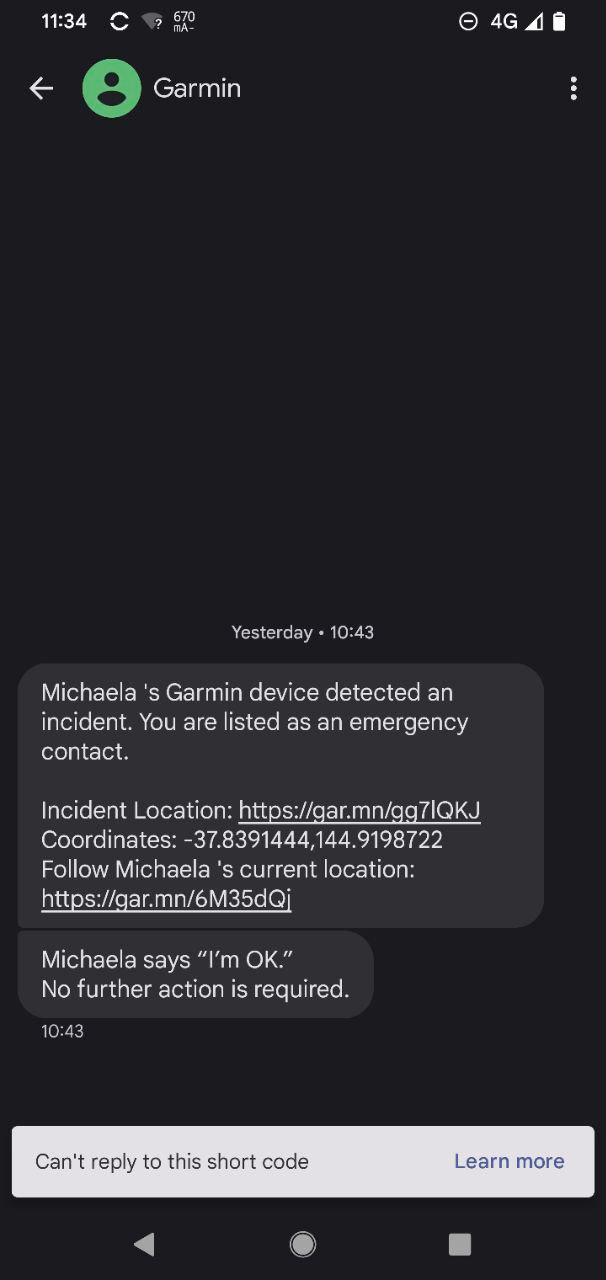
This triggered an SMS with location details and starts live location sharing with my partner. After I had worked out that I was somewhat ok I stopped the incident on Garmin, and sent a message to say I was fine.
Since I’ve had my Garmin Fenix 6S Pro I’ve recorded 585 activities and only 2 other times have I had incident detection trigger when I was fine. One time was when my watch band broke, and the other was mounting a curb and coming to a hard stop. Both of these are some what reasonable that incident detection triggered.
I am very glad for this system, as had I passed out it would have been over half an hour before someone would otherwise notice (this is the time I sat next to my bike recovering)
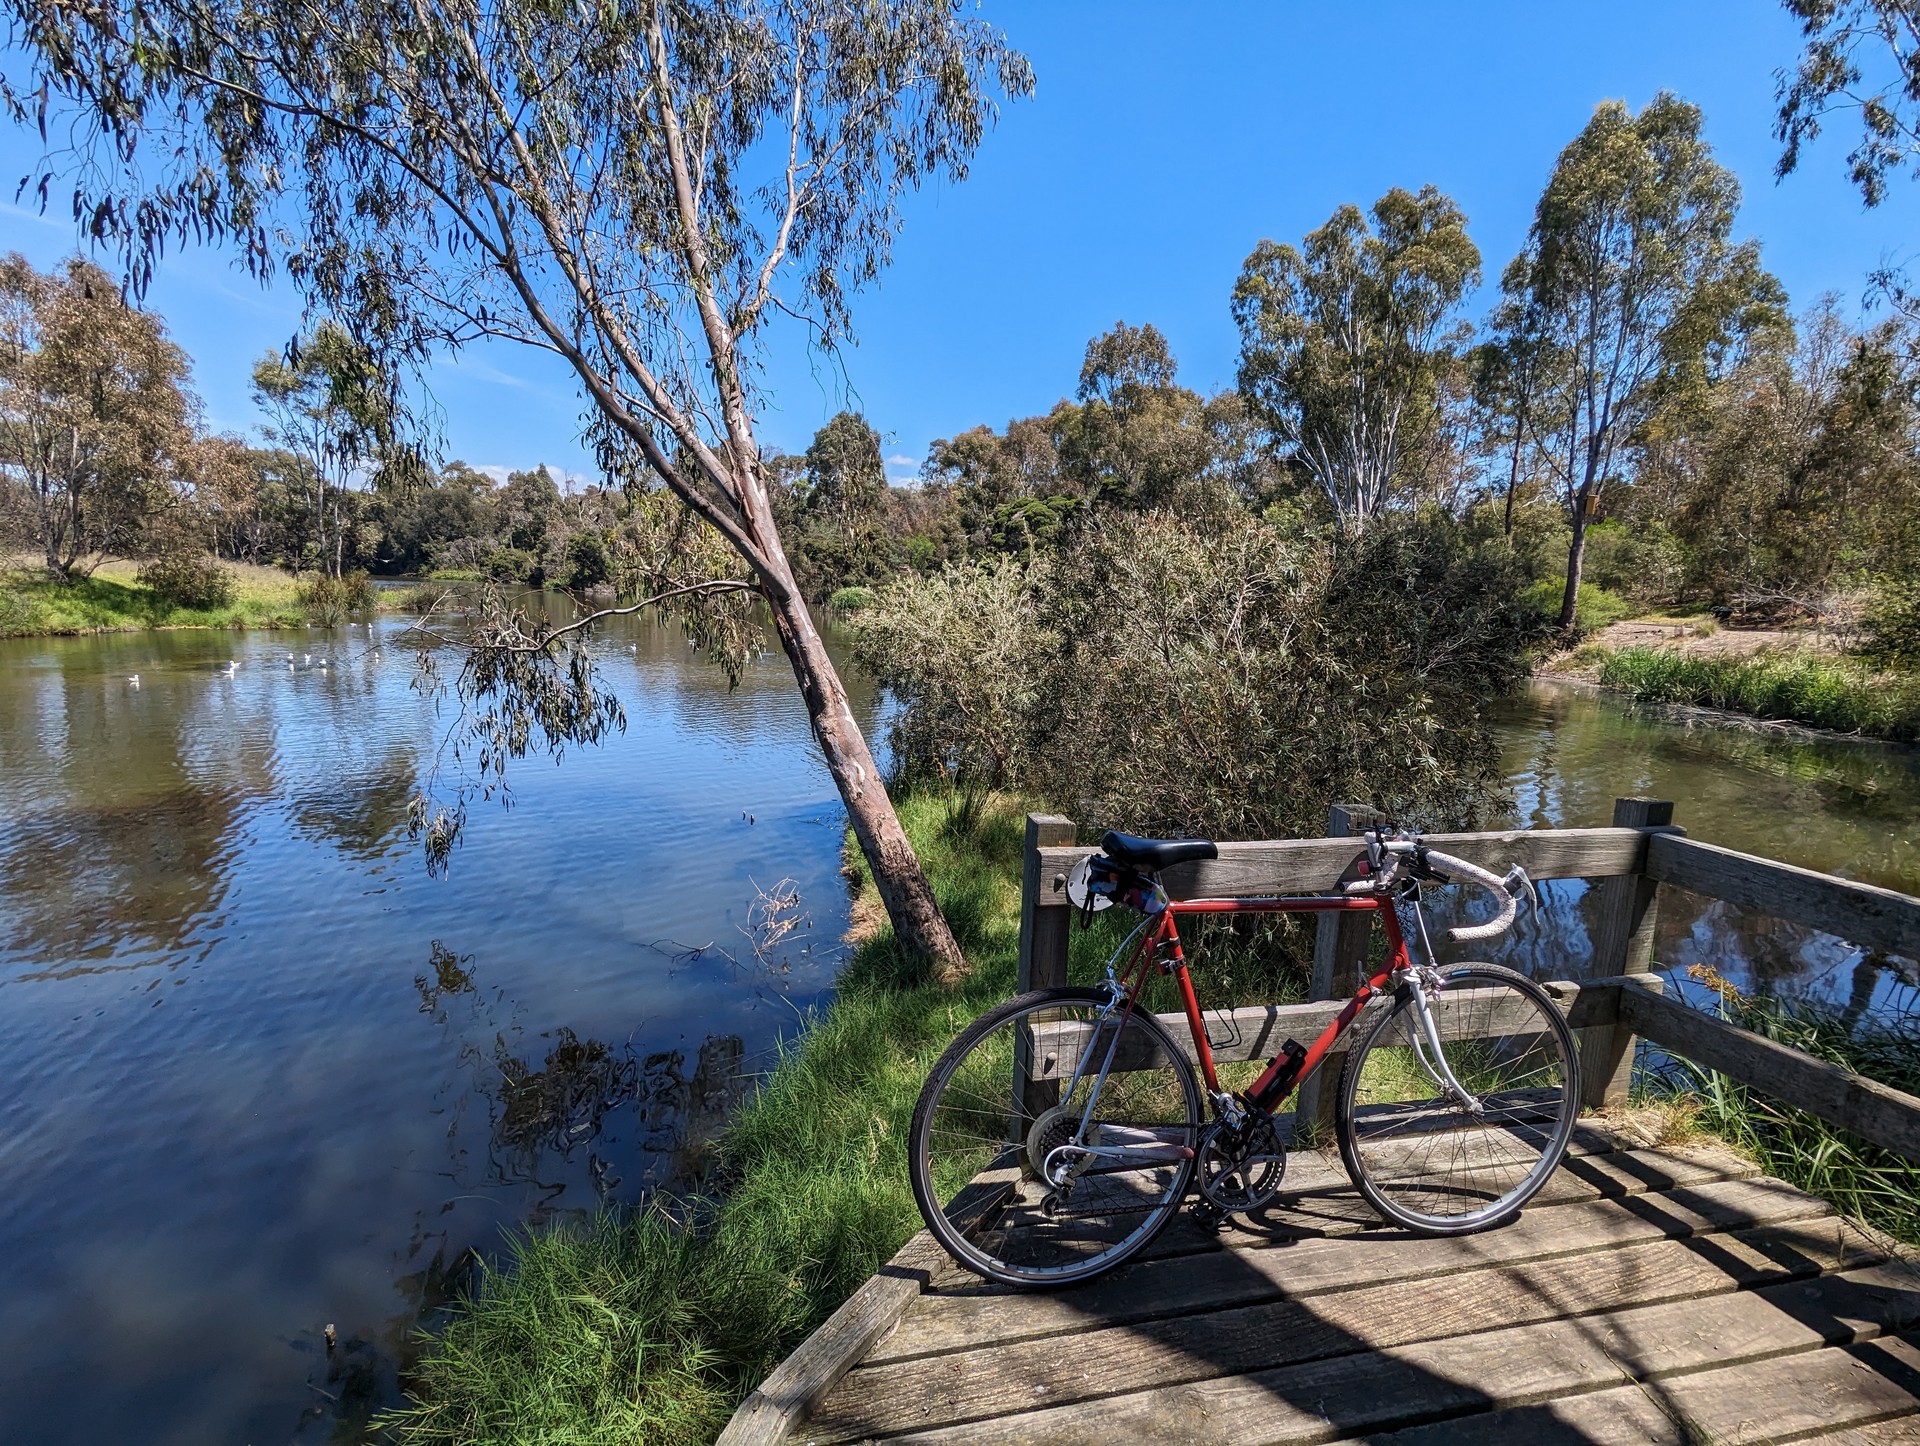
Given I was riding as an alternative to running for recovery purposes I’m not happy about the incident.
So with that out of the way, let’s talk brakes.
Inline brakes
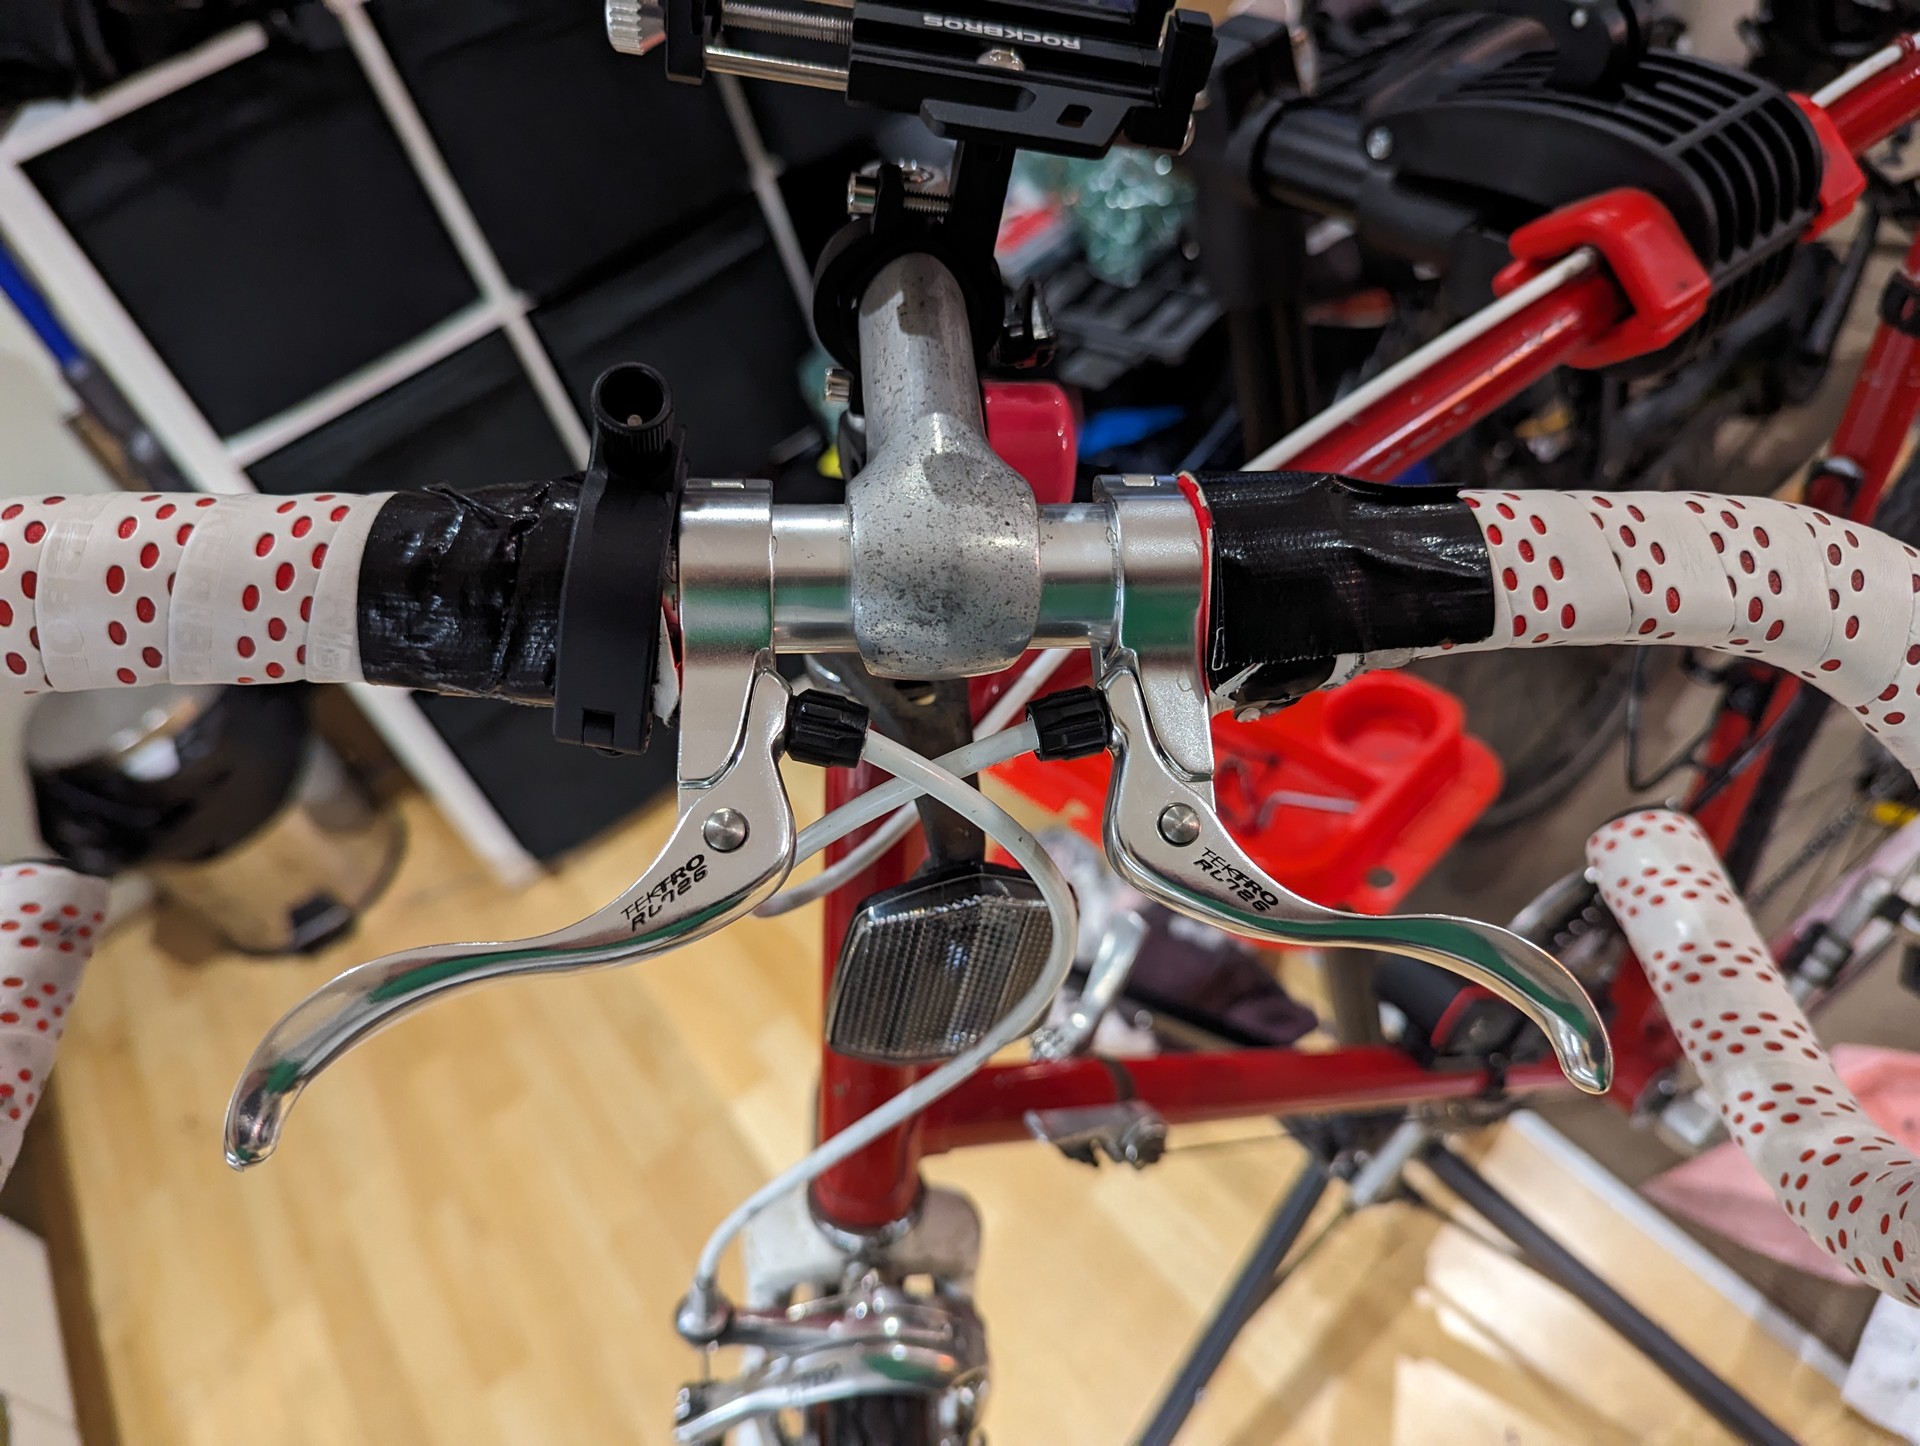
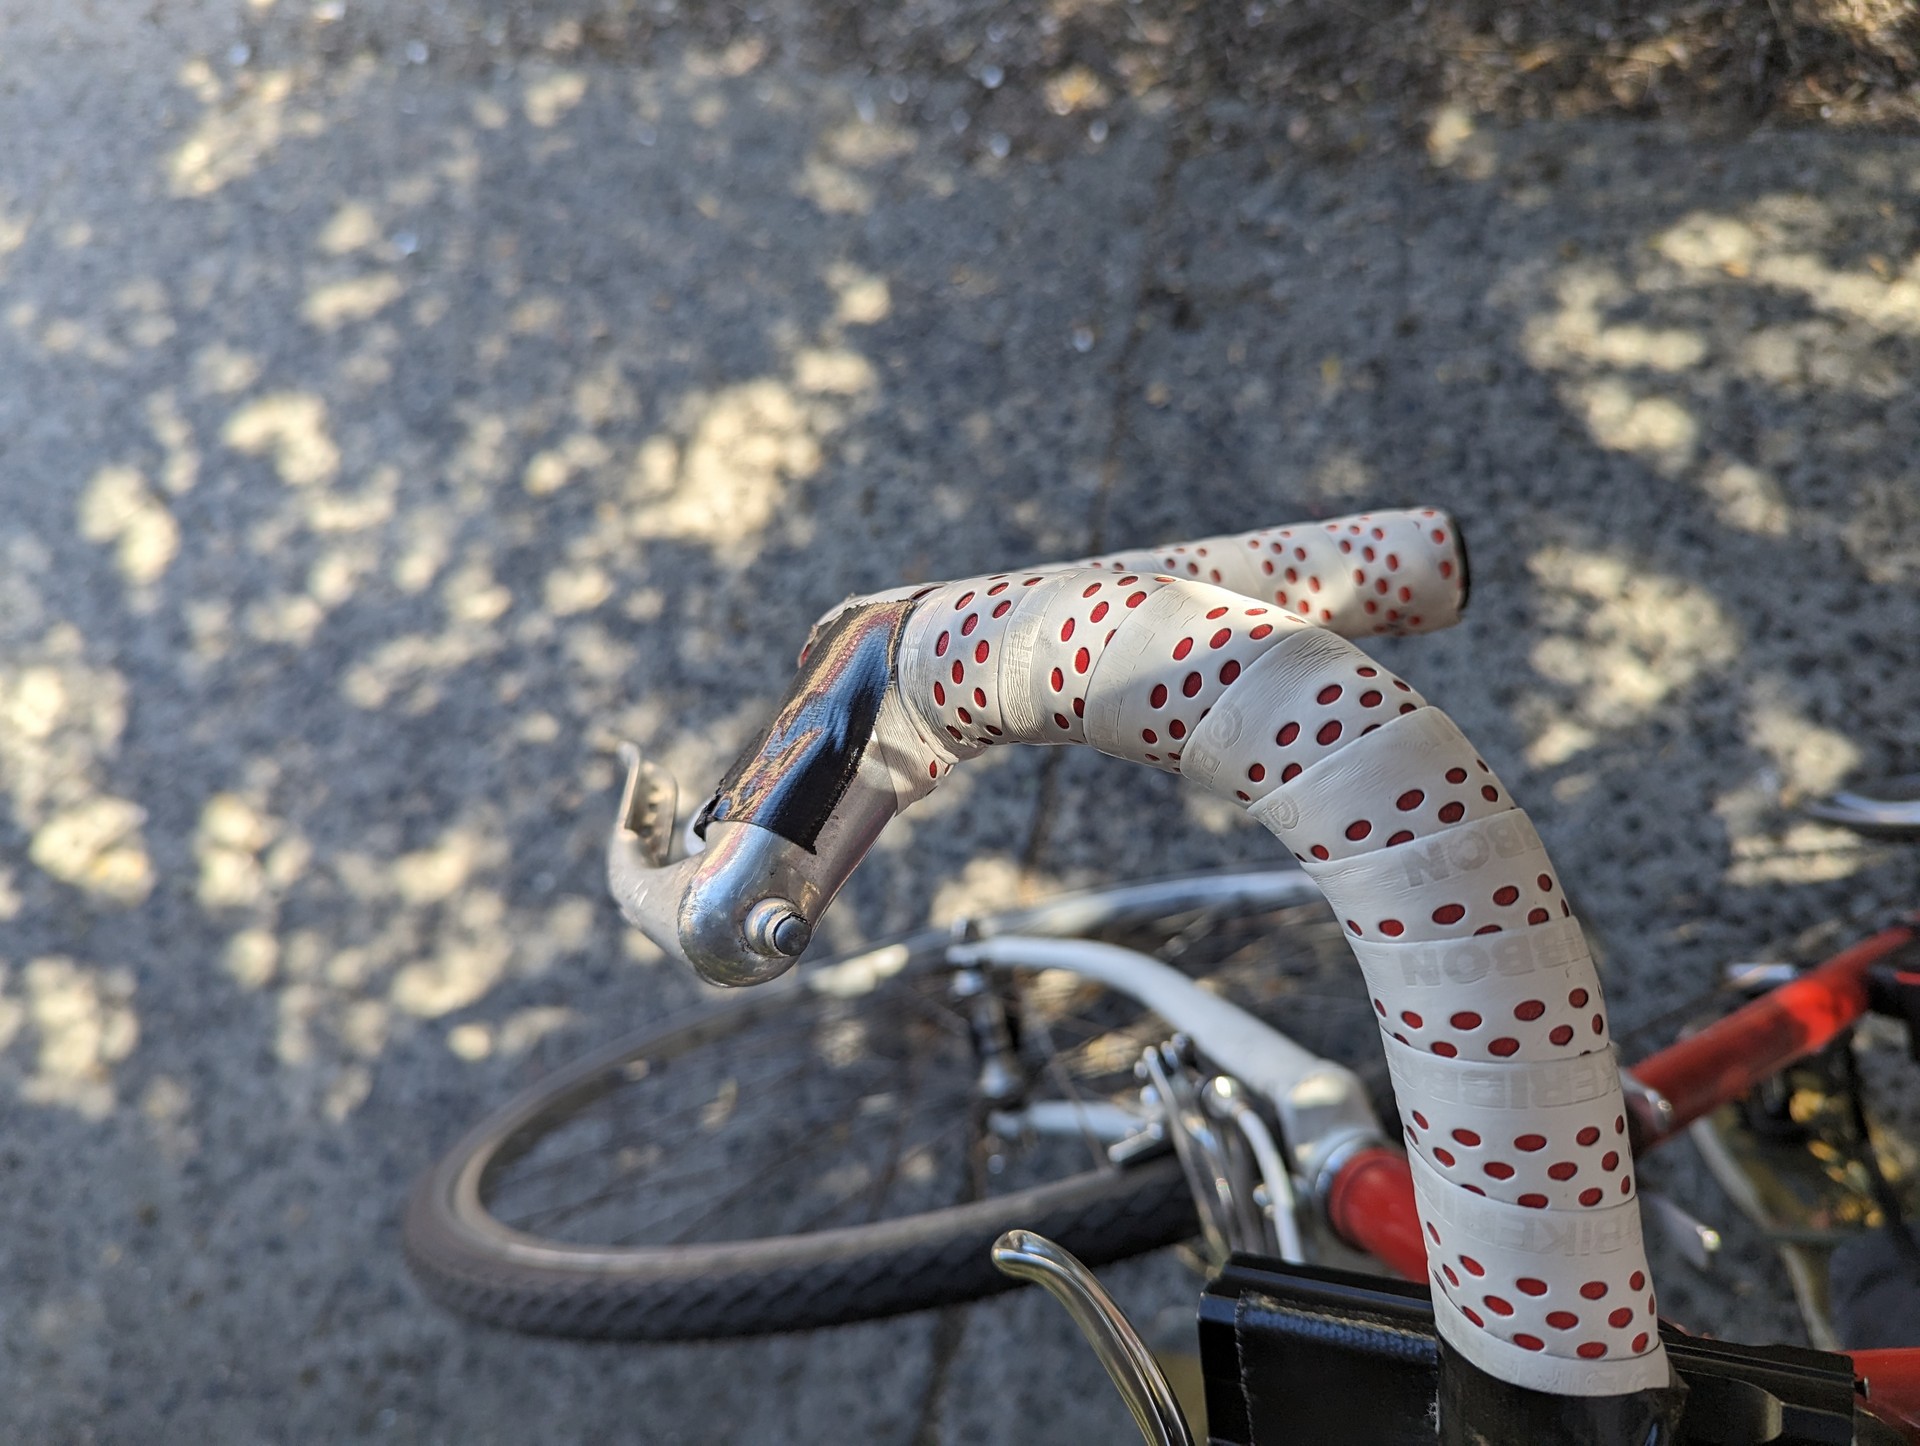
These were a breeze to install. I’m missing some end caps here and the grip tape ends is a temporary thing while I work everything out. The hardest part was working out how to mount my light given all the space is taken now by the brakes. I have end caps in storage but I wanted to test everything out first.
First off, the myth that inline brakes make the system spongy is clearly false. If you go back to part 1 of this series you’ll see that the brake cable is uninterrupted for inline brakes. There is no reason why adding inline brakes would make the system worse. My suspicion is that people think that inline brakes are spongy is that they are often installed on brake systems that are already spongy. The inline brakes themselves have a lot of pull - keep this in mind.
While I still haven’t gotten used to their presence, I have already adjusted my riding style. I’m sitting in a much more comfortable position while casually riding and not having to get into the drops to slow down. This is great in the city. I still find myself sometimes moving my right hand down to the original lever out of habit, but a lot less now. Tight corners are now much easier to manage.
And the back brake is getting a lot more use now - since I don’t have to get into the drops I now apply a lot more even braking. Where this is extremely useful is red lights and other stops. Previously I would brake to slow down, stop braking, move my hand to the gear lever to move into the lowest gear, then move my hand back to brakes to come to a complete stop. Now I can use my rear inline brake while changing gears with my other hand and perform the action all at once.
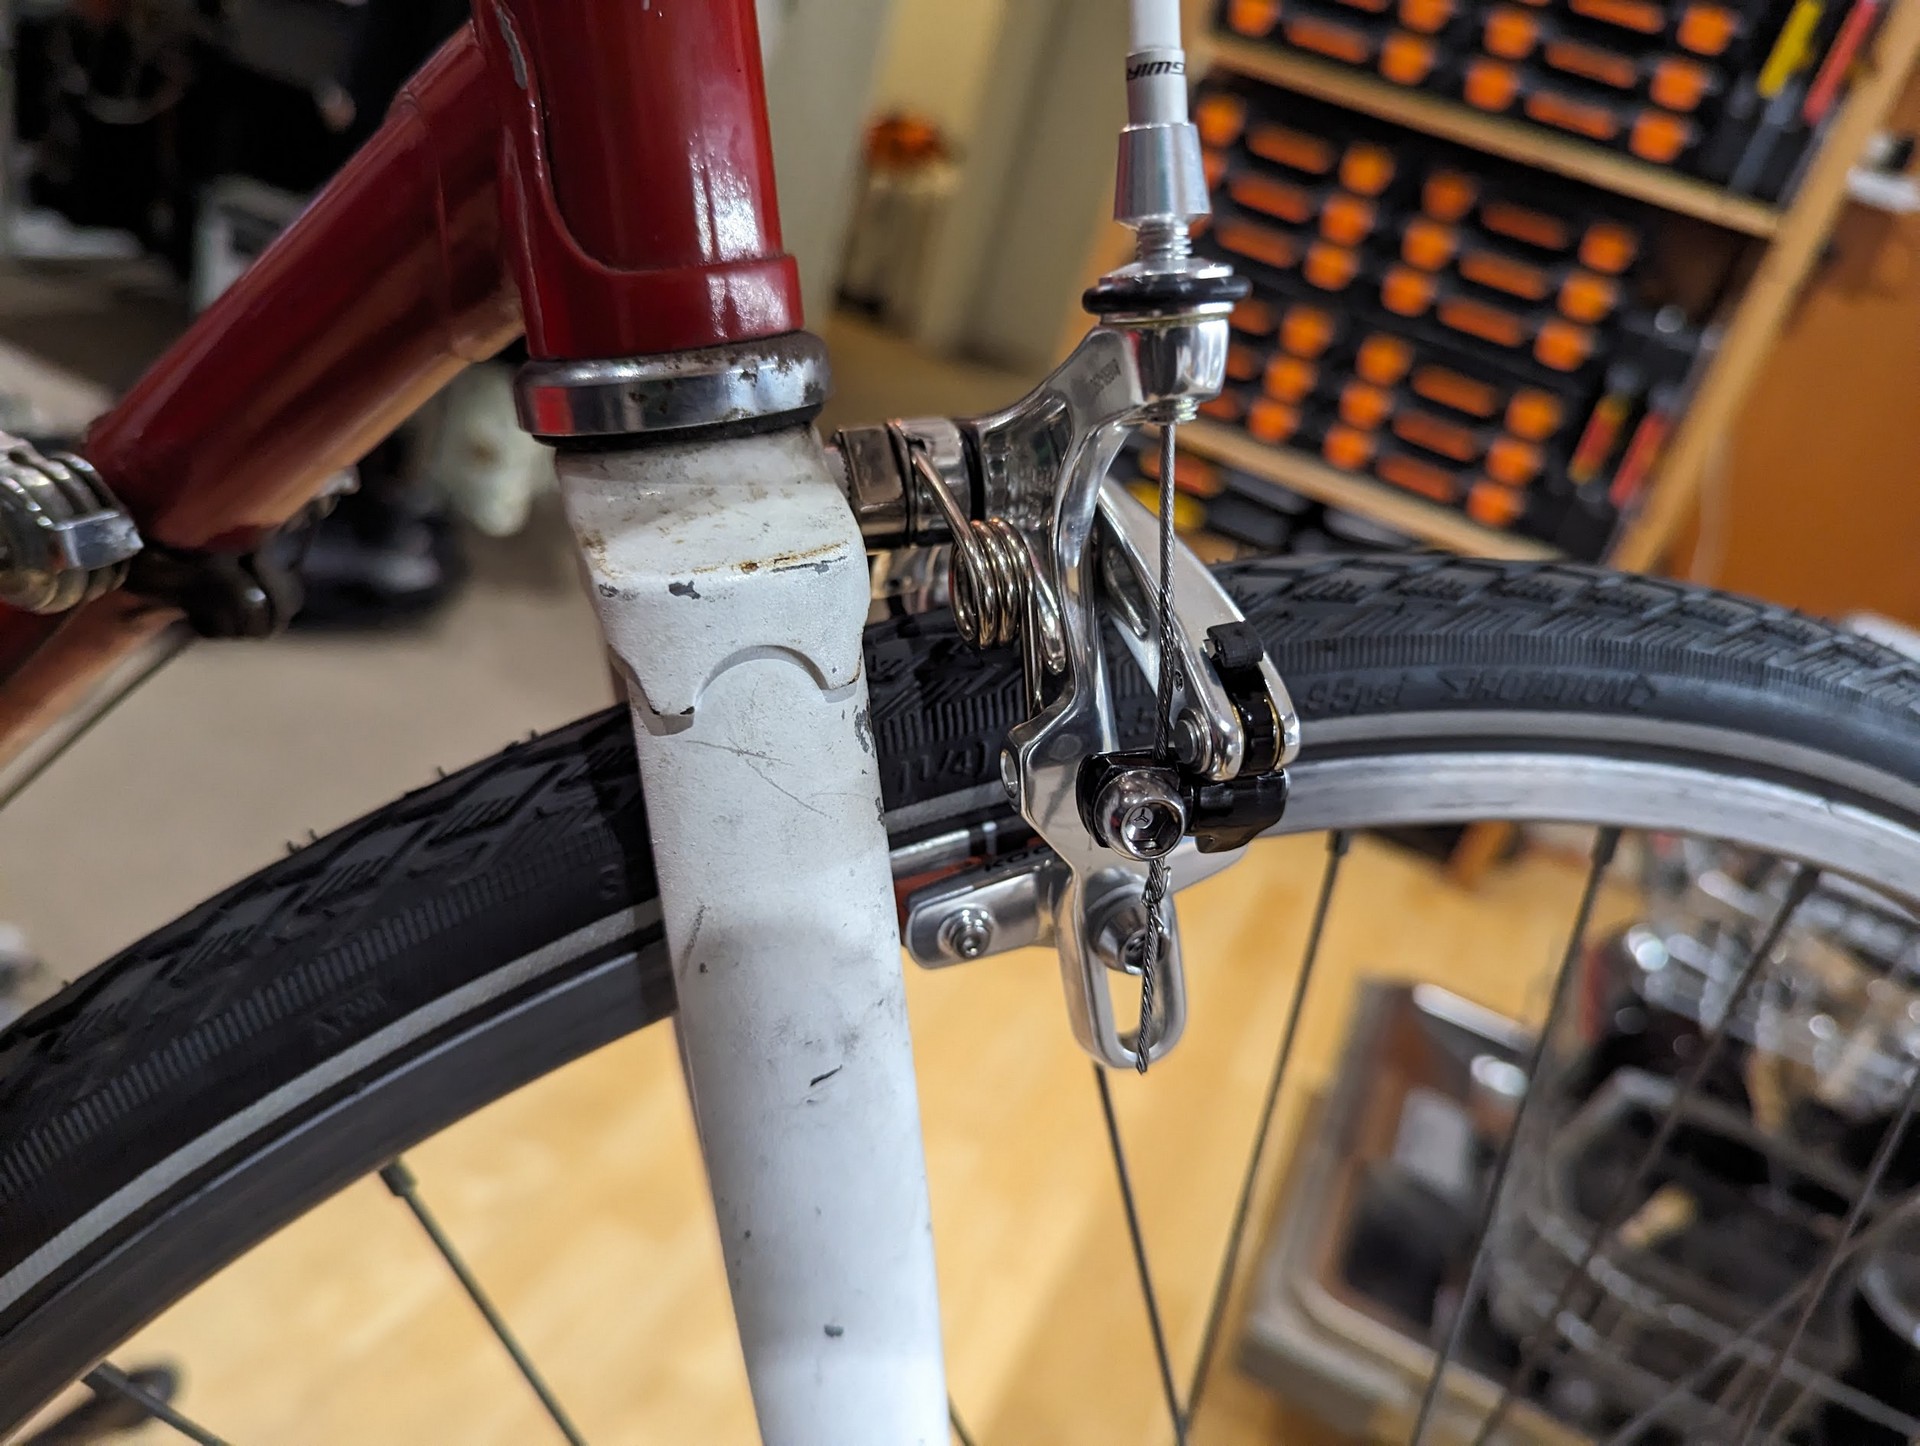
Dual pivot brakes
I ended up with the Tektro R559 dual pivot long reach brakes. The frame / wheel combination I have means that I’m on the higher limit of typically short reach brakes and the lower limit of typical long reach brakes. If I ever buy a new set of callipers again I might try to gamble on short reach brakes. Currently though the long reach brakes do give me the option to switch in a 700c wheel….
So while you can sometimes pick up traditional nut style brakes, it’s more common to find recessed style. These have a shorter shaft and a long recessed nut that is used to hold the brakes in place. I purchased these brakes knowing that the recessed style wouldn’t fit my bike out of the box.
There’s some solutions to mounting these brakes though. The most common is to drill out the back hole (usually using a right angle drill for the rear brake) to allow the recessed nut to fit.
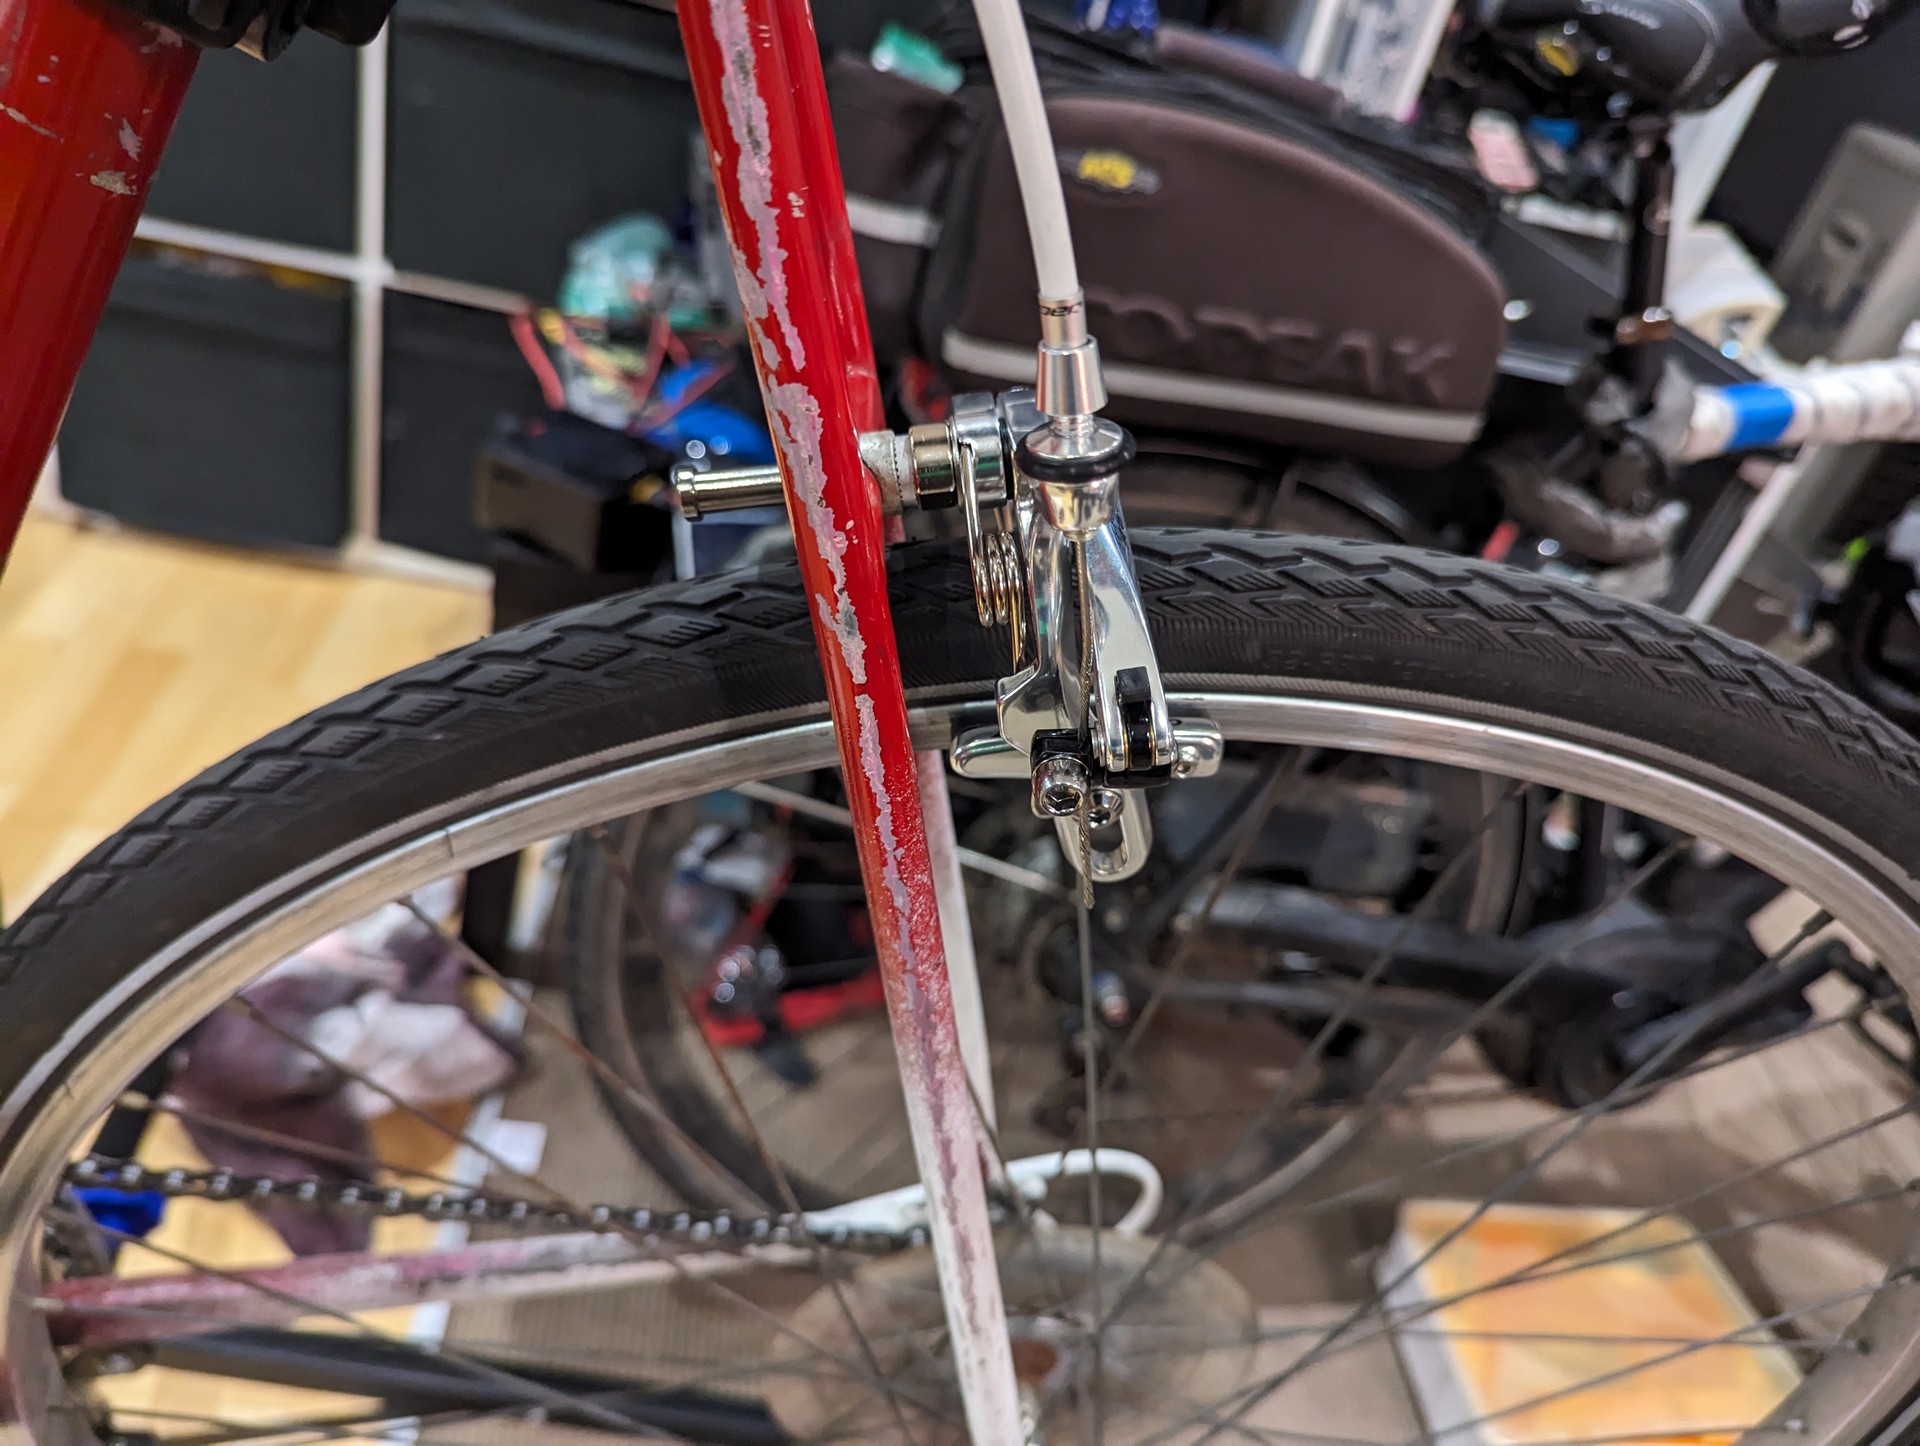
The other option that’s also sometimes available is to use the front brake (has a longer shaft) on the rear brake. How do you install the front brake then? For me I was lucky enough to be able to fit the nut through the bottom of the forks. This only gives half the mounting distance than typical however I believe it’s plenty.
For both the rear and front shafts I found I could only use one of the wedge locking washers, but once again - I feel like this is plenty. If this doesn’t provide enough friction the outcome is that the brakes could become unaligned and start rubbing while riding. It’s not catastrophic failure.
I’m happy with having the brakes mounted this way as it means I don’t have to make permanent changes to the bike frame and if I want to I can reinstall the original brakes.
Other changes
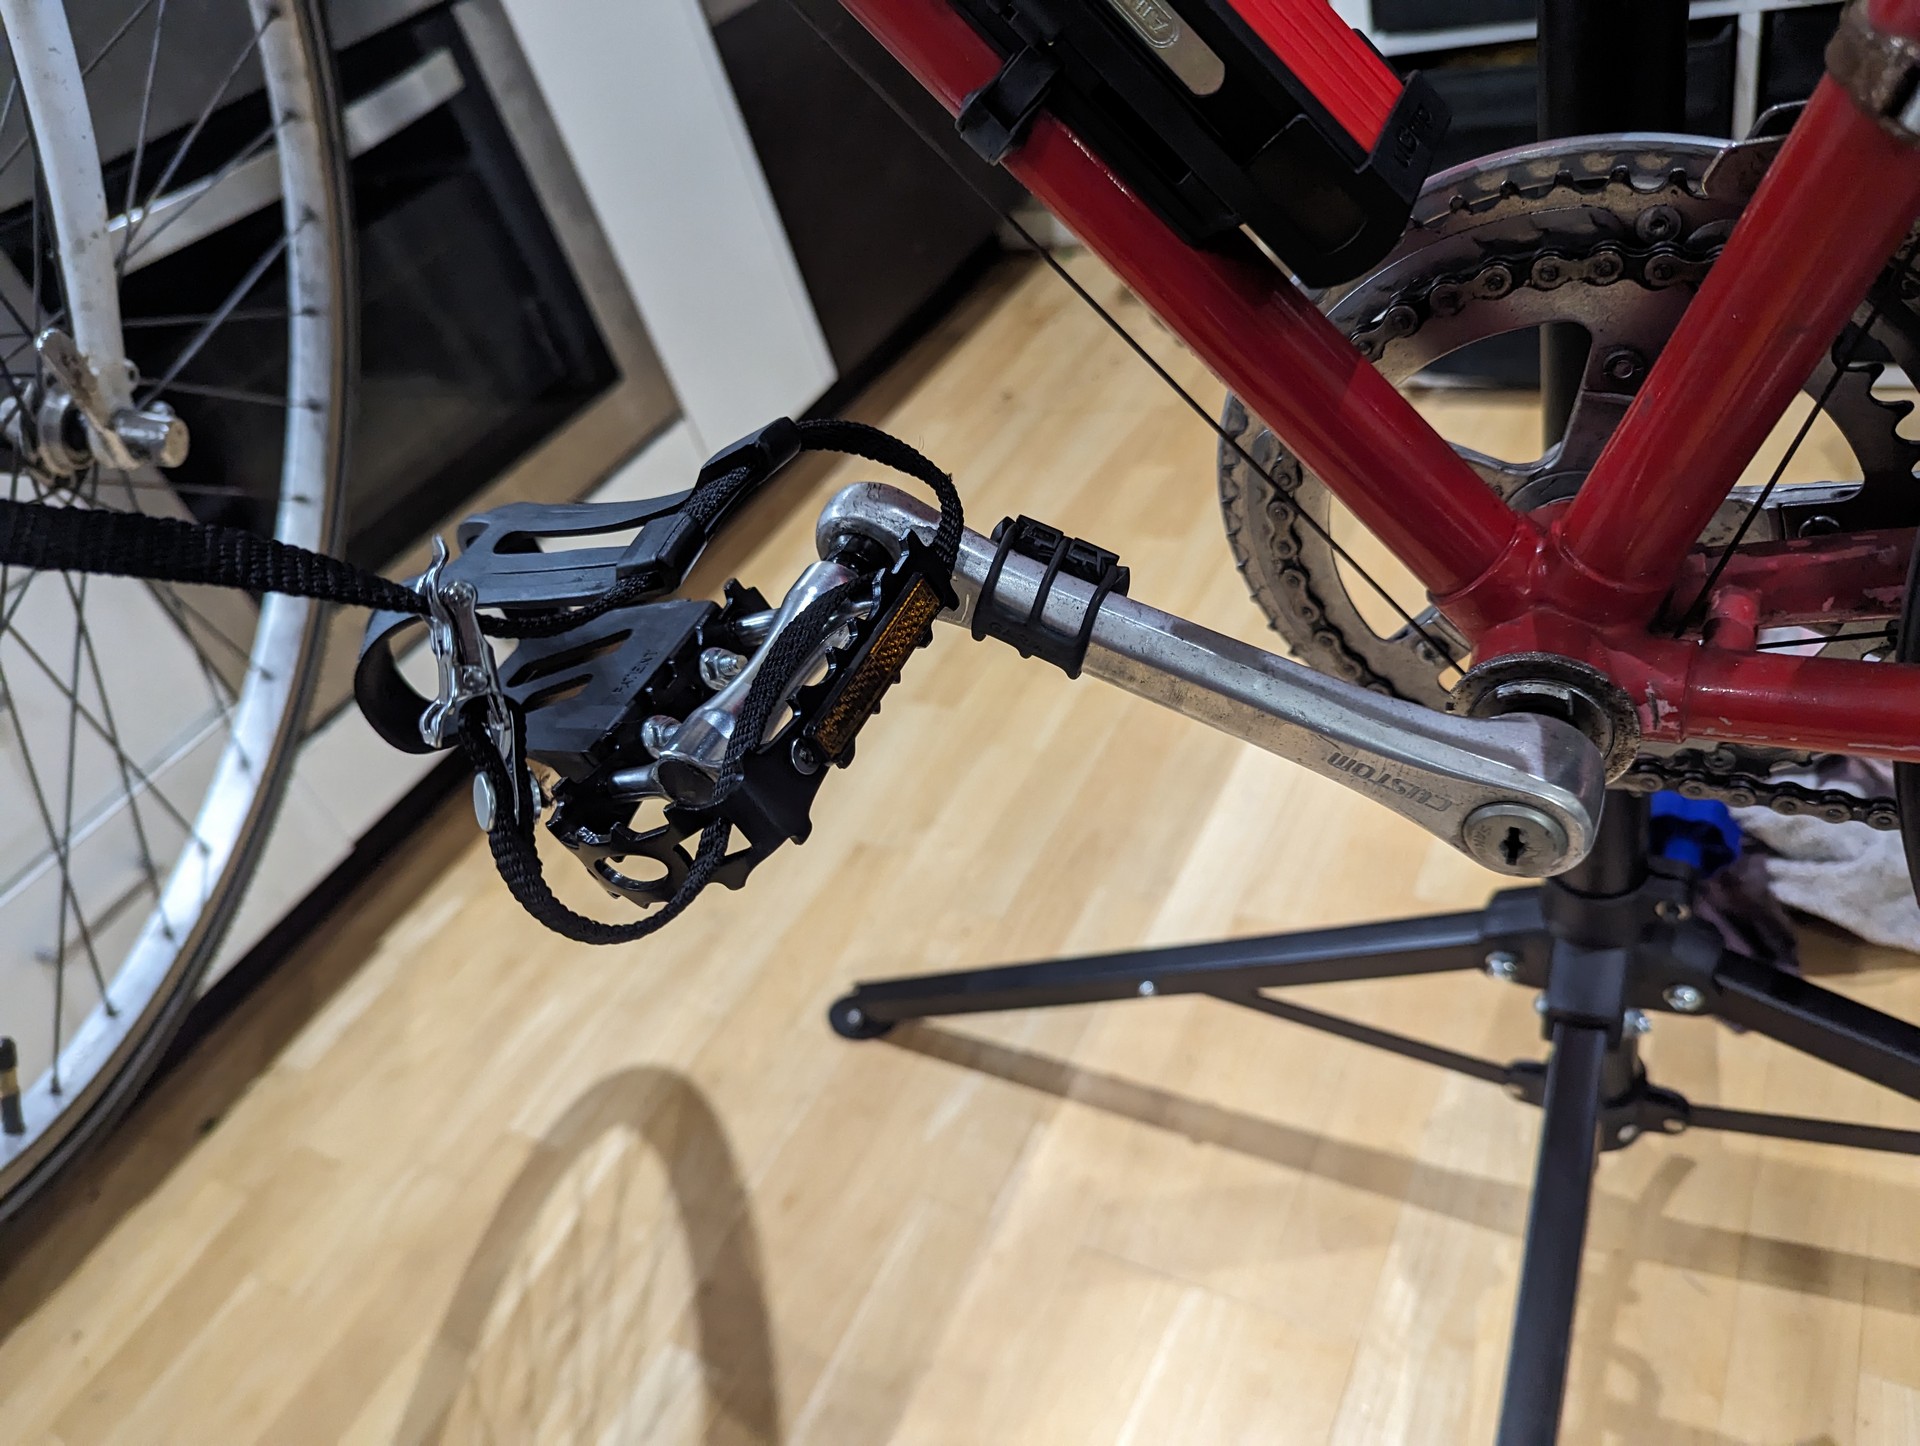
I’ve installed some new toe cage peddles. I was a bit nervous installing these again as they can add a certain amount of risk in casual riding, but I’ve been pretty happy so far with them. They certainly look the part. Unfortunately the NOS I purchased, the grease had gone bad. I’ve tried my best to get some oil in there, but I’m going to either flush out all the grease somehow or do a rebuild. Neither of which I can do easily right now.
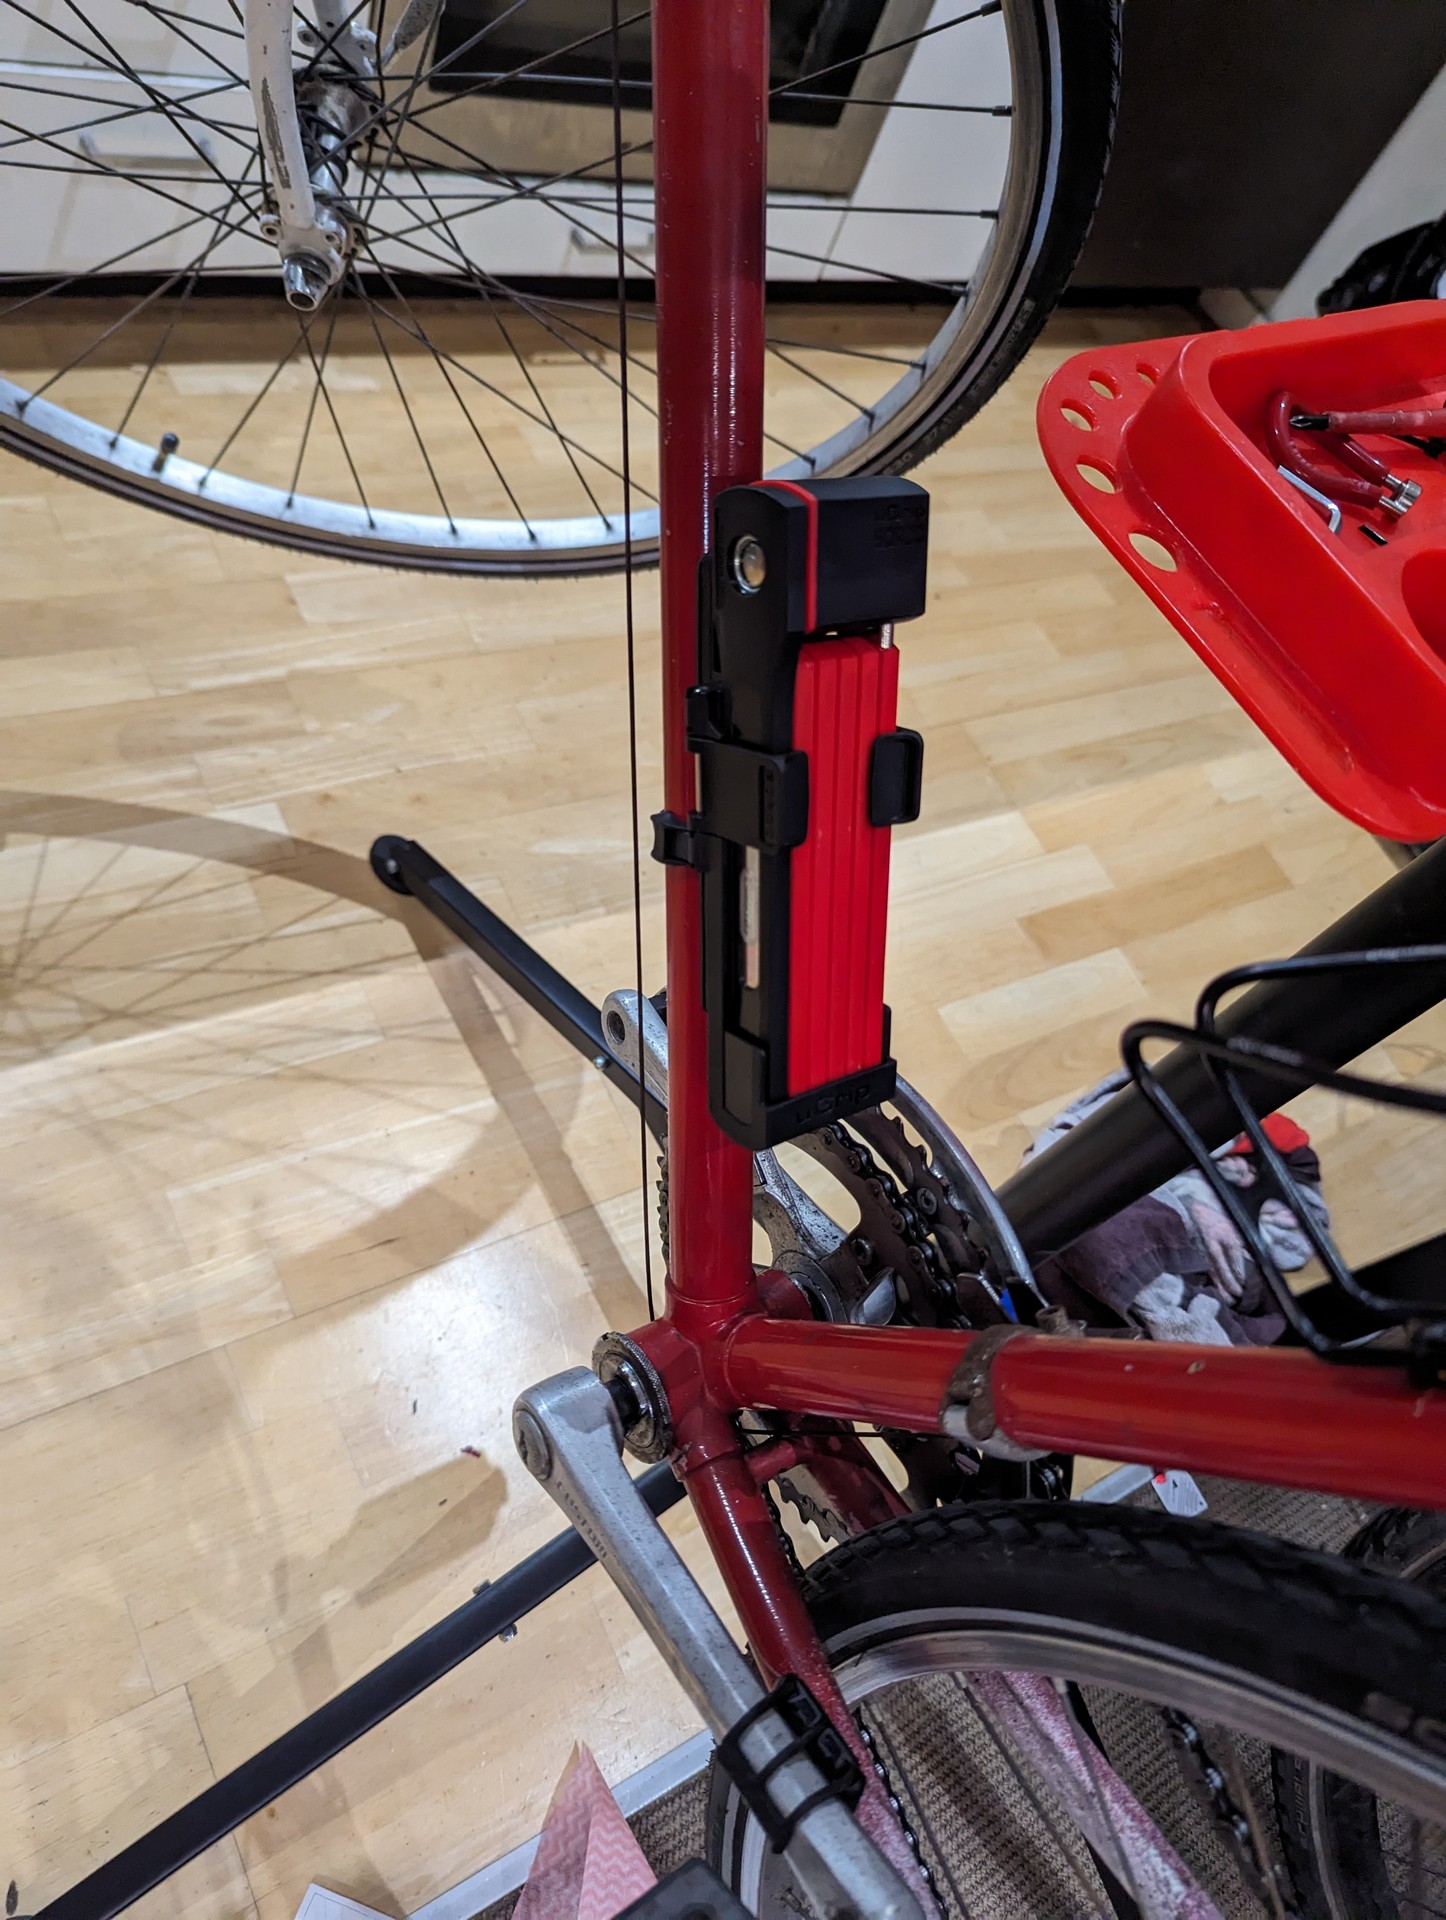
Lastly I’ve updated my Kmart bike lock to ABUS. Hopefully no one steals my lock. This lock feels very over engineered but I like it. It’s spring loaded and pops out when you unclip it.
That’s all the upgrades I want to do for now. Sometime next year I plan to strip all the parts off, de-rust, de-paint and give it a brand new paint job.