I’m currently waiting for my bike parts to arrive today, but in the meantime I thought I was explain to y’all the plan.

JSON is my road bike. I use it to get to many things. It now gets very regular use, sometimes short rides, sometimes ride that I consider long. JSON is a vintage road bike, I don’t know when it was manufactured or by whom. Given it has Suntour 7 derailleur I’m guessing mid 80s. While these bikes are amazing (please try one), given the age they do come with some design problems. The biggest has to be braking. While I like to keep things fairly original on the bike, given that I doing more and more city and busy area riding I want to make the bike a little safer.
Now the brakes work just fine on JSON. The major problem comes with where the brakes are. If your not familiar with road bikes, those curved down parts of the handlebars are called the drop bars. The idea is that when you want to ride fast you “ride in the drops” - that is move your hands to the bottom of the handle bars to get a lower position. In contrast if you want a more comfortable ride you might ride on the “tops” or like the picture below is doing riding in the “hoods”. The hoods in a modern road is the combination gear shift and brake controls - well the hood is actually just the cover on top….

I however don’t have a modern bike, so I can’t ride on the hoods. Even if I did ride on the sides I don’t get enough lever force to correctly apply the brakes. This means that if I want to brake I have to be in the drops. When I’m riding around the city or busy path ways I’m often sitting upright to get better visibility and stability at the lower speeds. At the moment I have to choose between being in the drops for braking, or upright for visibility and flexibility - often I end up riding in an awkward halfway position with one hand in drops and one hand not.
But how do you install an extra set of brakes when there is only one cable? That’s where the inline part works, but lets first look at how a normal set of brakes work.
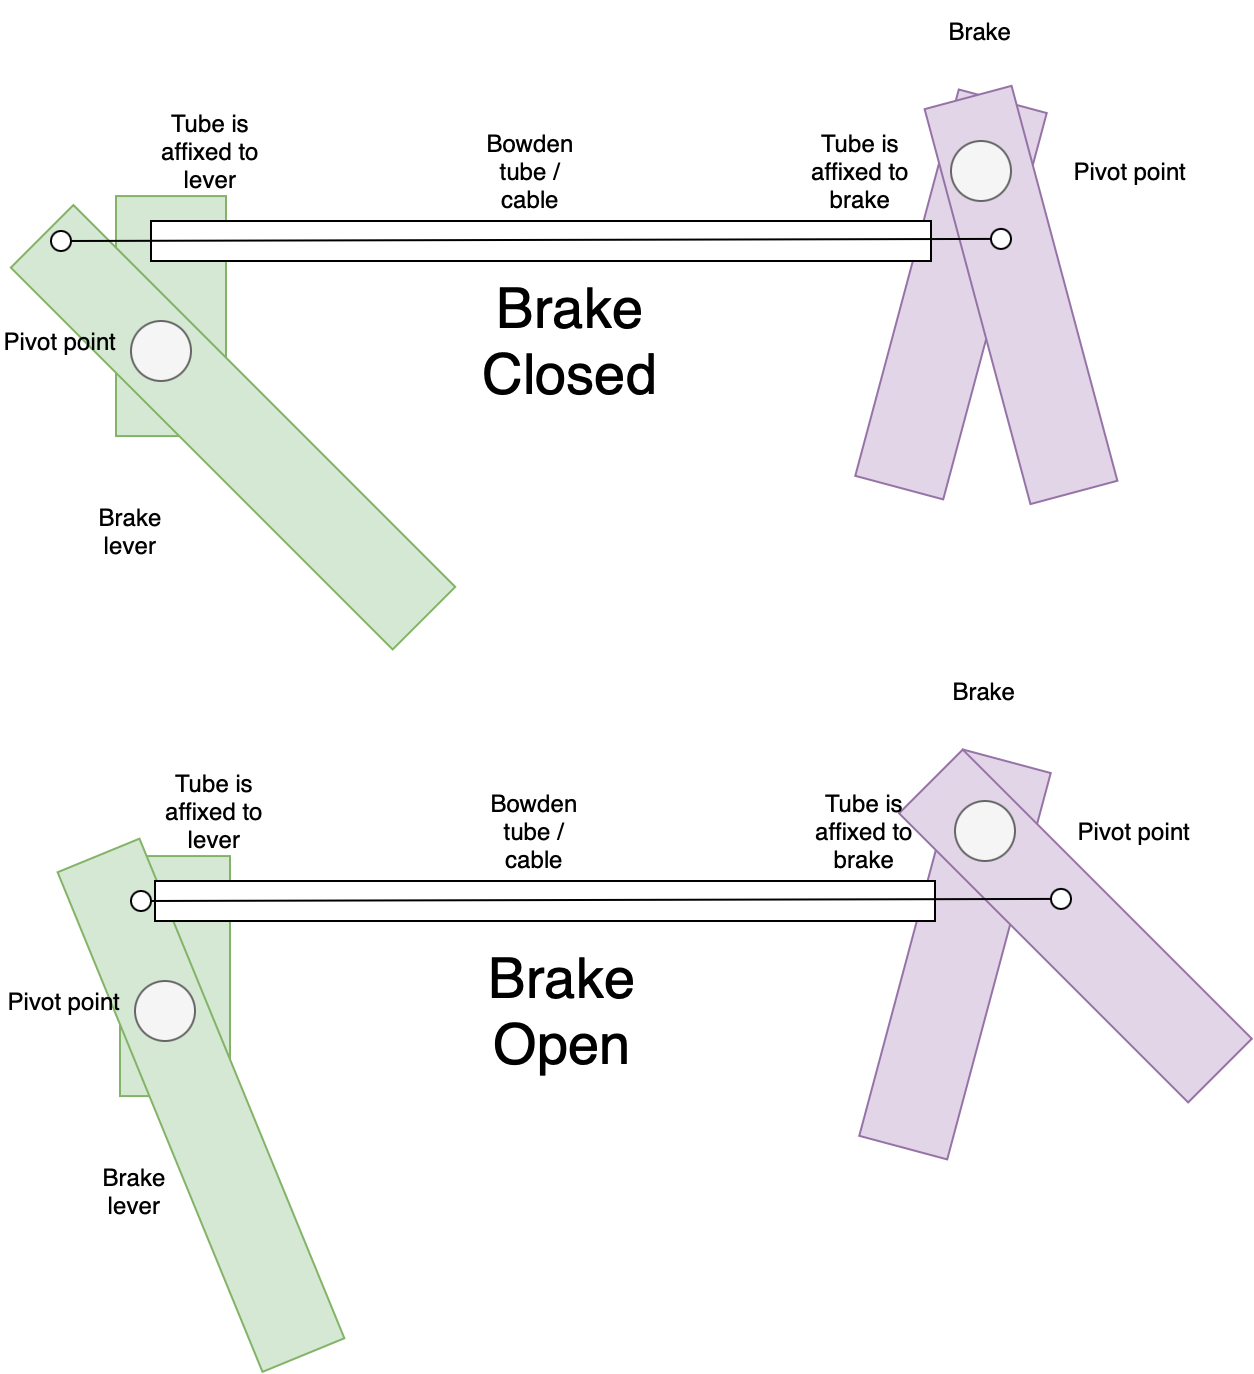
I’ve tried to create a crude diagram of brake fundamentals for bowden tube brakes. A bowden tube is, well a tube. It has a wire running down it. If the tube is fixed in place at either end you can push and pull the wire and the wire will push and pull from the other end. The final part is some pivot points, so when you pull on the brakes it pulls some wire out of the tube, that pulls the wire down on the brake end which squeezes the brakes together. Ok I get how bowden tubes work, what does this have to do with inline brakes….
For inline brakes the brake levers connect the outside of the bowden tube. The actual cable is unimpeded and the other brake will work as normal. Hence the inline part. In this diagram the left bowden tube is physically attached to the lever arm behind, and while the right part of the bowden tube outside is connected lever arm on top.
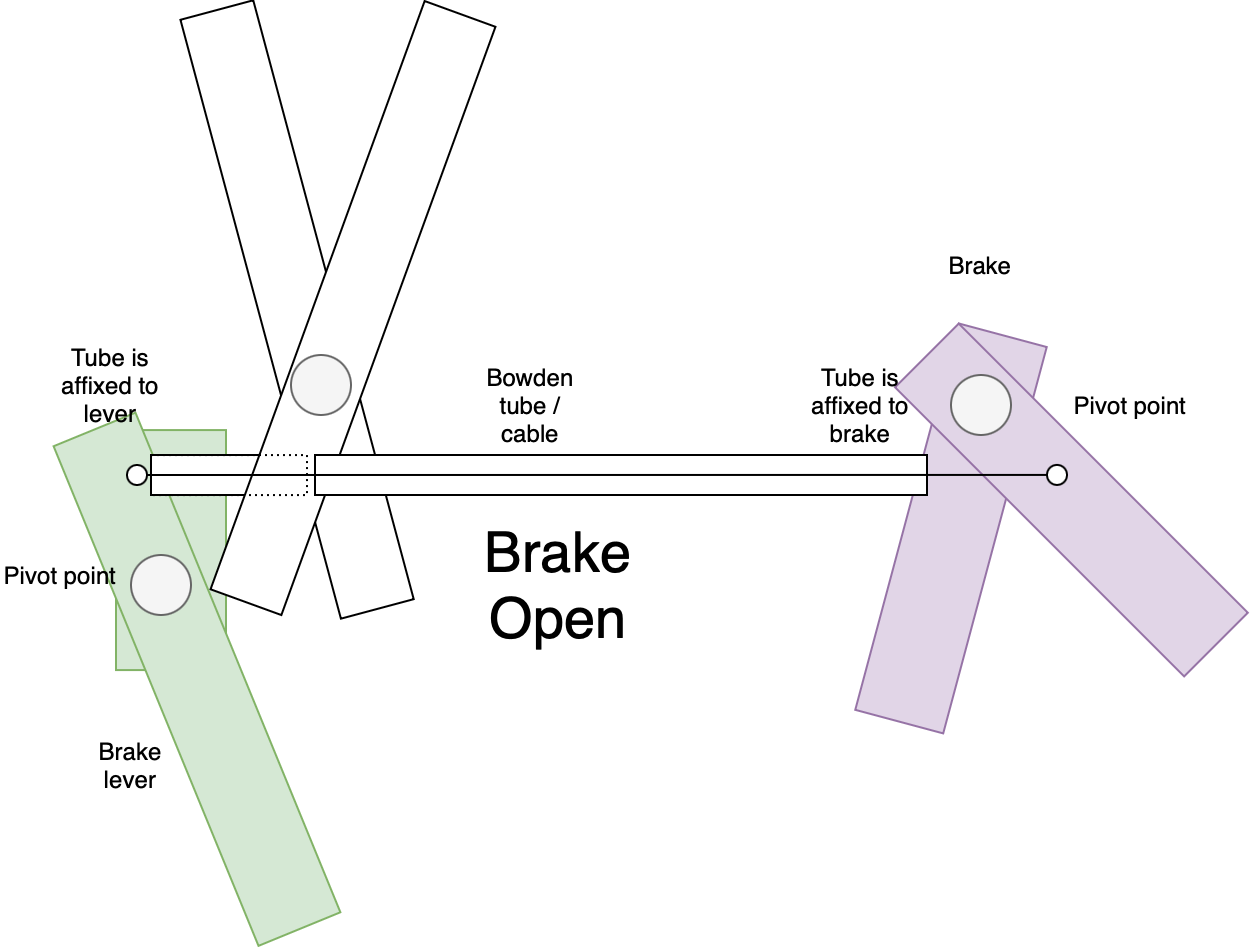
When we squeeze these levers together like you would on a brake the two bowden tube segments pull apart, widening the gap between the two bowden tubes.
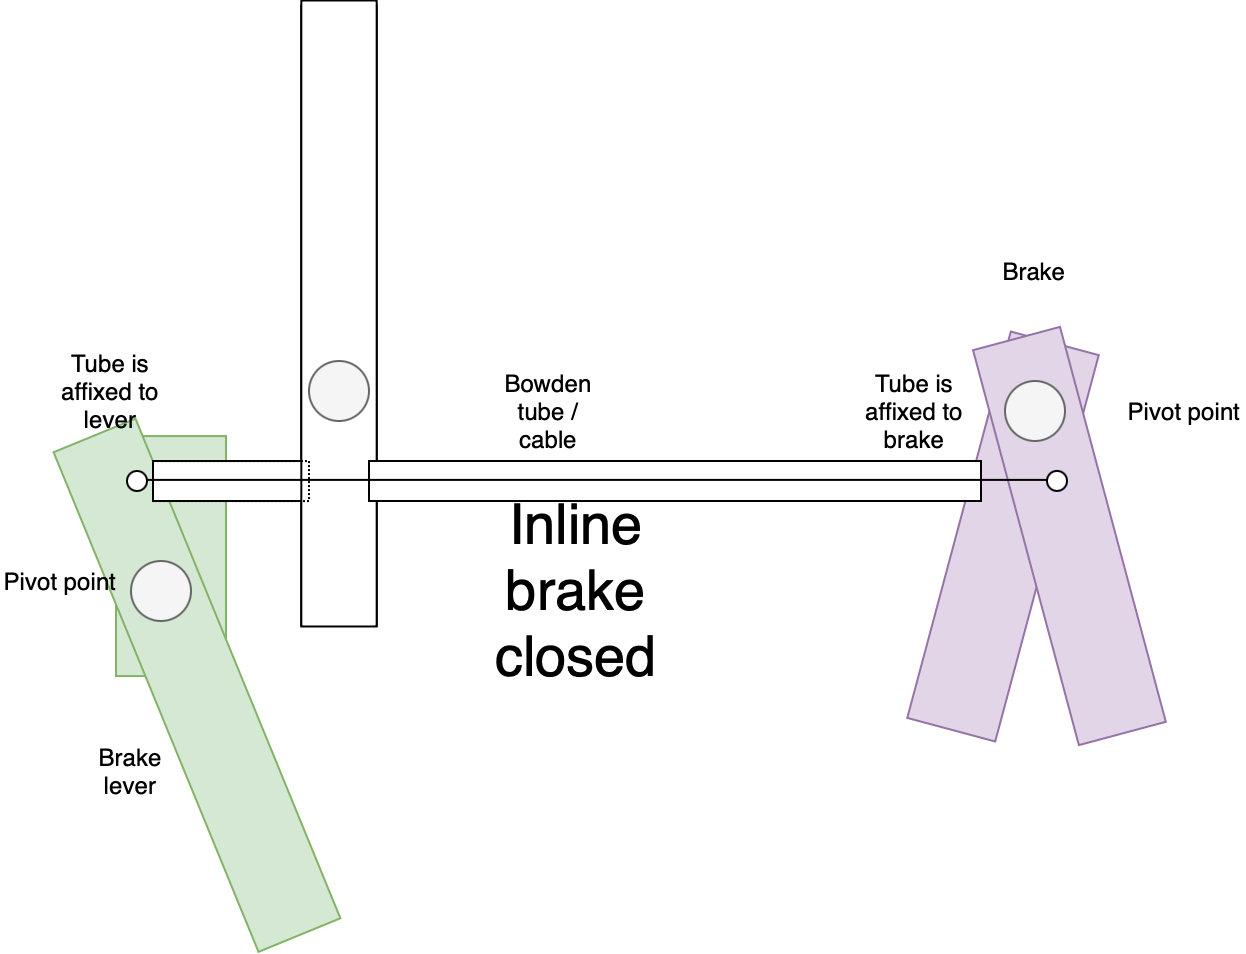
The wire has to remain the same length however it now has further to travel, so this causes the wire to pull on the brakes…. hopefully bringing the bike to a stop. I’ve kept the wire the same length in these diagrams. I’ve also left the bowden tube the same length as well as that can’t shrink - so if we created a gap in between the tubes, where does that length go? We’ve effectively lengthened the bowden tube. In the real world the bowden tube gets slightly pushed aside, you do need to account for the movement in the bowden tube when it comes to routing and taping the tubes.
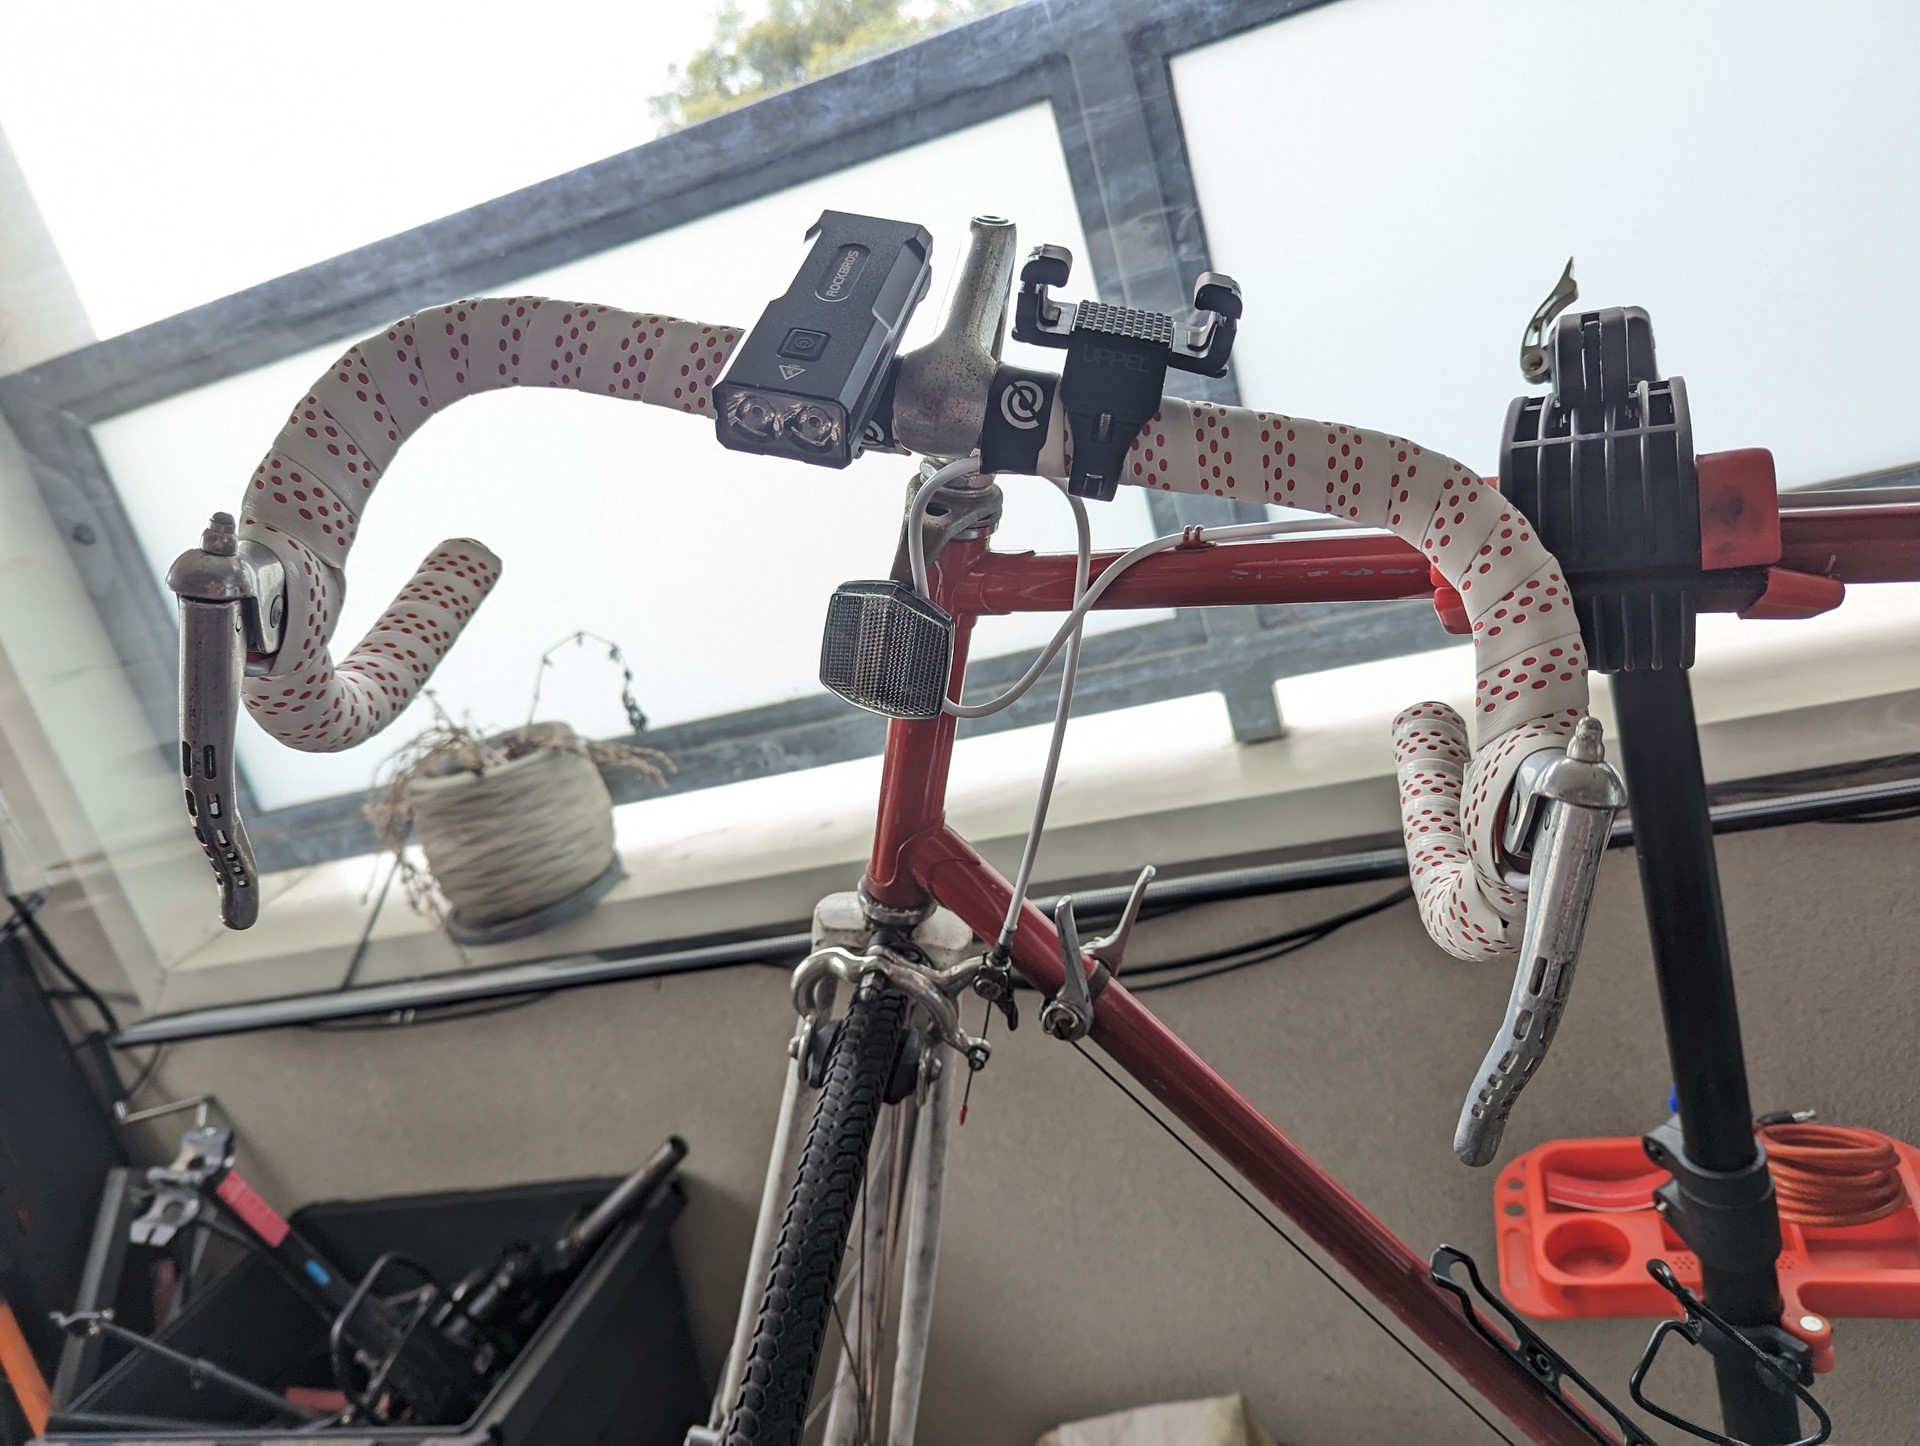
Installing these takes up handlebar space. I’ve already moved my phone mount to the stem, however I might need to rethink my bike light.
Finally, lets talk brake callipers. While braking on JSON is fine, I do want to make it better. Especially when I loan out my bike to someone else to ride. It currently has its original single pivot brakes, and the springs are a bit worn. Coupled with wheels that are over due for trueing it can lead to a fairly mushy experience if your not used to it.

That’s the plan.